A suite of spinach and romaine lettuces growing in late March.
This is the time of year to start your seeds for salad greens, such as spinach, lettuce, and arugula. Getting a head start indoors will ensure that you will have fresh greens by late March to early April when daytime temperatures are warm enough for growing and nights are still cool and crisp. Once transplanted in the garden in early March, your seedling starts should take off, if your beds have been well prepared.
Lettuce (Lactuca sativa) is the most variable green—coming in lots of shapes, lead densities and colors. Some of the most common and popular types include the upright romaine or cos lettuce (popular in Caesar’s salads), crisphead or iceberg lettuce, and looseleaf types, which include butterhead and oakleaf varieties, among others. Colors vary from bright chartreuse green to deep green, purple and bronze. Speckled varieties also exist, such as the Austrian ‘Forellenschluss’, which essentially translates to “trout-like”. Reliable starter varieties, such as the classic heirloom looseleaf variety ‘Black Seeded Simpson’, super tight-headed romaine ‘Spretnak’, and unusually beautiful French crisphead, ‘Reine Des Glaces’, are all quite easy and delicious.
The French crisphead lettuce ‘Reine Des Glaces’ looks beautiful and has more flavor than your average iceberg lettuce.
Spinach and arugula grow under the same conditions as lettuce—requiring cool weather for best growth and flavor. Both are less variable in appearance, but there are quite a few cultivated varieties with special characteristics that set them apart. Spinach may have smooth or savoyed leaves and some varieties are slower to bolt (set flower) in spring than others. The 1925 heirloom ‘Bloomsdale’ has large, savoyed leaves and is slower to bolt than most. I contrast, ‘Corvair’ has large, smooth leaves and is resistant to downy mildew. Some cultivars, such as ‘Baby’s Leaf‘, are recommended for growing “baby spinach”. Arugula cultivars vary somewhat in leaf shape, color and heat. The popular ‘Wasabi’ is an easy-to-grow selection with leaves that truly taste of hot wasabi. The new ‘Dragon’s Tongue’ is a visually pretty, finely cut variant with purple-red venation.
Looseleaf lettuce varieties can come with variable leaf shapes and colors.
There are a few things to know when growing these greens. To begin with, they must have cool germination temperatures. Lettuce seed, for example, germinates best at temperatures between 70 and 40 degrees F, with those at the higher end sprouting faster. Most other greens do, too. The small, almond-shaped seeds of lettuce also require light to germinate, so be sure not to cover the seed—just gently pat it down and wet its soil completely. Arugula seed is also small and should be surface sown, but spinach seed is larger and can be planted just below the soil’s surface. For planting all these seeds, it is vital to select a quality seed-starting mix with a fine texture, such as Fafard Seed Starting Mix with Resilience. (For more seed-starting tips, click here.)
Tidy, open beds and good spacing are needed for healthy, vigorous greens.
Before planting, be sure to harden seedlings off, slowly exposing them to outdoor temperatures and sunlight until they are acclimated. Soil should be fortified with a quality organic amendment. I recommend Fafard Garden Manure Blend for greens. Work it in evenly before planting your seedlings. Once seedlings are planted around six to eight inches apart, water them well and apply a light solution of water-soluble, all-purpose fertilizer.
In no time, you should have harvestable greens. In is not uncommon for most greens to take between 45 to 50 days to produce after planting. Harvest depends on the green. Spinach, arugula, and looseleaf lettuce can be harvested leaf by leaf while romaine and crisphead lettuce are harvested whole by the head. The easiest way is to cut the head with a harvest knife from the point where it meets the ground.
It is not uncommon for a few stray greens to begin bolting before they are harvested. If this happens, let them bloom and set seed. After plants have bolted, wait for the seed to mature and dry. Then collect the seeds for planting later in the season when growing conditions are cool once again.
The new slicing tomato ‘Black Beauty’ is darker than any other black tomato and has incredible flavor. (photo care of Baker Creek Heirloom Seeds)
Each year I boost my passion for vegetable gardening by adding some of the latest new varieties to the garden repertoire. Those that pass the flavor and productivity tests may have a permanent place in my yearly garden while those that don’t shine will make space for new plants to trial next year. Last year’s winner was the flavorful, uniform, and high producing, AAS-winning ‘Chef’s Choice Orange’ slicing tomato. (Its deepest orange fruits were so sweet!) Just glancing at my growing pile of vegetable garden catalogs makes me excited about the fresh suite of new vegetables for 2016.
The new AAS Winner ‘Candyland Red’ is a sweet new currant tomato for the garden. (Photo care of All America Selections)
Let’s start with tomatoes and close relatives, like tomatillos, eggplants, and peppers. By far, the most exciting tomato being offered is the succulent, pure black slicing tomato ‘Black Beauty’. The Wild Boar Farms introduction has meaty flavorful flesh that is dark red to black. A classic red tomato on the table is the hybrid ‘Madame Marmande’ from Burpee that boasts beautifully lobed fruits packed with rich tomato flavor. Cherry tomato lovers should consider ‘Candyland Red’—a high-producing red currant tomato that’s super sweet. Pair it with the golden currant tomato ‘Gold Rush‘ for fun, colorful snacking.
There’s a great pick of peppers for 2016, hot and sweet. Promising hots include the Brazilian ‘Biquinho’ hot pepper, which looks like a bright red teardrop when ripe and is said to have a fruity, smoky flavor, and the fire-red ‘Flaming Flare’ pepper with its sweet, slightly hot flavor. Sweet pepper lovers should check out the golden sweet ‘Escamillo’ pepper. This prolific early bearer is an AAS winner for 2016. All of these peppers will pair well with the new, heavy-bearing ‘Gulliver’ tomatillo for salsa making.
The golden yellow pepper ‘Escamillo’ is another AAS winner with great taste and performance. (Photo care of All America Selections)
Though eggplant can have challenges due to susceptibility to flea beetles and Colorado potato beetles, I am excited about the new ‘Meatball’ hybrid eggplant from Burpee. The large, meaty fruits are supposed to be extra tasty.
Gardeners seeking something unusual may consider the Mexican sour gherkin, also offered by Burpee. The tiny fruits are crisp and sweet but also slightly sour. Add these to a salad along with slices of the remarkable ‘Sakurajima’, the world’s largest radish. Offered by Baker Creek Heirloom Seeds, these massive daikon radishes can reach 15 pounds and just beg to be grown by adventurous vegetable gardeners with lots of mouths to feed.
Spring greens are some of the first veggies to go into the ground and new varieties, such as the super spinach ‘Gangbusters’ and/or beautiful heirloom lettuce ‘Yugoslavian Red’, are sure to make easy work of the salad garden. Throw in some vigorous Fidelio flatlead parsley or unusual saltwort Japanese greens for added interest and flavor.
The bright, uniform ‘Yellowbunch’ Carrot is a sweet new offering for 2016. (Photo care of Johnny’s Selected Seeds)
Unusually colored carrots are becoming more and more popular and Johnny’s ‘Yellowbunch’ Carrot looks like a real winner with its straight, crisp, sweet roots of bright yellow. Other new root crops of interest include the pure white ‘Avalanche’ beet, an AAS Winner with mild, sweet flavor and uniform roots.
This list would not be complete without something sweet. Said to have the highest Brix score (15!) of any other canteloupe, Park’s Select ‘Infinite Gold’ hybrid is bursting with flavor and highly disease resistant. Vines are high-yielding and fruits have very deep orange flesh.
Whether growing greens, tomatoes, or melons—your vegetable garden will only be as good as the soil and nutrients you provide. Give this year’s new offerings and old favorites the best chance possible for success. Feed your soil with quality garden compost, such as Fafard Premium Natural & Organic Compost, or quality manure, such as Fafard Garden Mature Blend. Both will enrich garden soil to the maximum for large fruits and big roots. Feed with a fertilizer formulated for vegetables—we like Black Gold Tomato and Vegetable Fertilizer—and your new garden vegetables will perform to their fullest.
Adventurous gardeners should consider growing the giant ‘Sakurajima’ radish. (Photo care of Baker Creek Heirloom Seeds)
Salvia Summer Jewel™ Lavender is a truly beautiful 2016 award winner. (image thanks to the AAS)
When choosing new plants for 2016, it always pays to know the bestowers of plant awards, so you can easily identify the best-of-the-best edibles and ornamentals for the season. Plant award programs are numerous and many are distinct in their selection criteria. What they have in common are great garden plants.
And these programs are reliable. Not only are most based on extensive field trials but they are also driven by third-party entities with the simple goal of promoting outstanding plants for home and garden. So, you can count on award-winners to perform well, if they are recommended for your region. Many are tested and approved for national audiences but others are specifically selected for regions, or by plant societies dedicated to specific plant groups. Here is just a sampling of recommended awards programs and their great plants.
Candyland Red is a superior currant tomato with big flavor. (image thanks to the AAS)
The All-America Selections (AAS) is a respected, independent, non-profit organization that promotes terrific plants for North America. Their mission is “To promote new garden varieties with superior garden performance judged in impartial trials in North America.” Their trials are conducted across the US and Canada and focus on high-performing vegetables and annual garden flowers. Each year a handful of award winners are chosen and promoted. The program began in 1933, and lots of “old” award winners, now technically heirlooms, are still grown today. To learn more about the AAS and their selection criteria, click here.
There are 12 AAS-winning plants for 2016 to include Salvia Summer Jewel™ Lavender, tomato ‘Candyland Red’, and the giant white pumpkin ‘Super Moon F1’.
The Royal Horticultural Society (RHS) has the RHS Award of Garden Merit (AGM) program, which highlights plants of great merit for UK growers. Thankfully, many of the selected plants also perform well in North America. Unlike the AAS, this program seeks out all forms of high-performing ornamental include trees, shrubs and perennials. Species and cultivated plants are all fair game.
Recent additions to the AGM program include Begonia ‘Glowing Embers’, sweet pea ‘Mary Mac’ and carrot ‘Artemis’.
Geranium Biokovo was the 2015 Perennial Plant of the Year. (image care of The Perennial Plant Association)
The Garden Club of America (GCA) promotes an outstanding North American native plant of the year and bestows upon it the Montine McDaniel Freeman Horticulture Award in honor of longtime member of a New Orleans GCA chapter, Montine McDaniel Freeman. The award-winning native for 2015 is the lofty and beautiful bur oak (Quercus macrocarpa), which is long-lived, tough and statuesque.
A “Perennial Plant of the Year”, bestowed by the Perennial Plant Association, has been selected since the program began in 1990. Chosen plants must be “suitable for a wide range of growing climates, require low maintenance, have multiple-season interest, and are relatively pest/disease-free.” Novice gardeners seeking to beautify their landscapes with perennials would be wise to start by choosing plants from this list—to include the 2015 selection, Biokovo geranium (Geranium x cantabrigiense ‘Biokovo’).
The steely blue Windwalker® big bluestem is a Plant Select® winner. (image care of Plant Select)
Plant Select® is a popular regional awards program dedicated to ornamental plants—woody and herbaceous—of the North American high plains and intermountain region, but many are good general performers in other parts of the country. One unique feature is that “Plant Select® leverages a uniquely collaborative model and highly-selective cultivation process to find, test and distribute plants that thrive on less water.” So, Plant Select® are water-wise in addition to being high performing and beautiful. Disease resistance and non-invasiveness are two more important selection criteria.
Notable Plant Select® winners for 2015 are the evergreen Wallowa Mountain desert moss (Arenaria ‘Wallowa Mountain’), perfect for fairy and succulent gardens, Windwalker® Big Bluestem (Andropogon gerardii ‘PWIN01S’), Coral Baby penstemon (Penstemon ‘Coral Baby’), and the stately Woodward Rocky Mountain juniper (Juniperus scopulorum ‘Woodward’).
Out East, the Pennsylvania Horticultural Society has been promoting its PHS Gold Medal Plants annually since 1978. The winners represent superior woody plants for the landscape that thrive in USDA Hardiness Zones 5-7. Recent winners include the Rising Sun redbud (Cercis canadensis ‘Rising Sun’) and Darts Duke viburnum (Viburnum x rhytidophylloides ‘Darts Duke’).
Penstemon ‘Baby Coral’ is a water-wise and long-blooming Plant Select® winner. (image care of Plant Select®)
There are lots of plant societies offering award-winning selections for home and garden each year. The All-America Roses Selections (AARS) has represented the best from their national rose trials since 1930, but due to a flagging economy this important trial ended in 2014. Fortunately, some have been willing to keep it alive, bringing us several great winners for 2015, which includes the thornless, cerise pink, antique rose ‘Thomas Affleck’ and the fragrant hybrid tea, Deelish®.
Choose to garden smart this season with a few award winners. Pick a few for the New Year and reap the rewards. Fortify them with top-quality potting soils and amendments from Fafard, and you cannot go wrong.
Growing garlic is easy and gratifying. For starters, it tastes infinitely better than store-bought. Secondly, there are also tons and tons of wonderful cultivated varieties to choose from that vary in size, color, heat, and flavor. Garlic isn’t just garlic when you become tuned into its diversity (just check out the offerings at The Garlic Store). And fall is the time to plant it.
Planting Garlic
The cultivation process begins in fall when the soil is still workable, usually between October and December. Just like any other root crop, the best bulbs develop in well-drained, friable garden loam. Then amend with compost, such as Fafard Premium Natural and Organic Compost, and add some bulb fertilizer for assured success
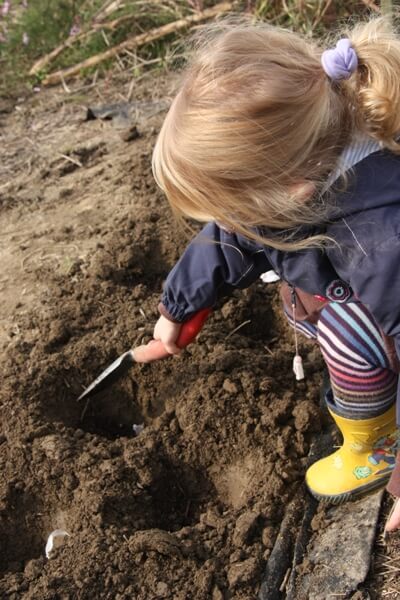
Garlic should be planted in fall in fertile, amended loam.
For planting, dig holes 3 to 6 inches deep and 12 to 16 inches apart. Set a single clove in each hole with the tip pointing upwards and the blunt root base down to a depth of 4-5 inches. Cover with soil, water, and wait. Within a couple of weeks, sprouts should rise from the soil, and the plants may reach 6 inches or more before heavy frosts hit. Garlic will overwinter in an evergreen to semi-evergreen state where winters are mild but will die back in colder zones.
Garlic Growth Cycle
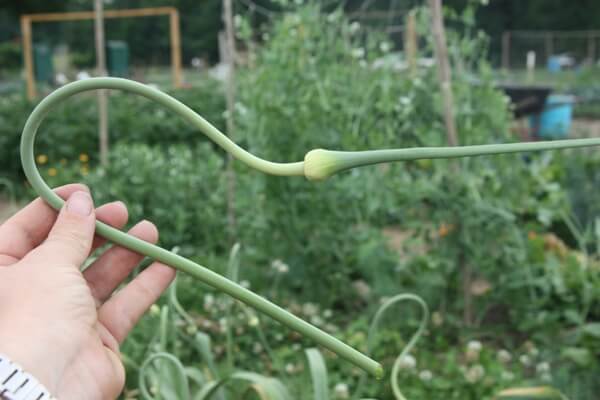
In spring, garlic plants will emerge and leaf up, and by late spring to early summer each will produce a heronesque flower or bulbil bud. The buds should be removed as soon as they appear or they’ll deplete the precious garlic bulbs underground. Just clip the stems back to the main plant, but don’t throw away the buds. They’re also good eating and look and taste great stir-fried or sautéed.
Some garlic varieties produce earlier in the season and others produce later, so it’s nice to plant a seasonal variety that will mature at different times. On average, most cultivars are harvestable by midsummer. You will know they are ready when their tops begin to turn brown. Refrain from watering the plants at this time to keep bulbs from rotting.
When the tops start to turn dry and begin to bend down, the cloves are ready to harvest. Dig the bulbs and allow them to dry in a cool, airy place away from sunlight. The drying technique depends on the garlic type. Softneck garlic can be hung to dry in braids, and the tops of hard-neck types can be cut and the bulbs dried on a dry, breathable surface. Store in a cool, dry place.
Softneck and Hardneck Garlic Varieties
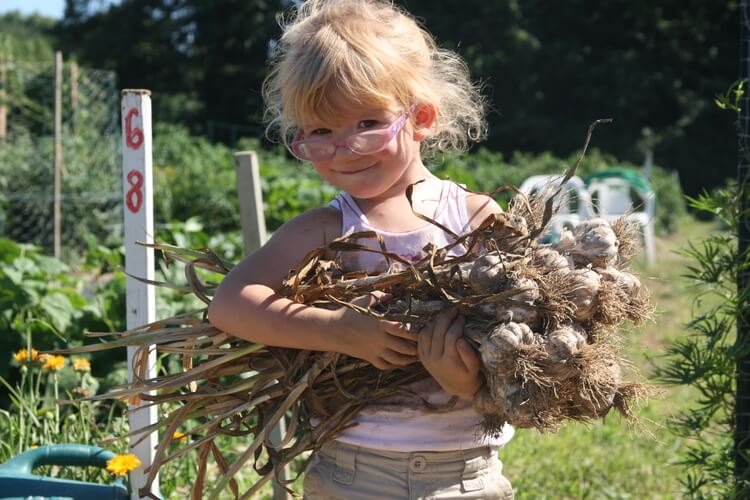
It’s amazing to see what a handful of garlic cloves planted in fall will become the following season.
Choosing the right garlic for you depends on where you live and the flavor your favor. The key distinction between types is whether they are soft or hardnecked. Softneck garlic is the most popular type grown in Europe and the American South. It grows better in milder climates (but will still grow well pretty far north), stores for longer, and has flexible necks that allow mature bulbs and plants to be easily braided into hanging garlic braids.
There are two softneck forms, silverskin and artichoke. Silverskin soft-neck garlic has smooth, silvery skin, more cloves and keeps for a very long time. Artichoke has coarser skin, fewer, larger cloves and a milder flavor. Still, heat, pungency, and flavor vary widely from cultivar to cultivar, so consider this when choosing garlic to grow.
Hardneck garlic is more commonly grown in northern and eastern Europe, Russia and North-Central Asia. It grows better in cooler climates, has a shorter storage life, and stiff necks that attach to the bulbs. This type produces fewer, larger cloves, which are fragrant and vary in flavor depending on the cultivar. Hardneck types are believed to be more closely related to wild garlic.
Garlic scapes appear in summer and are very good to eat.
The rewards of growing garlic are great. Homegrown bulbs have superior taste, you can grow lots of different types that vary in flavor, and they are cheap. Specialty varieties usually sell out early in the season, but gardeners wishing to experiment with garlic growing this late in the season still have an option. Garlic cloves from the grocery store (which are always softneck) work just as well. Just separate the cloves and plant away.
Love-in-a-mist flowers are airy, colorful and long-lasting. Their pretty puffy seed heads can be dried for winter everlasting arrangements.
Some of the prettiest flowers for cutting are annuals that grow and bloom fast and thrive in cool weather. Growing them is a snap. Start them in early August, and you should have lots of pretty flowers for cutting by late September or early October.
‘Towering Orange’ sulfur coreopsis is a tall variety that is perfect for fall cutting!
Planting Cut Flowers for Fall
If you are someone who already plants summer cut flowers, you will likely still have zinnias, tall marigolds, and purple cosmos in the garden, but these tend to lose steam towards the end of the season. Removing declining summer cut flowers and filling in the holes with fresh, cool-season bloomers will pay off. Just be sure to turn, smooth, and clean the ground before planting, and top dress with a good, moisture-holding mix that will allow your new cut flower seeds to germinate easily. Fafard Ultra Outdoor Planting Mix is a great choice.
Once your area is prepared, sprinkle your seeds of choice over the soil, and then lightly cover with some additional mix and gently pat the area down. Annuals with larger seeds, like sweet peas, will need to be planted at least an inch below the soil. Keep newly sown spots evenly moist with daily misting or watering.
Most annuals germinate quickly, in a week or two. Once new seedlings have emerged, continue providing them with needed moisture, and be sure to remove any weed seedlings. Feed plantlets every two weeks with a little water-soluble flower food. This will help them grow and flower at top speed.
Five Cut Flowers for Fall
1) Sweet Peas
Sweet peas (Lathyrus odoratus, 74-85 days from seed) are some of the sweetest smelling cool-season cut flowers, but they require light trellising. This is easily done by securing strong, firm stakes into the ground and lining the spaces between them with trellis netting that the peas can climb up with their tendrils. Renee’s Garden Seeds carries loads of exceptional sweet peas for cutting. The antique ‘Perfume Delight’ is especially fragrant and a little more heat tolerant, which allows them to forge through unexpected warm days. (Read Renee’s article “All About Sweet Peas” for more information about these pleasing flowers.)
The classic bachelor’s button for cutting is the long-stemmed ‘Blue Boy’. (photo care of Johnny’s Selected Seeds)
2) Bachelor’s Buttons
Colorful bachelor’s buttons (Centaurea cyanus, 65-75 days from seed) come in shades of richest violet-blue, pink, white, and deepest burgundy. Most agree that the blue flowers are the most remarkable and prettiest in a vase. There are lots of compact varieties, but these have short stems. Long-stemmed selections are the best for cutting, but they must be staked for reliable upright growth. ‘Blue Boy’ is an old-fashioned, large-flowered heirloom with tall stems that are perfect for cutting.
3) Sulfur Coreopsis
For fiery color, few cut flowers grow faster than sulfur coreopsis (Coreopsis sulphureus, 50-60 days from seed). The long-stemmed ‘Towering Orange’ produces billows of tangerine orange flowers that will last a long time. These look beautiful in a vase with ‘Blue Boy’ bachelor’s buttons!
Extra fragrant, colorful blooms are the selling point of ‘Perfume Delight’ sweet pea sold by Renee’s Seeds. (photo care of Renee’s Garden Seeds)
4) Love-in-a-Mist
Uniquely lacy flowers make love-in-a-mist (Nigella damascena, 63-80 days from seed) especially charming in the garden or a vase. The dried seed pots are also visually interesting, allowing them to double as dried flowers. The flowers come in shades of violet-blue, purple, white, and pink. One of the better Nigella mixes is provided by Johnny’s Selected Seeds.
5) Annual Baby’s Breath
No flower arrangement is complete without a frothy filler flower to add loft and interest. Annual baby’s breath (Gypsophila elegans, 45-50 days from seed) is the standard choice, and ‘Covent Garden Market’ is a tall, airy variety that will bloom until frost. It is very easy to grow, and its small, white, cup-shaped flowers make more colorful blooms stand out in a vase.
Cut flowers brighten our gardens and homes, so consider planting some of these traditional beauties in August for fall bloom. You’ll save money at the farmer’s market and impress your guests.
By summer’s end, I am generally picking hot peppers by the bucket. Three years ago it was the pasilla chili ‘Holy Moly’, last year it was ‘Hot Portugal’ and ‘Serrano’ and this year (with a little luck) it will be ‘Pasilla Bajio’, ‘Hot Lemon’, and super spicy ‘Red Savina’ habanero. As long as summers are hot and relatively dry, I can count on them. And friends and family reap the rewards of the many hot sauces, pickled peppers and relishes that will follow.
The popularity of hot peppers has grown with the hottest of the hots taking the limelight. The legendary Bhut jolokia (ghost pepper), ‘Naga Viper’ and ‘Carolina Reaper’ are three of the hottest peppers in the world, hence their wide popularity. Many others have outstanding flavor with more tolerable heat for the average pepper lover. But buying hot peppers is expensive, and some of the best are not sold in stores, so with pepper madness in the air, it pays to get to know and learn to grow these fruits.
An unripe green serrano pepper.
Hot Pepper History
Even though peppers are a staple in cuisines worldwide, they are New World plants that did not exist in the Old World until they were first brought to Europe by the Spaniards around 500 years ago. A close relative of tomatoes and eggplant, peppers hot or sweet are defined by the generic name Capsicum and have several things in common. The smooth-leaved annuals or perennials bear fleshy, hollow, edible fruits with a spongy central rib lined with flattened oily seeds.
Fruits can be red, yellow, orange, purple, brown or green and may be elongated, round, or blocky. For gardeners and cooks, sweetness, flavor and heat are the most defining characteristics of the fruit. And, when it comes to chili pepper heat, Scoville Units are where it’s at.
Hot, Hotter, and Hottest
Round ‘Cherry Bomb’ hot peppers are pretty and only moderately spicy.
The Scoville Scale measures Scoville Units, the formal unit of measurement for a pepper’s heat. They measure the presence of a suite of 22 chemicals called capsaicinoids—the best known being capsaicin. The concentrations of these spicy compounds are analyzed for the scale, so the higher the Scoville Units, the hotter the pepper. For example, the Carolina Reaper maintains 2,200,000 Scoville Units while the poblano measures an average of 1,000 to 4,000 Scoville Units.
Environmental factors can also impact a pepper’s heat. Hot, dry weather tends to generate more intense fruits with more intense spice and “bite”, while cooler, moister weather yields milder peppers. So, it’s important to know how to grow these fruits if high heat is what you are aiming for.
Growing Hot Peppers
Truly, the hotter the weather and brighter the sun is, the happier your pepper plants will be. Choose friable soil of average fertility and a slightly acid pH. Amending with a fertile, slightly acid amendment like Fafard’s Canadian Sphagnum Peat Moss, is a good choice.
When planting peppers, be sure to stake or cage them to help support the broad, bushy plants and their fruits. Plants with larger, heavier fruits are at greater risk of toppling over in rain and wind. As with most vegetables, fertilization is really important to encourage the best growth and fruit output. Choose a quality fertilizer formulated for tomatoes, like Black Gold Tomato and Vegetable Fertilizer. A light sprinkling with garden-grade Epsom salt will also keep plants from suffering from Magnesium deficiency, a common problem with peppers.
Hot Pepper Types
Tabasco pepper flowers
From the Guinness Book of World Record’s hottest ‘Carolina Reaper’ pepper to relatively mild poblano chilis, hot peppers come in all colors, shapes, sizes and heat levels. Peppers are heavily cultivated plants, so most botanists have thrown away any attempt to formally categorize them. Cultivated plants like these are named and classified by horticulturists. To keep it simple, it’s cultivar (a.k.a. cultivated variety) names, like ‘Ghost’, ‘Naga Viper’, ‘Holy Moly’, and ‘Spanish Spice’, and essential common names, like Jalapeno, Habanero, and Cayenne, that define these peppers.
Harvest and Hot Sauce
When harvesting really hot peppers, protect your fingers. The spicy compounds can actually burn your skin. Snipping them with a pair of fine shears is a good method. The skin should also be protected when cutting and preparing peppers for cooking. A pepper’s heat is most concentrated along the inner lining and seeds, so remove them if you want less heat. And when it comes to cooking, homemade hot sauce is a great choice.
Homemade Garlic Sambal
Chiles ready for sauce making!
We eat a lot of sambal, a spicy Southeast Asian chile-based condiment. At its heart, it simply contains chiles and salt, but other ingredients can be added to liven it up, such as garlic, vinegar and sugar.
I made my own version of garlic sambal with a couple surprise (non-traditional) ingredients. The result is really good, though I also credit the positive outcome to the quality of the fresh-picked chiles from my garden. The peppers chosen (‘Hot Portugal‘ and red jalapeños) are only moderately hot, so this sauce can be eaten like a spicy, slightly sweet, garlicky ketchup. I make small batches, but the recipe can be doubled.
Ingredients
1 pound fresh, red chile peppers, whole with tops removed
2/3 cup apple cider vinegar
1/3 cup water
1 tablespoon agave syrup
1 small apple, peeled and sliced
3 large cloves garlic, peeled
1 teaspoon salt
Steps
Add the chiles to a medium saucepan and put on medium to medium-low heat. Add 1/3 cup of the vinegar, salt, and cover. Cook the chiles for around 15 minutes or until they have softened. Next add the water, remaining 1/3 cup of vinegar, agave syrup and apples. Cover and cook for another 15 minutes or so until the apples have softened and the liquid has reduced.
Allow the mix to partially cool. When it’s still warm, transfer it to a blender or food processor along with the fresh garlic cloves. Mix it until smooth, then taste. Adjust the flavor with more agave syrup and salt as needed. If it’s too thick, add a little water or vinegar. Place in a lidded glass jar and refrigerate.
Use as a condiment or as an addition to marinades and sauces.
Are coffee grounds really beneficial to rose growing? Maybe! Rosa ‘Wekcobeju’ (CINCO DE MAYO™ shown)
There are many garden truths and tales. Growing up, my family subjected me to lots of gardening anecdotes that I simply accepted. My grandfather feverishly sprayed his veggies with odd homemade concoctions, my grandmother insisted that amending her roses with coffee remnants was beneficial, and my aunt claimed that planting marigolds among veggies deterred harmful pests. These are a few of many.
I question whether these and comparable anecdotes have any elements of truth. Are such practices based in truth, or are they simply products of tradition or hearsay? To tackle this matter, I turned to research to pick out truths from garden practice lore.
Creative Pest Deterrents
Bars of soap hanging from trees, carnivore urine sprinkled in beds, pepper spray applied to tulips, and dishes of beer scattered among hostas. These home remedies are weird, to say the least, but do they work?
Folksy remedies to deter deer are some of the most popular, because deer are garden destructors. Soap, sachets of human hair, pepper sprays and urine concoctions are favorites, because deer dislike disagreeable scents and flavors, but effectiveness has more to do with consistent density of coverage.
Sprays made from hot peppers have been known to ward off pests, for a while.
Such remedies create a fleeting veil of protection over garden deer treats. For example, scented bars of soap hanging in apple trees are not enough to keep deer from plucking apples, it’s time consuming to keep ornamentals swathed with pepper sprays (though they work), and human hair is a red herring. One method, however has been shown to work. Predator odors can linger, and studies show they ward off prey, such as deer, mountain goats and beavers. So, carnivore urine, though not cheap, works.
Still, the best course of action is to “simply” plant plants that deer dislike—though they’ll eat practically everything in a lean winter. Dogs in the yard work well too.
Snails and slugs are real pests, and beer is the favorite home remedy for their demise, which is great because it works. Slugs love beer’s hoppy, sweetness, but are pickled by its ethyl alcohol. One evening try sinking a half-filled can in the ground near a troubled spot, and you’ll have marinated escargot by morning.
Some tout homemade pesticide concoctions with ingredients like tobacco juice, dish soap, or medications. Stay away from such motley mixes. Certain ingredients may be helpful; soap acts as a surfactant and smothers insects on contact, and nicotine (actually a nasty neurotoxin) is one of the oldest pesticides, but spraying meds on plants, particularly veggies, could be dangerous as well as ridiculously expensive.
Companions or Charlatans?
Marigolds can actually ward off some garden pests down below in the soil.
There is a lot written about companion planting, and certainly some plants offer benefits to their neighbors, nitrogen fixing legumes for instance, but can one plant actually deter pests from another?
The answer is, sometimes. Herbivorous insects can pick up the volatile compounds from their host plants from great distances, and a 2005 study conducted in the UK showed that insects can find their host plants when hidden amongst other undesirable plants. This should not be surprising. To survive, they must be able to pick that needle of a plant out of a haystack of others. So, sadly marigolds won’t protect your cabbages from loopers.
Marigolds have been shown to repel root knot nematodes, a real problem with tomatoes, so they do provide natural good down below. (Read more about the power of marigolds in the garden here.)
Odd Amendments
The raised probably raised eyebrows when Native Americans taught them to plant a fish with their corn crops, but we now know that these fishies acted as quality fertilizer (think fish emulsion). Other homemade amendments might offer some help, too.
Take my grandmother’s favorite amendment for roses, tea and coffee. Both are slightly acidic and break down quickly, so essentially they act as quick compost at a pH suitable for roses. So long as its organic, disease or heavy metal-free, it’s probably going to eventually adding some benefit.
But, at the end of the day it pays to amend with proven garden amendments shown to provide sound organic matter and encourage the growth beneficial microorganisms. Fafard’s Garden Manure Blend, Natural & Organic Compost and Canadian Sphagum Peat Moss are all proven amendments that will make your garden plants shine.
With age I’ve learned to approach anecdotal garden solutions with a healthy dose of scrutiny. But, I also refrain from total disbelief in their power. Even the oddest sounding remedies might do some good. At the end of the day, it’s best to stick with tried-and-true methods and garden amendments and additives proven to work.
These tidy beds have a compost mulch layer protecting vegetables and a walkway protected with thick grass clippings.
Rain and snow melt make spring garden soil preparation a challenge every year, but once you can get into the garden, get into your soil! Feeding your garden soil in spring is an investment that pays off every time. Amending, turning, tilling, fertilizing, and mulching are the five practices needed to make your garden great all season! The addition of drip hoses for easy irrigation can make garden care even more effortless.
Amending Garden Soil
Rich soil yields better crops, so it pays to feed your soil. Adding the best amendments will ensure your soil is ready to work. Adding lots of compost will increase good yields, but be sure that your compost is good quality. Fafard Premium Natural & Organic Compost is a high-performing compost sure to give your garden what it needs. For areas where you intend to plant greens, go with nitrogen-rich amendments, such as Fafard Garden Manure Blend.
Turning Garden Soil
“No till” areas in the vegetable garden need different care. These include beds with perennial and winter crops, like areas with asparagus, garlic, strawberries, or hardy herbs, as well as well-amended spots that are already in good shape below ground. Still, adding extra organic matter to no-till spots will ensure better growth while allowing for the addition of needed amendments. Adding a layer of compost and lightly turning it into the surface will increase organic matter while not disrupting your plants or soil structure.
Tilling Garden Soil
Compost acts as both an amendment and protective mulch.
Many gardeners have bed areas that are tilled yearly. This has its pluses and minuses. Tilling brings the bank of weed seeds to the surface and disrupts soil structure and organisms, but it also increases tilth and allows organic matter to be worked deeply in the soil. If you plan to till, plan to double your amendment by adding a till-in layer and a mulch layer. First, put down a thick layer of compost or manure and till it deeply into the soil, then rake and berm bed spaces as needed. Finally add a second layer of compost to further enrich the soil and protect against weeds. The second step is extra important because tilling brings lots of weed seeds to the soil’s surface.
Fertilizing Garden Soil
Many vegetables require lots of food to produce good yields through the season. It’s essential to feed the garden well from the beginning with a good tomato & vegetable fertilizer. OMRI Listed fertilizers approved for organic gardening are best. Simply broadcast the fertilizer and gently work it into the top layers of soil where it’s needed most. Heavy feeders, such as tomatoes, peppers, and melons, should be fed again at planting time.
Mulching Garden Soil
In addition to adding a compost mulch layer, I protect and define walkways with leaf mulch, straw or hay, and grass clippings. These natural mulches stop weeds and make it easier to traverse the garden in wet, muddy weather. They also hold water and keep root zones cool on hot summer days. By fall’s end, they have usually broken down into accessible organic matter.
Living mulches are another option. Planting a dense summer cover crop in walkways, like white clover, will keep them tidy, cool, and mud-free while also feeding the soil. Just be sure to keep the edges trimmed and turn plants under in fall.
Amendment Application Formula
When adding amendments, determine how many inches you want to add over your garden area. Here is the simple formula needed to determine this:
([area to cover] ft2 x [depth in inches desired] x 0.0031 = ___ yd3).
Example: If you wanted to cover a 20 square foot area with 2 inches of compost, the result would be: 20 ft2 x 2 inches of compost x 0.0031 = 2.48 yd3.
A thick layer of straw helps hold moisture while also keeping walkways clean and weed free.
Irrigation
For added benefit, consider snaking a drip hose beneath mulch layers to make summer watering easier and more efficient. Below-the-surface watering keeps water at root zones while virtually stopping surface evaporation on hot days. The key is marking your drip lines from above (to keep from accidentally cutting the line with gardening tools) and securing nozzles for easy access. At watering time, just hook up your lines and let them drip for an hour or so to ensure deep watering.
Once the vegetable season takes off, your garden will be in good shape with these five steps. Sure, weeds, drought, and hot days will come, but their impacts will be minimized and your time and garden’s productivity will be maximized.
Large-headed cabbages, like those growing in this spring vegetable garden, need lots of space to reach full size .
Of all the cool-season vegetables, few are as variable and satisfying to grow as cole crops (Brassica oleracea), also called “brassicas”. Tasty favorites like kale, cabbage, broccoli, and cauliflower yield big harvests and are easily grown the organic way, even in the face of lots of pests. It all starts with healthy plants and good care.
Smaller cabbage varieties, like these ‘Caraflex’, can be planted closer together.
Where summers are hot, cole crops are best grown in spring or fall, but in my community garden my spring crops yield better. This is largely due to plentiful foragers, like rabbits, groundhogs, voles, and deer. By summer’s end, mammalian garden pests are in larger numbers and always take a toll on my fall crops—particularly my brassicas. Fencing and smelly organic animal repellants like 100% natural Plantskydd will help, but it’s always a battle.
In spring, it pays to plant large, robust seedling starts for quick establishment and good success. If growing from seed, I begin planting early indoors—generally in late February to early March. By the time my plantlets are 4-inches tall, they are ready to harden off and plant outdoors. Starts are also sold at local nurseries, though they offer less selection. Seed catalogs always have newer, more interesting varieties. This year I chose seeds for the small-headed savoy cabbage ‘Alcosa’, broad-leaved ‘Galega de Folhas Lisas’ kale, bolt-resistant ‘Packman’ broccoli, and bright purple ‘Graffiti’ cauliflower.
Fafard’s OMRI-Listed Compost Blend is an ideal amendment for cole crop beds.
Growing Brassicas
Brassicas require full sun for best growth. Deep, fertile soil with a slightly acid to neutral pH (6-7) is ideal. Be sure to amend the soil with Fafard® Sphagnum Peat Moss and Premium Natural & Organic Compost —being sure to till amendments in deeply—and fortify with a fertilizer formulated for vegetables. These vegetables have high macronutrient requirements (NPK 14-14-14) and specific micronutrient needs (high calcium and boron). At planting time, I recommend fertilizing with an OMRI-Listed (certified by the Organic Materials Review Institute) vegetable fertilizer, bone meal, and borax, at the recommended doses.
Set plants out after hard frosts have ended but cool days and light frosts are still expected. Most cole crops can withstand freezing temperatures down to 20° F but grow best at temperatures between 70° and 85° F. Late March to early April is the best planting window where I live in the Mid-Atlantic.
Each brassica grows a little differently and may require slightly different care. Here are the growing basics for my spring standbys:
Growing Broccoli
Broccoli varieties vary widely. Some produce enormous central clusters and others smaller clusters with ample side shoots; some have large, loose beads (buds) while others have small beads produced in tight, dense clusters. Gardeners can expect plants to bear heads 50 to 70 days after planting. ‘Packman’, ‘Diplomat’, and ‘Early Purple’ are three high-performing varieties that produce big heads, have good side shoot production, and grow beautifully in spring.
Grown for its good looks and flavor, broccoli ‘Early Purple’ is also a popular market vegetable.
Broccoli seedlings look like nondescript leafy sprouts, but in a matter of months they will produce big budding heads of broccoli. Space your broccoli plants about 1 to 1.5 feet apart at planting time, and plant a minimum of six plants for good yields. Don’t allow newly planted seedlings to dry out, and ensure established plants always get ample water. Once nice broccoli heads are set, harvest them and wait for more to develop. Broccoli is a cut-and-come-again crop that should not be allowed to flower and set seed. I generally harvest mine with garden shears or a garden knife.
There are a couple of troubles specific to broccoli. Boron deficiency causes florets to turn brown prematurely and stems to become hollow. Additionally, insufficient water will keep plants from setting florets, and heat in excess of 86 ° F may encourage plants to bolt quickly and taste bitter.
Growing Cabbage
There are lots of fun cabbage varieties offering different flavors, looks and characteristics. Heads may be conical, flattened, rounded, large or small, and can have smooth or savoyed leaves. Four varieties for connoisseurs are the blue-green and purple-pink blushed ‘San Michele’, dwarf conical ‘Caraflex’, giant sweet savoyed ‘Drumhead’, and elongated purple ‘Kalibos.’ Days to harvest vary from variety to variety , but on average you can expect heads to develop 63 to 88 days after planting.
‘Alcosa’ is a small, savoyed heirloom cabbage that’s easy to grow.
Seedlings should be planted outside when they are around 4 to 6 inches tall. Compact varieties may be spaced as close as 10 inches apart and large varieties between 18 and 24 inches apart. Once healthy heads develop, cut them at the base with a garden knife and remove any large, ratty lower leaves. Cabbage will store for a long time, if refrigerated or kept in a cool dry place.
There are several common cabbage nutrient deficiencies. Potassium deficiency is common and results in heads with leaves that become yellow then dry and papery along the edges. If comparable yellowing is seen between the leaves, then magnesium deficiency is likely the problem. Heads with weak or hollow stems are suffering from boron deficiency.
Growing Cauliflower
Cauliflower comes in a myriad of sizes (tiny to giant) and colors (white, green, purple and orange). Fun, interesting varieties include the dwarf heirloom ‘Snowball’, bright purple ‘Graffiti’, electric orange ‘Cheddar’, and very large ‘Giant Naples.’
The orange cauliflower ‘Cheddar’ is higher in beta-carotene than white forms.
The sooner you can get your cauliflower into spring ground, the bigger the heads will be, but it’s important to note that this brassica is not as frost-tolerant as cabbages, broccoli and kale. Seedlings should be planted 18 to 20 inches apart. Be sure to give plants ample water when cauliflower heads begin to develop. Layers of leaves cover and protect developing heads from sun and pests. Once the leaves unfurl and heads look curdy and fully developed, they can be cut from beneath and harvested.
Nutrient deficiencies and heat troubles that plague broccoli are also a problem with cauliflower. Excessive heat and ill-timed harvest can cause heads to elongate and taste bitter.
Growing Kale
Some of the best kale varieties for eating are the popular ‘Nero di Toscana’ (aka. dinosaur kale), heat-tolerant Portuguese ‘Tronchuda Beira’, and frilly, tender ‘Red Ursa’. Young leaves can be eaten fresh in salads and more mature leaves are great for cooking.
One of the most beautiful and delicious kales for the garden is the blue-green ‘Nero di Toscana.’
Kales are cold hardy and can be planted along with broccoli and cabbage starts. Spacing varies from variety to variety, but on average 12 to 18 inches apart is a good planting range. Leaves can be harvested as soon as plants reach a reasonable size and have ample foliage. Harvest leaves as needed using clean shears.
Unlike the other cole crops mentioned, kales can survive hot summers with care. Be sure to water them well through the hot months while protecting them from summer pests, namely harlequin bugs and cabbage loopers.
Brassica Pests
Lots of pests predate on brassicas. Slugs and cabbage loopers (Trichoplusia ni) commonly attack cabbage heads, eating their way through the layers of leaves. Harlequin bugs (Murgantia histrionica) are aggressive sucking insects known to lay waste to summer kales, and cabbage maggots (Delia radicum) will de-root and gut spring plants in no time.
Orange, black and white harlequin bugs attacking a head of ‘Packman’ broccoli.
There are several organic methods to tackling these pests. Sluggo® is a non-toxic, OMRI-Listed pesticide that will quickly take care of slugs. Cabbage loopers are best tackled with a product containing BT (Bacillus thuringiensis); OMRI-Listed Safer® Caterpillar Killer is a great choice. Harlequin beetles are eradicated at all stages with products containing neem oil, a popular organic pesticide, and applying a sprinkling of wood ashes around the base your brassicas will deter cabbage root maggots.
It also pays to recognize and destroy the pest eggs on sight: Small, pearly cabbage looper eggs are laid singly or in small, open clusters (5-7 eggs) on leaf surfaces; harlequin bug eggs look like black and white bulls-eyed barrels laid in tight clusters (~12 eggs) along leaf undersides; cabbage maggot flies lay eggs near the base of plants, so it can be helpful to sink 3” plastic bottle collars (1” below ground, 2” above) to keep hatched maggots from reaching seedlings.
With good care, any gardener can grow broccoli, cabbage, cauliflower and kale organically. Once the harvest begins, it will make all the work worth it.
Tropical begonias, like Begonia ‘Irene Nuss’, are wonderful, blooming plants to consider for the home.
Happy, healthy house plants do more to improve a home’s air quality, while also offering the obvious reward of green, living beauty. Plants in the home perform better with good care, from leaves to roots. Cleaning accumulated dirt and dust from leaves, feeding, trimming, proper watering, and repotting are a few small efforts that can result in big rewards. Maintenance to reduce pests and pathogens is also essential to master if healthy indoor greenspace is a goal.
House Plant Cleaning and Pest Control
House plants get dusty and dirty and often perform better if their leaves are gently cleaned. (photo by Pam Beck)
Leaves quickly accumulate dirt and dust, which dulls appearance while also reducing a plant’s ability to photosynthesize and breathe. A quick foliage wipe down or wash in the sink or bathtub can make a big difference if looks and performance.
For leaf cleaning, make a very weak soap solution by adding a drop of gentle dishwashing detergent to 1 liter of warm water. Wet a soft cloth in the solution and wring until damp. Wipe the leaves down, top and bottom, while being sure not to tear or damage the tissue. Once the leaves are clean, rinse them by either repeating the process using a damp cloth dipped in just warm water or by rinsing the leaves under a sink or handheld shower head.
Broad-leaved tropical plants may also benefit from the use of commercially available leaf-shining products, which give leaves a pretty, glossy look while not clogging stomata (leaf breathing holes).
Once your leaves have been properly washed, be sure to dust them from time-to-time with a clean dust cloth. If pests, such as aphids, mealybugs, spider mites, or whiteflies, appear, the best rule of thumb is to treat them with a safe insecticidal soap while removing and disposing of the most damaged leaves and stems. Common soil-borne pests, such as shore flies and fungus gnats, can be managed by keeping the topmost soil layer dry and watering plants from the bottom rather than the top.
Feeding and Watering House Plants
Succulents should be watered minimally, especially in winter. (Agave victoriae-reginae ‘Variegata’ shown)
Knowing an indoor plant’s seasonal water and feeding needs can really make or break growing success. Many house plants are tropical or semi-tropical, which often means they require less food and water in the winter months (when they are growing slowly) and more in summer (when they are actively growing). Succulent indoor plants, like cacti and agave, are even more extreme in their seasonal needs because too much food and water can kill them so quickly, especially in winter.
A safe method for watering non-succulent plants is to keep soil lightly moist, never wet. Always plant in containers with efficient drainage holes, choose a well-draining potting medium, and water only as needed. If a plant’s potting soil is moist to a knuckle’s depth below the surface, don’t water. House plants also grow better if you water them from the roots rather than the tops—this is of particular concern for African violets and their relatives which dislike water on their leaves.
Many opt to take indoor plants outdoors during the warm growing months. This can really improve the growth and appearance of “house plants” for the winter months. Just be sure to give them extra care outdoors. Outdoor potted plants always require more water—often daily watering until water runs from the bottom of the pot—as well as regular feeding.
Pruning and Trimming House Plants
Good potting mix will ensure that your newly transplanted house plants will shine.
There are three reasons your house plants would require trimming and/or foliage removal: 1) There are dead or dying stems or leaves, 2) the plant needs to be reshaped for improved appearance, or 3) the plant is overgrown and needs to be pruned for rejuvenation.
Dead or dying stems and leaves can be a result of poor light, poor fertilization or a sign of pest and/or disease problems. If growing points show poor color and growth, improved light and fertilization with a quality fertilizer may be in order, rather than removal. Dead or dying leaves should always be removed for better health and appearance.
Plants that have become overgrown or have developed undesirable growth habits can always be pruned back to adjust for size and appearance. Just be sure to take pruned stems back to a clear node or central stem. This will ensure that new growth will return
Dividing and Repotting House Plants
It’s easy to tell when a plant has outgrown its container. It will require more water, the plant may appear too large for the pot, and the root system will become dense along the bottom holes, pot edges, and topmost soil layer. Sometimes the easiest way to check is by feeling along the pots edge for roots or checking the bottom of the pot creeping roots.
Crowded plants must be divided and repotted for good health.
Dividing and repotting plants is easy. Start by clearing an area in preparation for a messy job, have your new, appropriately sized pots on hand for transfer, and buy plenty of quality potting mix for your plant. For general growing, Fafard Professional Potting Mix or Fafard® Natural & Organic Potting Mix are both great options. Succulent house plants would do better to be planted in Fafard Cactus and Succulent Potting Mix. And, African violets and their relatives always require specialty soil for best results, such as Fafard African Violet Potting Mix.
Division is appropriate for any plant that spreads laterally in the pot. During the division process, it pays to wear good, protective gloves. Start by removing the plant from the pot, doing as little damage to the root system and top as possible. Then, using a planting knife or durable serrated knife, begin cutting the rootball in half or in quarters, depending on the plant’s size, being sure that each piece has a healthy supply of roots and shoots.
Once your plant is divided, gently tease apart any roots that are densely tangled. Then begin preparing your pot. Choose an attractive container that will easily accommodate your plant. Be sure to allow a layer of 2 to 3 inches of soil on the sides and bottom to support your new plant. Gently work the soil in around the roots, and pat it down at the top, allowing two inches of space for easy watering.
These care instructions apply to most common house plants, such as easy, air-filtering tropicals like Boston fern (Nephrolepis exaltata ‘Bostoniensis’), Chinese evergreen (Aglaonema modestum), croton (Croton spp.), dumbcane (Dieffenbachia spp.), mother-in-law’s tongue (Sansevieria trifasciata ‘Laurentii’), and rubber plant (Ficus elastica). Follow them and you and your plants will reap the rewards.
Colorful croton are one of the many easy-care tropical house plants to consider.


 lettuce can be harvested leaf by leaf while romaine and crisphead lettuce are harvested whole by the head. The easiest way is to cut the head with a harvest knife from the point where it meets the ground.