
Shady spaces are a frequent source of frustration for flower-loving gardeners. Annuals, like impatiens (regular and New Guinea) and wishbone flowers (Click here to read more about wishbone flower), can help, but for a truly vibrant landscape, dependable flowering perennials are a must. Put your frustration aside, because the options are plentiful, even for the dreaded dry shade.
The following are some of the best flowering perennials for shade ranked roughly by bloom time. Some come with added bonuses, like interesting leaves, ground-covering ability, and deer resistance.
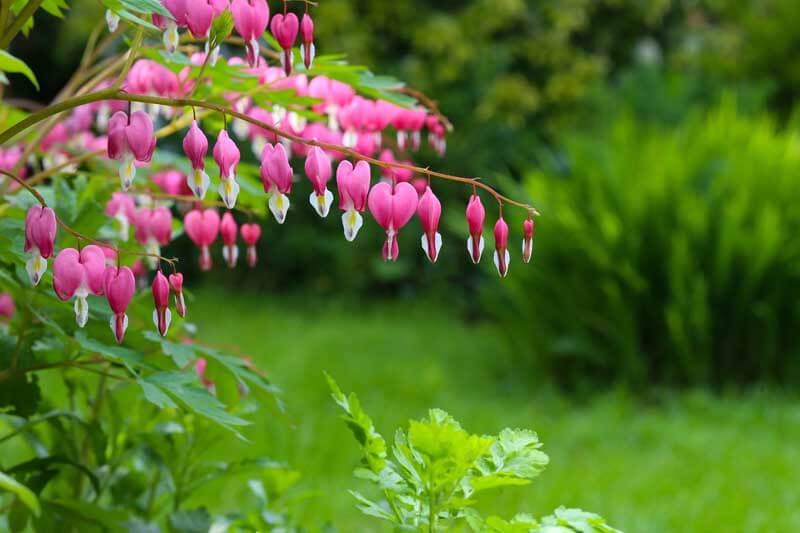
Bleeding Heart: The name is a bit misleading because the old-fashioned bleeding heart (formerly Dicentra spectabilis and now Lamprocapnos spectabilis) will make your heart sing in mid-spring. It features graceful, arching stems that rise to 2 to 3 feet. Pink, pendulous, heart-shaped blooms are the norm, but the variety ‘Alba’ has clear white flowers. Unlike some other shade perennials, bleeding heart dies back by summer, so you need to consider planting other ornamentals to fill in the gaps it creates. By early to midsummer, the leaves and stems will turn brown and fade away. But never fear, they will return without fail next spring.
The later-blooming fringed bleeding heart (Dicentra eximia) is a shorter species from the eastern United States with pink or reddish flowers. They have more delicately dissected foliage, but the pendulous “hearts”, or individual flowers, are similar. Unlike the old-fashioned bleeding heart, the leaves of this species remain through to fall.
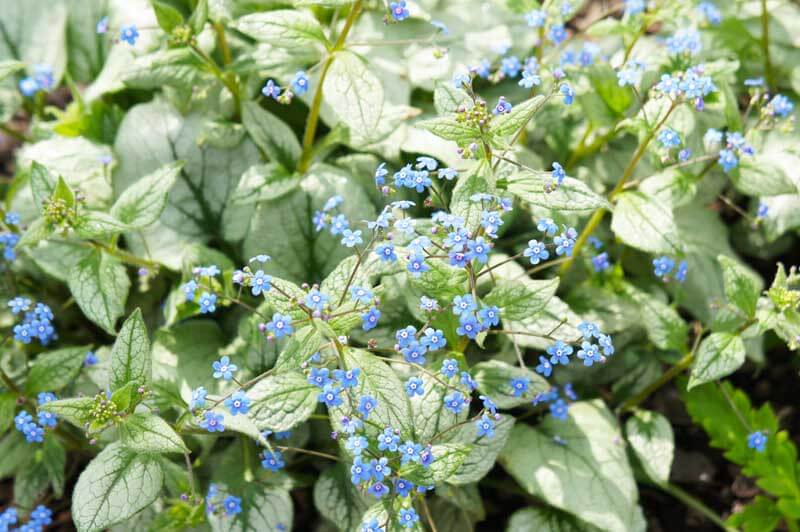
Siberian bugloss: Low growing Siberian bugloss (Brunnera macrophylla) is also known as false forget-me-not because of its delicate, blue, late-spring flowers. These appear on 6- to 12-inch stalks in spring, creating dots of true blue in the shade garden. Brunnera is especially valuable because the heart-shaped leaves add interest after the flowers fade. The best garden varieties are also variegated to brighten shaded spots. ‘Jack Frost’ is one of these with its silvery veined foliage that looks great through summer. Siberian bugloss forms neat mounds. Easy to love and easy to divide as clumps increase, it also thrives best in evenly moist soil conditions. It is a good edging plant and also works well in containers.
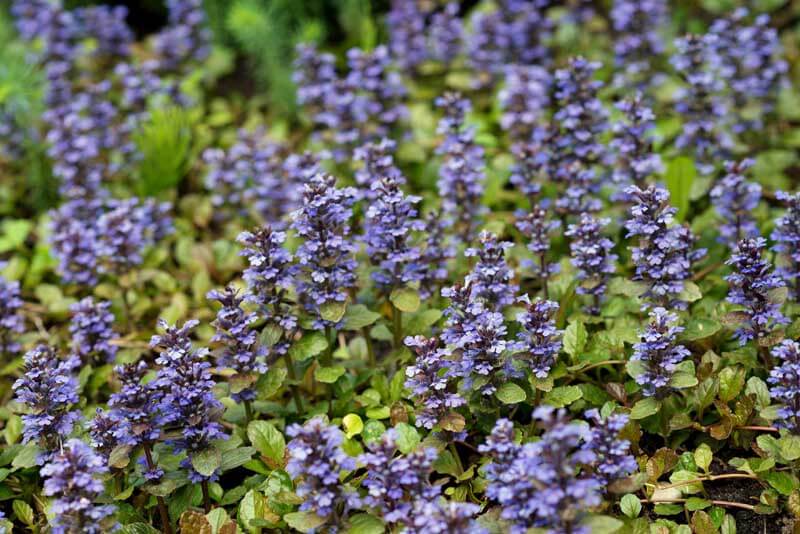
Bugleweed or Viper’s Bugloss: Botanically called Ajuga reptans, this very low-growing perennial groundcover happily creeps in sites with light to relatively heavy shade. The plants will also persevere against deer, rabbits and the toxins emitted by black walnut trees. Depending on the variety, the crisp leaves may be green, variegated with cream and pink, or dark bronze-purple. The late-spring flower stalks, that are between 6 to 8 inches, have many blue, lipped flowers that are beloved by bees.
Coral Bells: The world of hybrid Heuchera, or coral bells, has exploded over the last two decades to encompass an incredible range of leaf colors, including bronze, shades of green, orange, peach, purple-black, and russet-red. Some varieties feature variegated leaves, with two or more colors vying for attention. Those colorful leaves may also be wavy or even ruffled on the edges. Many hybrids are mostly grown for their leaves while the lovely Heuchera sanguinea is also grown for its wand-like spires of tiny crimson bells that wave high above the rosette of leaves in late spring. The bells aren’t always coral but may also be white or pink. While very tolerant of shade, the plants insist on even moisture for best growth and looks.
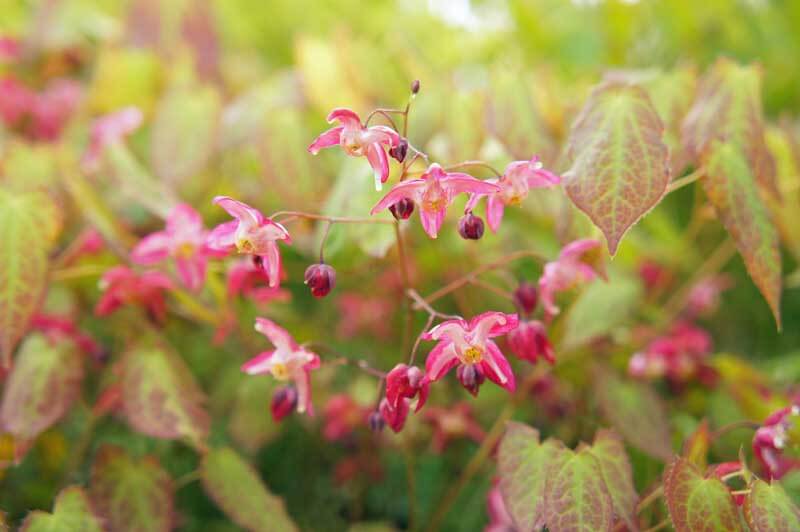
Barrenwort or Bishop’s Hat: The popular garden plants in the genus Epimedium are vigorous and tolerant of a wide variety of shade situations, including dry shade. In spring, they are bedecked with spurred, four-petaled flowers of yellow, pink, red, or white, depending on the variety. They dangle from the wiry stems, providing delicate, woodland elegance. The low-growing, spreading plants feature elongated, heart-shaped leaves that redden at the edges, especially in cooler weather. For good spring appearance, cut back the dried foliage in late winter.
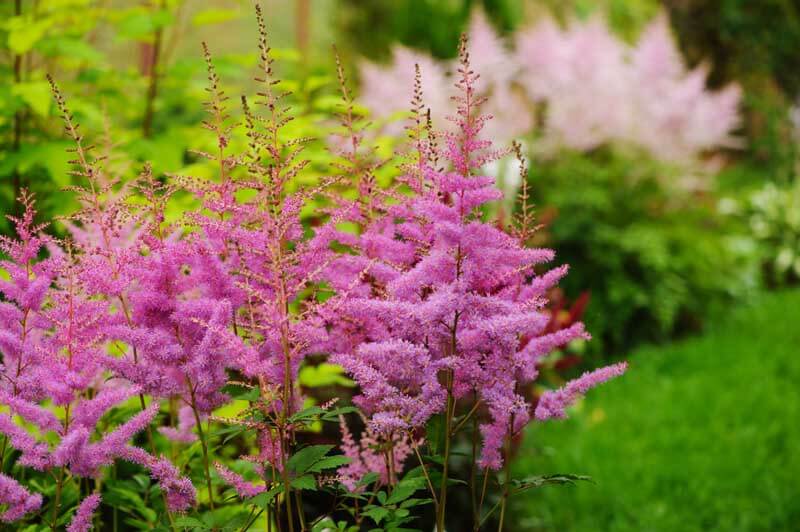
Astilbe: With feathery late-spring conical plumes of white, pink, peach, red or purple, Astilbe is a shade stunner, even in places where shade is deep. With few requirements other than consistent average moisture, these late spring bloomers are bright spots in borders and large containers. The average astilbe rises 18 to 24 inches, with a plume-like profile. Shear back the old flower heads to enjoy the plant’s ferny foliage from midsummer to fall. Great varieties include pink-flowered ‘Rheinland’ and pale peach ‘Peach Blossom’.
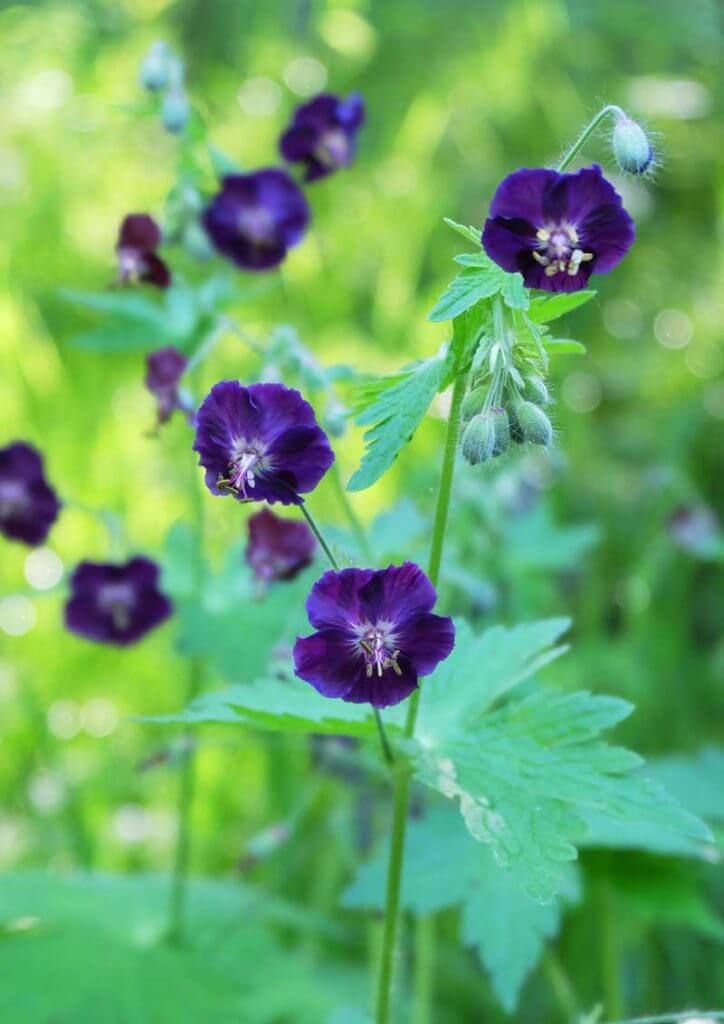
Mourning Widow: Hardy geraniums are among the workhorses of the perennial garden and mourning widow (Geranium phaeum) is an understated star for light to medium shade. Tagged with its somber common name, this geranium features dissected leaves and mauve to dark purple flowers that rise on 12- to 24-inch stalks any time from late spring through midsummer. The lovely variety Alba’ features white flowers, which provide a nice contrast in shady corners. For even more interest, try ‘Samobor’, with its purple flowers and foliage splashed with maroon. Throughout the rest of the season, its mound of broad, notched leaves continues to look attractive.
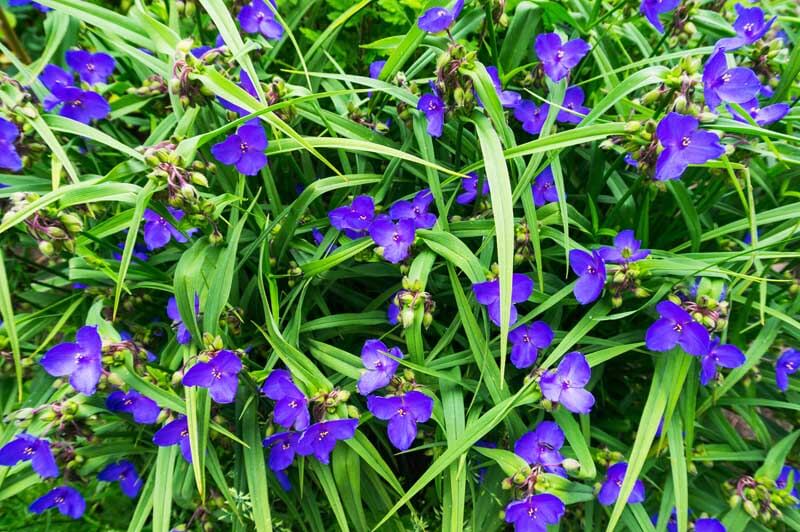
Spiderwort: Modern garden spiderworts are descended from the native woodside species, Tradescantia virginiana. Standing up to 1.5- to 2-feet tall, the plants feature long, strap-like leaves, reminiscent of iris. Round buds cluster and dangle like beads at the top of each sturdy stem. Opening a few at a time and lasting for only one day, the blooms may be purple (the most common color), violet-blue, lilac, white, or nearly pink. Bright yellow stamens punctuate the center of each flower. The first flush of bloom comes in mid to late May. Once the last petal drops, cut back the stems almost to the ground. New growth will appear, and a second flush of bloom may occur. Happy tradescantia will multiply into significant clumps, but these are easily divided and shared. The golden-leaved ‘Sweet Kate’ is an extra pretty variety that simply glows in shade.
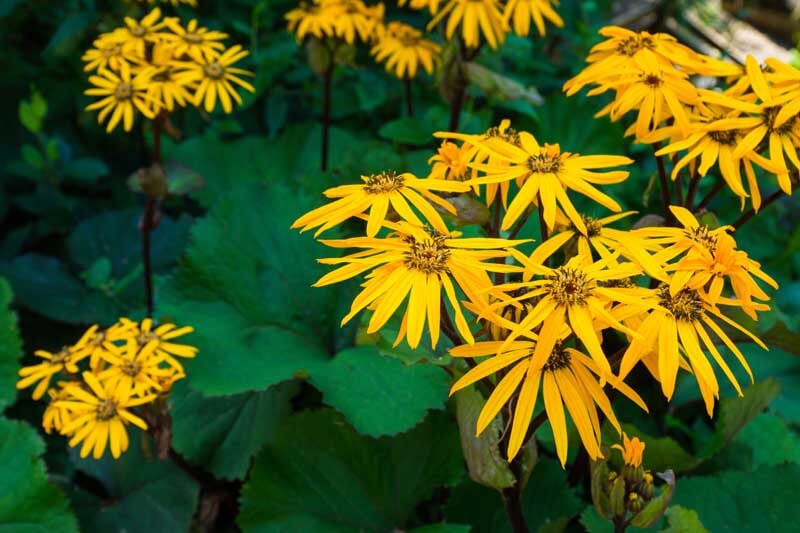
Leopard Plant: Botanically referred to as Ligularia, these perennials are tall, wide, and handsome, rising from a basal rosette of large green leaves that can reach from 2- to 5-feet tall, depending on the type. These garden “leopards” prefer consistently moist soil and thrive in partial to deep shade. The bright flowers range from yellow to yellow-orange. ‘The Rocket’ is a popular tall variety, with gigantic, triangular, toothed leaves and towering yellow flower spikes made up of tiny daisies. Ligularia dentata ‘Desdemona’, is a little shorter at about 2- to 3-feet tall, with glossy, rounded leaves that are green on top and dark purple on the bottom. Instead of spikes, its blooms are clusters of larger, golden-orange, 2-inch daisies.
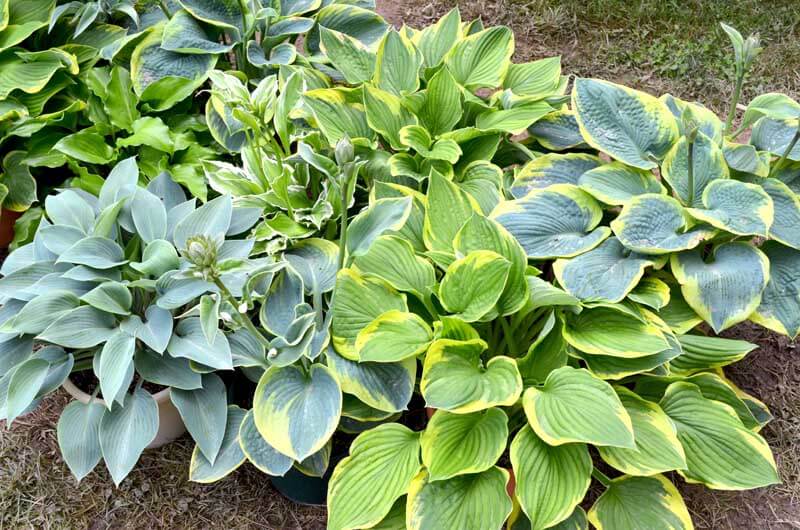
Plantain Lilies: Everyone knows and loves Hosta, which are grown primarily for their foliage. With leaf sizes ranging from small (‘Blue Mouse Ears’) to giant (‘Blue Mammoth’), hostas can suit any size of shade garden or container. Foliage colors include a range of greens, from the palest chartreuse to the darkest dark green. Powdery blue-greys and blue-greens are also common as are variegated hostas, with leaves striped, splashed, or edged in contrasting creams, yellows, and bright greens. At bloom time, tall stems of flowers bear lily-like blossoms that are often fragrant. One hosta with extra lovely flowers is the August lily (Hosta plantaginea), which is renowned for its fragrance. Hosta lovers do have to contend with deer and/or slug damage, but remedies for these pests abound. (Click here to learn more about warding off animal pests in the garden.)

Toad Lily: Toad lily is a whimsical name for a lovely fall-blooming shade lover. Known botanically as Tricyrtis, toad lily, like the amphibian for which it is named, prefers consistently lightly moist soil conditions and partial to medium shade. Arching stems rise 2 to 3 feet and feature oval or oblong leaves that appear to clasp the stems. The flowers, which look a bit like small, spotted lilies, bloom on stalks that sprout from between the stems and leaves. Blooming in late summer or early fall, toad lily varieties may have flowers that are white with spots and splashes of medium to dark purple, pink, or mauve. If given a chance, the plants will also naturalize.
Planting Shade Perennials
When planting your shade perennials, give them a good start by adding a quality soil amendment, like Fafard® Garden Manure Blend, and prepare yourself for colorful, exciting shaded spaces.
If you plan to plant your perennials in dry shade, be sure to raise the amended soil several inches above the soil line and mulch them well with a fine mulch. This should give them a little more space to grow without smothering surface tree roots.