Articles

Bayberry for Landscapes and Candle Making

Bayberry for Landscapes and Candle Making Featured Image
Bayberries are tough, shore-side shrubs with the most fragrant, waxy berries. Bayberry for Landscapes and Candle Making (Image by Jessie Keith)

When we visit Cape Henlopen, Delaware along the Atlantic coast in fall, I always enjoy plucking a few waxy bayberries to rub between my fingers on the way to the beach. Their warm, familiar scent quickly fills the air. My children like the aroma, too, and it’s no wonder. Bayberries have been a staple of American candle and scent making since colonial times and earlier. But, they offer even more; utility, resilience, and adaptability, make these tough, native shrubs perfect for shore-side and inland landscapes.

Bayberries (Myrica spp.) have other unique attributes that give them a shore-side edge. They tolerate salt, moist soil, set deep roots, and grow well in sand or clay. Most importantly, they are able to convert atmospheric nitrogen into soil-bound nitrogen, like plants in the pea family (legumes). That means that they fertilize themselves and plants around them. (Click here to learn more about other garden plants that feed the soil naturally.) The berries also feed native birds, such as Carolina wrens, through winter.

Good Bayberries for Gardens

Northern bayberry
Northern bayberry loses its leaves in winter, but has attractive dense foliage in the growing months.

Before planting bayberries, it is important to understand that they are dioecious, meaning that some shrubs and male flowers and others have female flowers. That means that a male and female are needed in the landscape for fruitset.

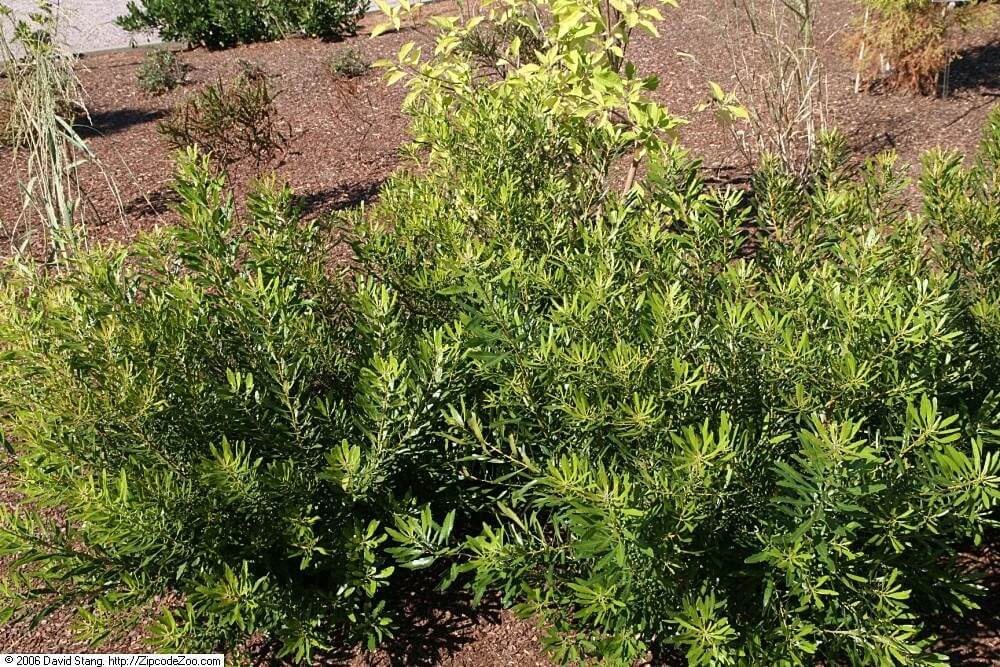
Northern bayberry (Myrica pensylvanica, Zone 3-8) is a deciduous shrub that produces some of the finest smelling bayberries. It tends to become quite a large shrub reaching 5-12 feet, but there are a number of varieties that stay much smaller. Southern Bayberry (Myrica caroliniensis, Zones 6-10) the evergreen is similar in most traits other than foliage but is far less available at plant nurseries.

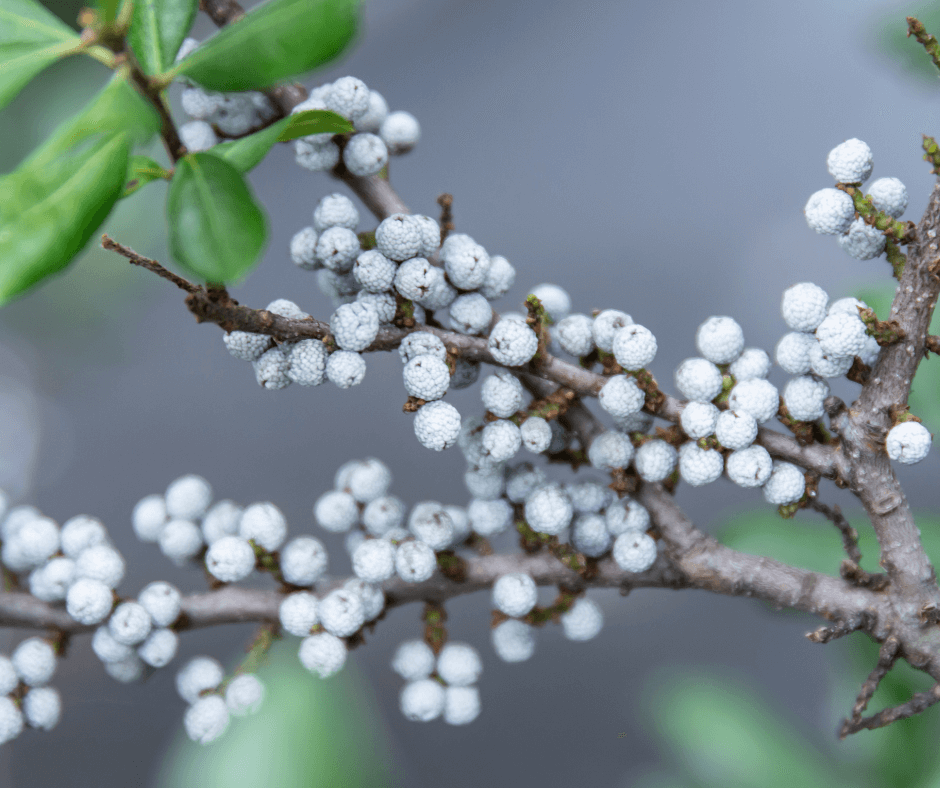
Bobbee™ (Myrica pensylvanica ‘Bobzam’) is a female variety that reaches 4-6 feet and bears copious waxy fruits on stems lined with deep green leaves.

Silver Sprite™ (Myrica pensylvanica ‘Morton’):  A compact female that has grey-green foliage, bears many fall fruits that are excellent for candle making, and has dense branching, and a tidy broad-oval habit. Mature specimens can reach 4 to 5 feet high and 6 to 7 feet wide. Plant it with Male Silver Sprite™ (Myrica pensylvanica ‘Morton Male’), which has the same habit but produces make flowers. The leaves of both turn deep purple in fall.  

Wax myrtle
Wax myrtle is evergreen and female plants produce lots of fragrant berries. (David J. Stang)

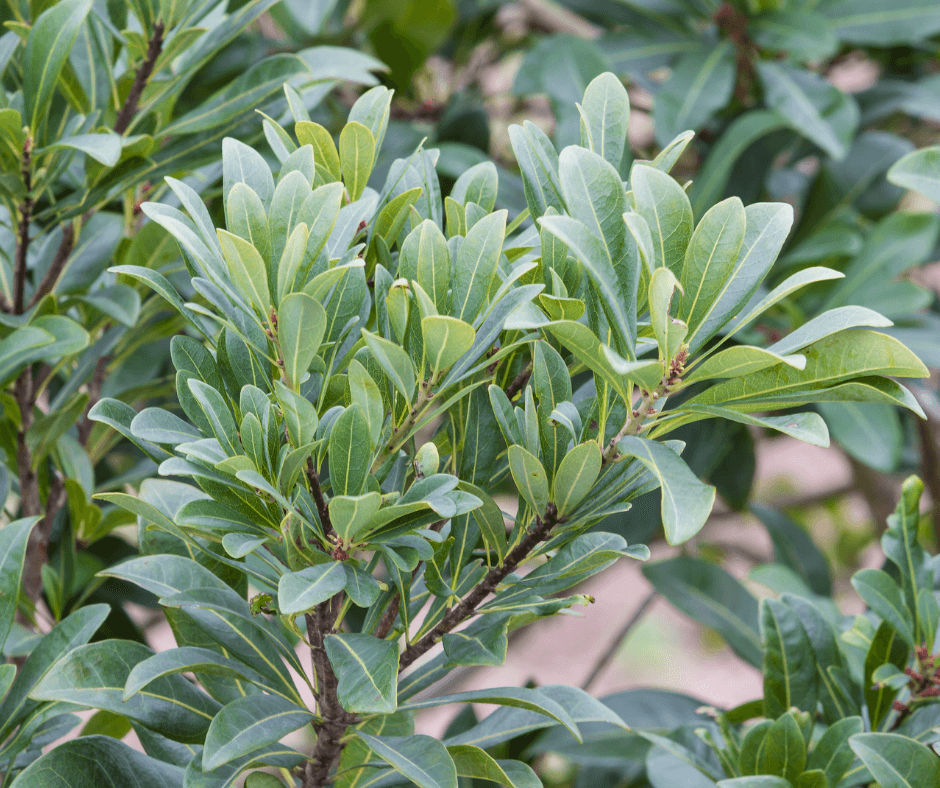
Wax Myrtle (Myrica cerifera, Zones 6-10) evergreen foliage makes this Oceanside bayberry great for home landscapes. In the wild, it commonly dots the dunes and beaches from New Jersey down to Florida. Uncultivated specimens can form small trees reaching 10-15 feet, but there are plenty of dwarf varieties well suited to home landscapes. The small, tidy ‘Don’s Dwarf‘ (3 feet), with its blue-green fruits and olive-green leaves is one of the best and most widely available.

Planting and Care

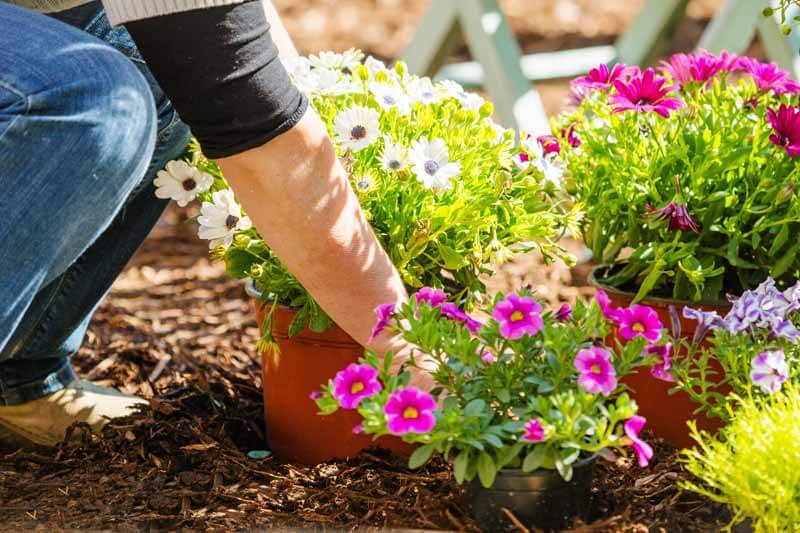
These adaptable shrubs will tolerate excess moisture and drought once established. At planting time it helps to feed the soil with a quality amendment, such as Fafard Topsoil. (Click here to read more about how to site and plant trees.)

Prune large specimens liberally, as needed, after flowering or fruitset. Compact varieties only need light pruning and shaping early in the season. August and September are often the best months to collect berries for harvest. If you have them in your landscape, be sure to leave a few for the birds.

DIY Homemade Bayberry Candles

The waxy berries of Myrica cerifera and M. pensylvanica
The waxy berries of Myrica cerifera and M. pensylvanica are copious and covered with fragrant wax nodules.

Ingredients

  • 4 cups bayberries
  • 5 cups of water
  • Saucepan (just for candlemaking)
  • Cotton wick
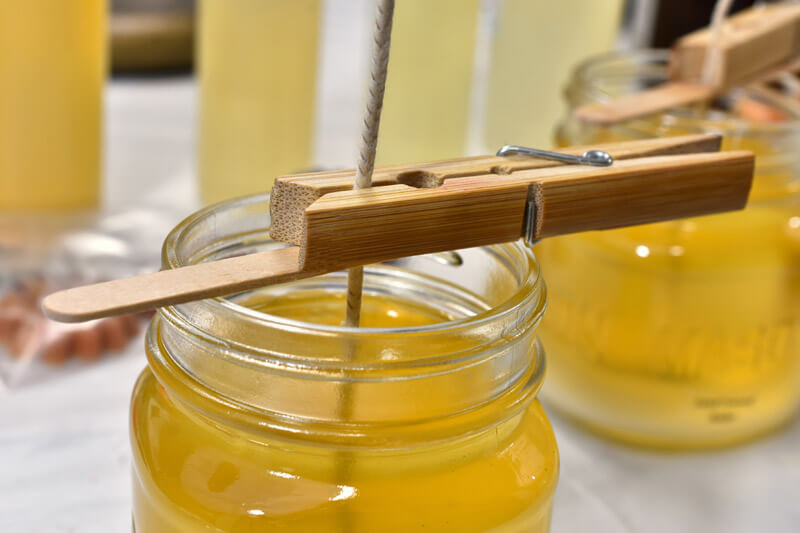
  • Clothes Pin and Popsicle Stick (see below)
  • Metal Washer
  • Two 8 oz canning jars
  • 8 oz. Beeswax
  • Label
  • Pyrex bowl
  • Disposable chopstick or bamboo skewer

It takes approximately 4 cups of bayberries to yield 1 cup of wax. Start by picking mature bayberries; they should be fragrant, blue-gray, and waxy. This recipe will make two 8 oz. candles for gifting.

Place the bayberries in the saucepan, cover with water, bring it to a boil, and cook for 10 minutes. Remove the pan from the heat and allow it to cool. Once fully cool, the wax will harden and can be removed by hand from the pan. Be sure to remove any stray berries. The wax should be olive-green and fragrant. Your saucepan will smell of it forever, which is why we recommend purchasing an inexpensive saucepan just for candle making.

Fragrant bayberry wax is generally mixed with other natural wax, such as sweet-smelling beeswax, to make candles. Place the bayberry wax in a Pyrex bowl (preferably with a spout) along with the beeswax. Place it over a saucepan of water, double-boiler style, and bring it to a low boil until the wax has melted. Mix the waxes together with the wooden chopstick.

Tie the wick to the washer and dip it in the wax to prime the wick. Center the wash at the bottom of the candle and use the clothes pin to hold the wick at the center of the jar. Then slowly pour the melted wax in, being sure to leave 1/2 inch of headspace at the top. Repeat with the second jar.

Label your candles, secure their lids, and you are done!

Homemade candle with clothespin to keep the wick centred
When making any candle be sure to prime and center the wick. A clothespin lengthened with a popsicle stick glued to the base works well. Trim your wick once the wax has hardened.

Vertical Gardens for Space-Saving Vegetable Gardening

Vertical Gardens for Space-Saving Vegetable Growing Featured Image
Gronomics vertical, free-standing planters are constructed of long-lasting cedar and made in the USA.

More and more large, vertical planters are being designed for big harvests of vegetables and small fruits. Creative gardeners are even coming up with clever ways to create their own mega edible container gardens. Here are some of the better products and ideas, ranging from inexpensive make-your-own containers to state-of-the-art vertical gardens that perform well at a range of costs.

All planting systems are best suited to smaller vegetable crops, like lettuce, spinach, small kale, bush peas, baby carrots, beets, determinate (bush) tomatoes, bush beans, compact peppers, and bush cucumbers and squash. Everbearing strawberries and low-bush blueberries are the best choices for fruiting crops. (Click here to learn about growing blueberries. Click here to learn about growing strawberries. And, click here for a list of the cutest, tastiest miniature vegetables for small-space gardens like these.) Just be sure that you consider planting time for warm- and cool-season crops as well as rotation. (Click here to read more about crop planting times and rotation.)

Vertical Gardens For Purchase

To be able to accommodate lots of plants, vertical gardens must be spacious and hold a lot of mix for ample root support and growth. That’s why the best vertical gardens have plenty of space.

Gronomics® Vertical Garden

Gronomics system
The Gronomics system is very sturdy and well-made.

If you like attractive gardens made from natural materials, then this is the vertical planter for you. The Gronomics Vertical Garden (32x45x9) is made in the USA from 100% western cedar and has a footprint of just 2 square feet. Simply fill it with a quality potting mix, such as Fafard Natural & Organic Potting Mix, and begin planting. The garden contains its own drip irrigation system for easy watering. Apply a continuous-release fertilizer formulated for vegetables at planting time.

The Gronomics Vertical Garden is best suited for growing greens, herbs, strawberries, and small root vegetables. The top planter is perfect for growing bush beans (as shown in the image).

Garden Tower®

Garden Tower
All manner of vegetables can be grown in the Garden Tower. (Image thanks to Garden Tower)

The Garden Tower® is a dual composter and soil-based vegetable garden tower that can accommodate up to 50 plants in just a 4-square-foot growing space. The system is watered from the top down and features a nutrient-tea drawer at the base, which catches fertile water for redistribution in the system. The Garden Tower has lots of room for root growth, which allows deep-rooting plants, like bush tomatoes, to grow well. Fill it with Fafard N&O. Gardeners growing greens should consider also mixing in some Fafard Garden Manure Blend, which is naturally high in nitrogen. It is made in the USA of high-purity HDPE plastic and has a 5-year manufacturer’s warranty.

Greenstalk® Stackable Vertical Planter

Greenstalk plants
Here’s a thriving Greenstalk planter community garden. (Image thanks to Greenstalk)

Just fill it with soil and plant! It is as easy as that. The modular Greenstalk® Stackable planter allows gardeners to raise it to various heights with its stackable segments. The planter is made in the USA and constructed from thick, UV-resistant polypropylene plastic (BPA, BPS & PVC-free), so it is long-lasting. One nice feature is the trickle-down watering well at the top that allows for easy irrigation and fertilization with a water-soluble fertilizer.

DIY Vertical Gardens

Vertical wooden crate garden
Vertical wooden crate or pallet gardens are popular, but beware. Some are made of pressure-treated wood, which contains dangerous heavy metals that leach into soils and are taken up by vegetables.

Creative gardeners have come up with economical DIY methods for vertical vegetable gardening. One popular method is creating pallet gardens, which are safe and inexpensive as long as they are constructed from untreated wood. Simply place the pallets upright, or affix them to a wall, fill them with growing media, and plant. Just find out whether the wood is pressure-treated before creating these gardens because treated wood contains heavy metals, which can leach into the soil and be taken up by vegetables. (Click here for a guide for identifying pressure-treated wood.)

Deck baskets hanging from a trellis
Here, deck baskets have been hung from a strong trellis to create a make-shift vertical vegetable garden.

Other gardeners transform everything from traditional baskets to hanging baskets and plastic tubs into makeshift vertical gardens. As long as you can provide the with planter good support, it drains well, and it holds enough soil for strong root growth, your vertical garden scheme should work.

Large wicker baskets with lettuce and cabbages
Large wicker baskets lined with burlap and supported by strong wire cages create a garden wall for lettuce and cabbages.

So many other materials can be used. Something as simple as a strong, tall tomato cage lined with mulch cloth (or burlap liner) and filled with quality potting mix and compost, such as Fafard Premium Natural & Organic Compost Blend, can create an outstanding structure for growing vegetables. To learn how to make one, watch this Black Gold video!

This sweet potato tower could be used to grow all kinds of vegetables. Get creative!

How to Map and Plan a New Garden

How to Map and Plan a New Garden Featured Image

The cusp of the New Year is not prime gardening season in much of the United States. But, it’s often an excellent time to map and design a new garden or planting border, even in areas that experience real winter. All that is required are bare ground, a relatively mild day, and a few common household items.

Start by considering the garden’s location, size, shape, and desired plants and their growing needs. Roughly sketch out your basic plans. At this stage, don’t worry about precision or specifics. The finer details will be worked out later.

Setting the Garden Perimeter

Measuring tape in grass
A 50- to 100-foot tape measure with a tip that you can stake in place is extra-useful.

Once you have sketched basic garden perimeter designs on paper, grab a couple of tape measures and a notepad and pen (or smartphone) and head out to the new garden site. A 50- to 100-foot tape measure with a tip that you can stake in place is extra-useful. If necessary, also bring a garden hose to mark portions of the prospective border’s perimeter that aren’t already defined by paths, walls, and the like. Place stakes along any hose-defined edges so that you’ll have something to refer to after you return the hose to its winter quarters.

Page on landscape architecture
Curved garden edges have a freer feel but are more difficult to edge and map. Rectilinear bed edges look more formal and are easier to edge and map. (Image from Residential Landscape Architecture)

A border with at least one long, straight edge is a cinch to map. At regular intervals (5 feet usually works well), measure the perpendicular distance from the straight edge to the opposite side of the border. Also, measure the distances to any extant plants and features that will remain as part of the new garden. Transcribe the data to graph paper and – voila! – you have an accurate map of your soon-to-be-border.

A border with curving edges is somewhat trickier to map. In this case, extend the tape along the approximate “equator” of the border, and measure the perpendicular distances from the tape to both edges at regular intervals. Compared to the straight-sided border, a few more dots and a bit more freehand sketching are required to translate these measurements to graph paper.

Mapping the Garden

Designing a garden
After taking measurements, put your design to paper.

A landscape design template is an especially handy implement for the drawing and mapping stage. You can purchase one (as well as graph paper) from most art- and drafting-supply stores, as well as online. It also helps if you have an image of your home’s footprint and yard to sketch upon and include for perspective. This will also help ensure that your garden is placed within your yard’s boundaries.

Illustrated plant renderings
Plant renderings can be illustrated in many different ways. Have fun. Be creative.
(Image from Residential Landscape Architecture)

To map the border’s location relative to the house, measure the length of the nearest side of the house, and the distances from its corners to the ends of the border. Using graph paper and a ruler, compass, or landscape design template, lightly sketch a curve representing the distance from the one corner of the house to one end of the border. Repeat for the distance from the other corner of the house. The intersection of these curves pinpoints the end of the border. This technique also works if you’d like to map the border’s relationship to other landscape features such as property lines.

Choosing Plants for the Garden

Choosing plants for the garden
Choose colorful, attractive plants that meet the site’s requirements and your aesthetic goals.

Next comes the really fun part – choosing plants. Given the border’s conditions and surroundings, what would grow and look well there? Compile a list of candidate garden plants that would provide a pleasing mix of flowers, foliage, shapes, sizes, and textures. When you’re happy with your list, start to play around on paper, beginning with the major “keystone” perennials, shrubs, or trees that will form the backbone of the new planting. A composition of rhythmically spaced “keystone” specimens – interspersed with clumps of smaller companion plants – generally works well. Lightly pencil-in a circle for each plant, spacing the circles according to plant size and vigor. Use a complete circle to represent individual specimen plants (often trees or shrubs), and fused circles (omitting their inner portions) to depict clumps.

De-sodding the garden beds
Once the soil warms, start cutting and de-sodding your beds.

Once you have a good handle on the design of your new border, you can start planning how to execute it. It’s never too early to start sourcing and ordering plants (especially rarities that are likely to sell out early). You also need to consider how you’re going to prepare the border site. Is the site currently occupied by grass or by other plants that will need removing? Now’s the time to formulate a strategy.

Fafard Premium Natural & Organic Compost Blend pack

Perhaps you’ll decide to rent a sod cutter come spring to remove turf from the site. Or maybe sheet composting is the way you’d like to go. Solarization – blanketing the site with heavy plastic to fry the existing vegetation as well as the weed seeds that lurk in the soil – is another excellent approach that works particularly well if you plan to hold off on planting until fall. A soil test might also be in order, whenever as the ground is workable (most state extension offices offer soil testing at a reasonable price). Finally, what’s your mulch of choice going to be? Now’s the time to find a source.

Whatever strategy you choose, you’ll likely need compost and soil amendments to improve the soil. If so, you’ve come to the right place! Fafard offers a bevy of such products, including Fafard Premium Natural & Organic Compost Blend and Fafard Premium Topsoil.

Happy planning – and planting – in 2020!

Garden Journaling: How To Plan Your Dream Garden

Garden Journaling: How to Plan Your Dream Garden Featured Image

A journal is one of the best tools for achieving the garden of your dreams. Your recorded observations of what’s happening today will give you a clearer vision of what to do tomorrow – and many years beyond.

Starting Your Garden Journal

A note pad, smartphone, and/or computer are all you need to build your journal. Use them to record the dates and details of significant garden happenings, such as the following (with photos, if desired):

  • Flowering and leaf-out times for key garden plants;
  • Impactful weather events such as freezes and storms;
  • Disease and pest outbreaks;
  • Sowing and planting (including what was planted and where);
  • Important maintenance activities such as mulching, shrub and tree pruning, harvesting, and major weeding;
  • Garden amendment, fertilization, and other soil preparation strategies;
  • What succeeded and what performed poorly.

Do a weekly journaling stroll around your garden. When you see something that delights or concerns you or otherwise grabs your attention, take a note or a photograph (or both). Is the perennial border up to something particularly spectacular this week? Are sawfly larvae skeletonizing the swamp hibiscus? Does the rhododendron by the front entry need to be replaced? Make a note (with the date!), along with any associated thoughts that might come to mind.

Garden Journaling Methods

Jotting down notes and smartphone on the side
A note pad and/or Smartphone are all you need to build your journal.

Traditionalists will opt for hand-written journals, but Smartphones make especially good journaling tools, especially for photos. Not only are photos automatically dated, but you can also add text to them and store them by subject. Smartphones are also good for note-taking, via apps such as Google Keep (which can link notes to photos). Then you can organize printed photos and other physical records (such as receipts and empty seed packets) in a binder with plastic pocket sleeves.

If you are one for the computer and a stickler for the details, consider creating spreadsheets to track trends in seed germination, harvests, flowering dates, pest appearance, and so forth. In time, you can create charts showing the ebbs and flows of your garden. These can be very informative.

Winter Garden Journaling

Gardening notebook with supplies
Winter is the time to organize any notes, photographs, and data from the past year that are still at loose ends. It’s also the time to record seed-starting data.

Gardening and journaling continue through winter. There are bulbs to force, catalogs to peruse, seeds to order and plant, house plants to enjoy and maintain, and any number of other winter gardening activities to complete and chronicle. It’s also the time to reflect on gardening seasons past and future. What were the garden’s highlights and successes this year? Where did it fall short? What are your visions and overall goals for next year, and beyond? Get it all down on paper (or microchip).

Finally, winter is the time to organize any notes, photographs, and data from the past year that are still at loose ends. For example, a spreadsheet of the year’s planting data – including plant/seed source and sowing/planting information – will be essential when you get around to ordering and planting next year’s seeds and plants. You can move a copy of the spreadsheet to your smartphone, to join the rest of your journal information. A well-stocked, well-organized garden journal from the previous year is just what you need to get rocking in the upcoming year.

Garden Journaling for Design

Thinking about garden design
Garden design must be planned and continuously recorded for the best success.

Journals are essential for the dynamics of garden design. Your journal will make the greatest impact have these essential planning and design materials on hand:

  • Documentation of the garden site’s layout and characteristics, including maps/plans, soil test results, sun and wind exposures, grades, and extant plantings;
  • Garden design ideas and plans, including drawings and plant lists;
  • An “encyclopedia” of information of special interest to you and your garden, comprising entries on plants, materials, gardening techniques, and other relevant subjects (be sure to include a file on Fafard’s outstanding lineup of potting soils and soil amendments!);
  • Short-term and long-term garden calendars, specifying the sequence of yearly gardening activities, and the long-term (e.g., 5-year) plans for maintaining or renovating the garden and for implementing designs.

Combine these elements with the detailed observations of your journal, and you’ll have all the ingredients to make your dream garden a reality.