Articles

Homegrown Mints for Cooling Libations: Mojitos and Juleps

Mojitos have become a favorite tart, herbal summer drink!

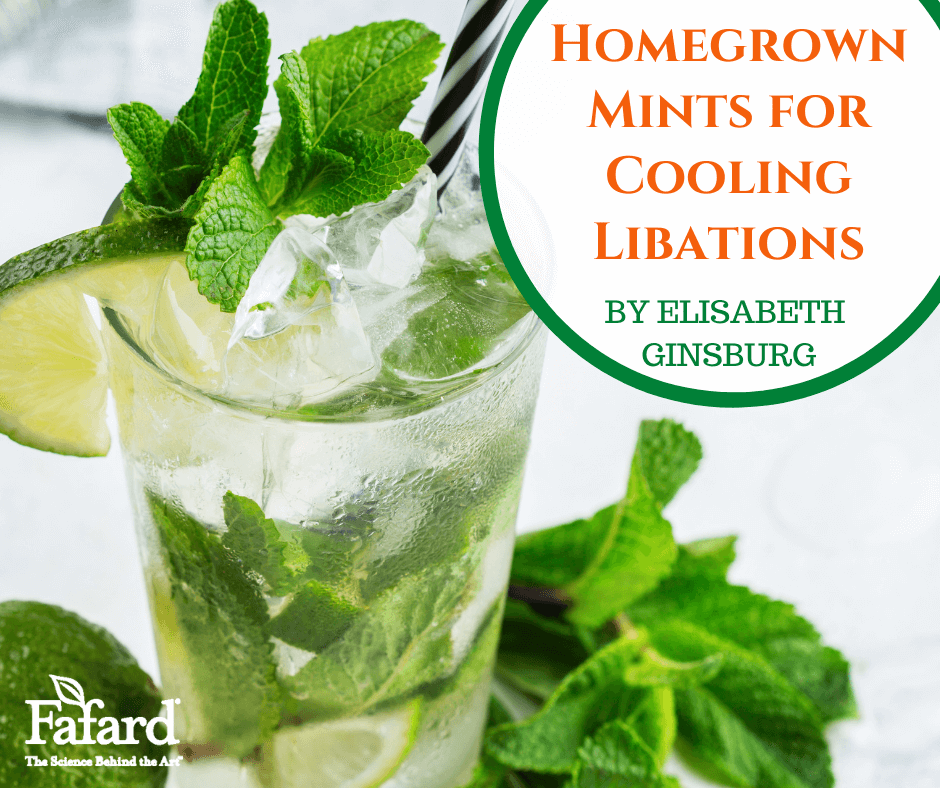
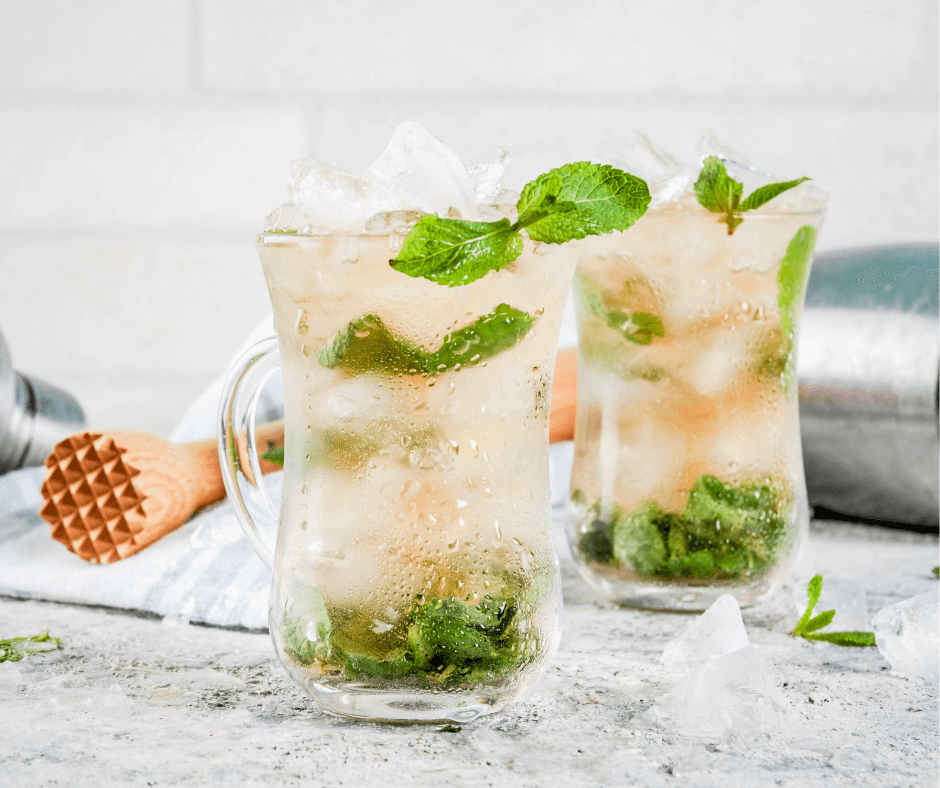
Parched summer palates demand refreshments that are icy cold, wet, and flavorful.  For sophisticated adult palates, the mojito, a classic Cuban cocktail, and the julep, beloved in the American South, check all the right summer boxes. Mint, muddled or crushed with sugar prior to the addition of liquid ingredients, adds distinctive flavor notes to these drinks.

But, which mint is best for an authentic mojito or traditional julep?  The Mentha genus is large and full of popular varieties and hybrids.  That kind of abundance is a blessing for cooks and cocktail makers, but it can also be daunting.  The mints below are the best choices for these fabled libations.

The Mojito: A Taste of Havana

Fresh spearmint makes fabulous mojitos.

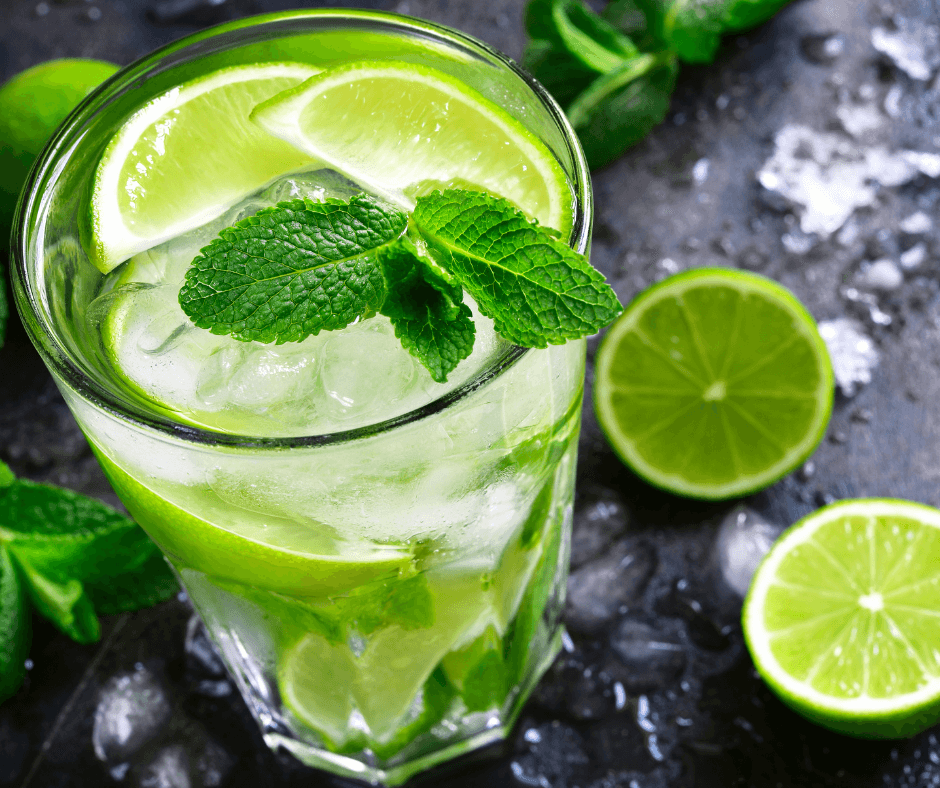
There are many origin stories associated with the mojito (click here for the traditional Havana-style recipe), but one thing is clear–it was popularized by novelist Ernest Hemingway, who first enjoyed it in the 1950s at a favorite Havana bar.  The cocktail’s fame spread, and by 2002, even super-spy James Bond tossed one back in the film Die Another Day.

A classic mojito embodies the flavor of the Caribbean in a fizzy mix of white rum, lime juice, mint, sugar, and club soda or sparkling water.  Ice cubes keep the drink cold. Nonalcoholic versions omit the rum.

Spearmint was the preferred mint for drinks in the early 20th century.

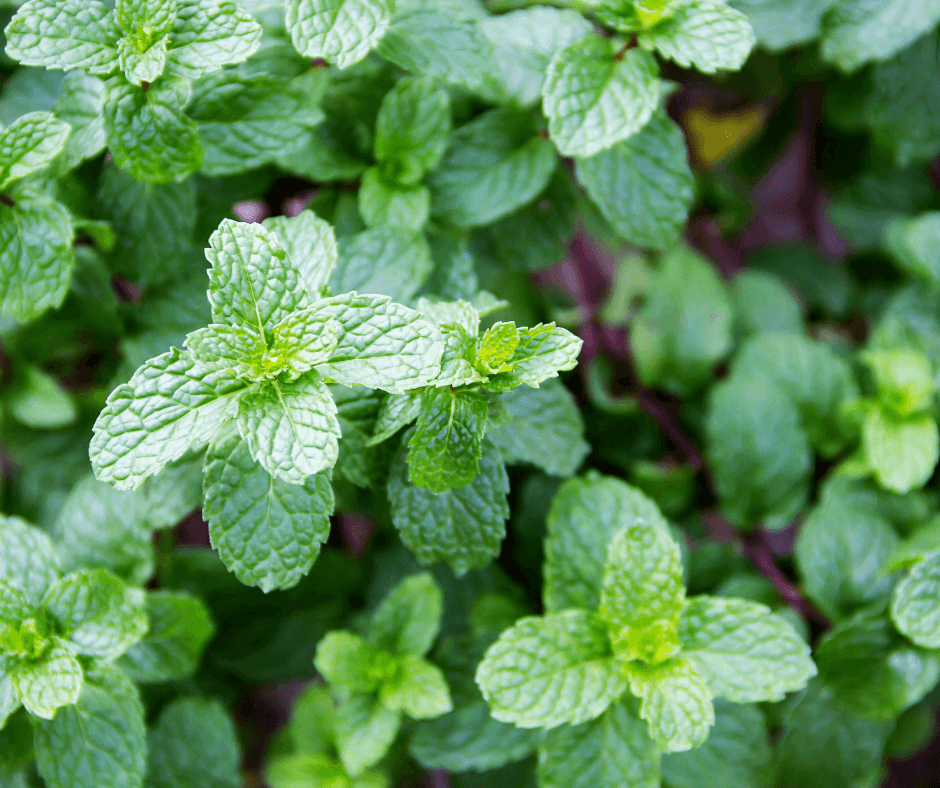
Until early in the 21st century, mixologists looking for mint to flavor mojitos often used spearmint (Mentha spicata), which has a familiar, piquant mint flavor.  Some drink makers also used peppermint (Mentha x piperita), but the mint flavor in peppermint leaves is much stronger and spicier than that of spearmint.

Around 2006, Cuban mint (Mentha x villosa), native to the island, began making appearances in the United States, and bartenders started using this “original” mojito mint in the rum drinks.  Since that time, Cuban mint has become more readily available, especially for those who are willing to grow their own.

Mint connoisseurs say that Cuban mint has a somewhat milder flavor than spearmint, along with citrus notes that marry well with the lime juice in the cocktail.

Jubilant Mint Juleps

Frosty mint juleps were originally served in silver cups but glass is also used these days.

The mint julep (click here for the traditional recipe from the Kentucky Derby) comes with its own collection of romantic and/or evocative stories, featuring a cast of larger-than-life characters ranging from Andrew Jackson to Teddy Roosevelt, William Faulkner, and Ernest Hemingway (a prodigious cocktail consumer).  The drink, traditionally served in a frosty silver or pewter cup, is a popular hot-weather tipple all over the South (and elsewhere) but is most often associated with the Kentucky Derby.  It has been the official cocktail of the Derby since 1983, and hundreds of thousands of them have been served to racegoers ever since.

Juleps were originally served in silver cups, like this antique one.

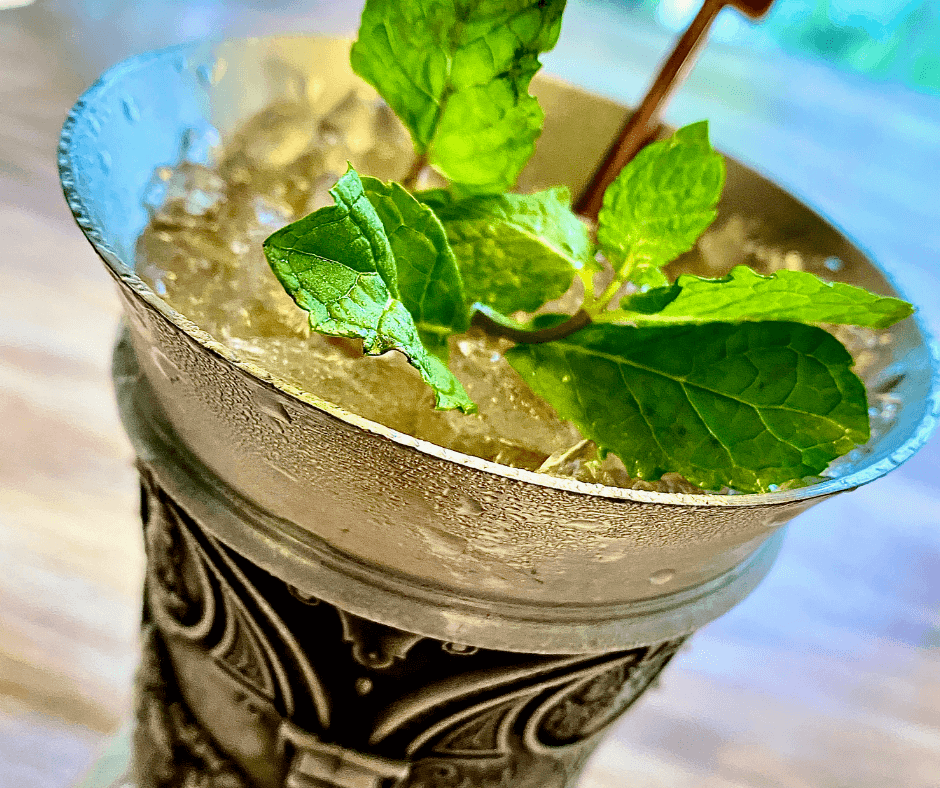
Juleps are traditionally made with bourbon, mint, sugar, and lots of shaved or crushed ice.  Julep aficionados might argue that quality bourbon is the most important component, but the mint also plays a defining role.  In many recipes, the instructions simply refer to “mint leaves”, without reference to specific types. Overall, the most common mint for juleps is spearmint, which harmonizes nicely with both the sugar and the bourbon. 

In a bow to tradition and the Derby, one variety of spearmint, with especially large leaves, was named ‘Kentucky Colonel’, however, any spearmint will work well in the drink.

Other Mint Options

Variegated pineapple mint is tasty and pretty.

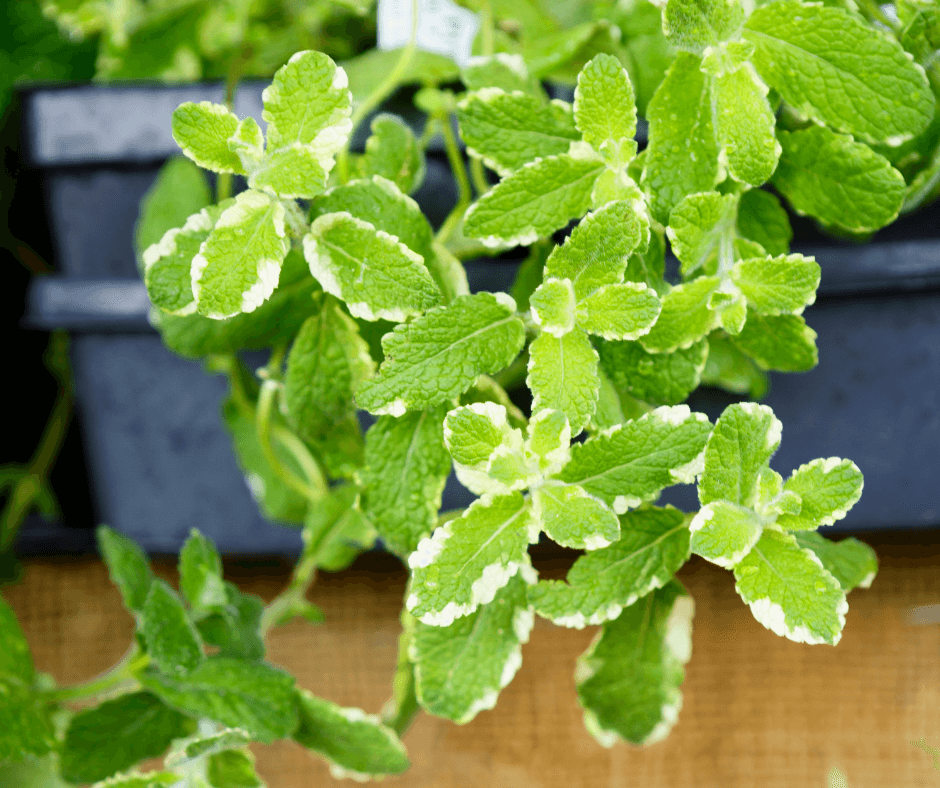
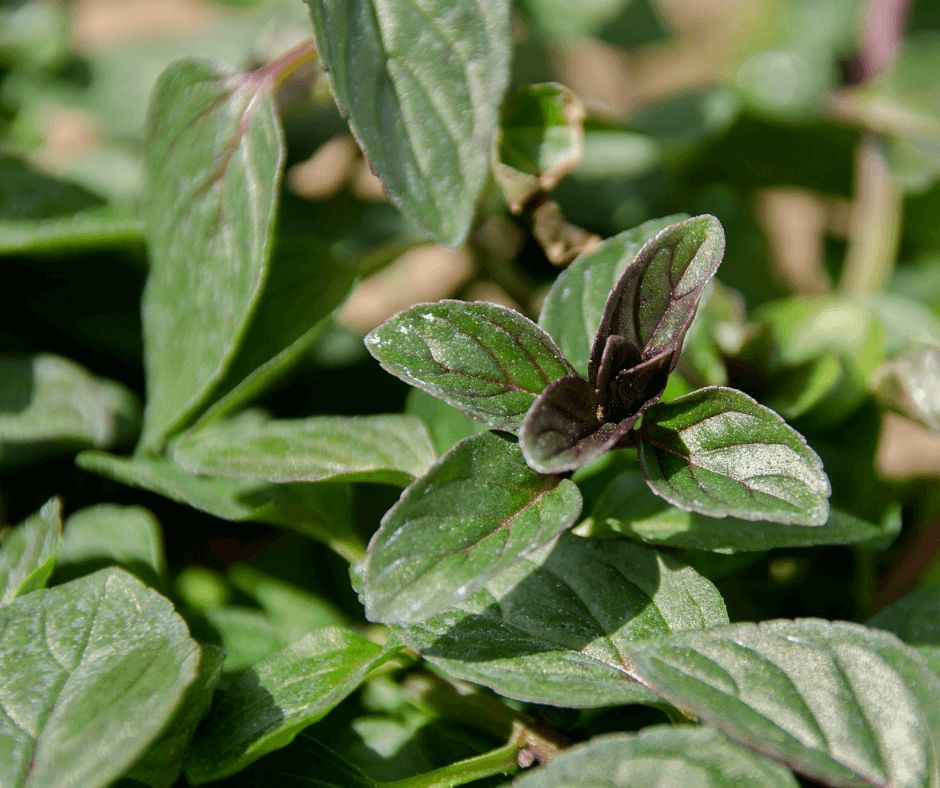
Cocktail purists might frown, but you can enhance the flavors of mojitos and juleps with other mints, according to personal taste. Mojitos, with their lime flavor components, might include lime-scented peppermint (Mentha x piperata f. citrata ‘Lime’).  While a challenge to hallowed tradition might just be enough to scare the horses at Churchill Downs, julep lovers who like the combination of mint and chocolate can flavor their drinks with chocolate mint (Mentha x piperata ‘Chocolate’).  It is pretty and tastes sensational. The chocolate flavor is mild but discernible. The pretty variegated pineapple mint (Mentha suaveolens ‘Variegata’) is another sweet variety to try for a fruity twist.

Grow Your Own Cocktail Mixers

Chocolate mint is my favorite for drinks!

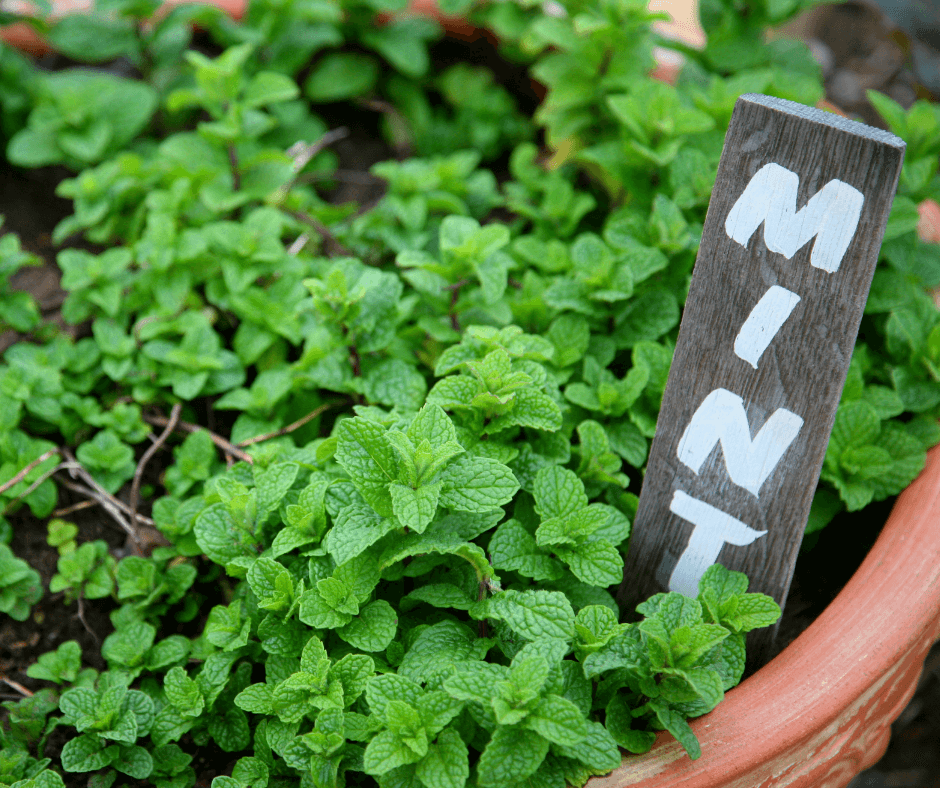
Whether you are making mojitos or juleps, mint is extremely easy to grow.  Start from seed, young nursery plants, or cuttings from an established plant.  Cuttings from mint family members, including spearmint and Cuban mint, will root quickly in a glass of water and can then be transplanted to soil-filled containers. 

Mint’s vigor may also be its greatest liability in garden situations.  In rich, moist soil mint spreads rapidly and may take over increasingly large areas in beds and borders.  To keep the plants within bounds, grow them in containers filled with a good potting medium, like Fafard Natural and Organic Potting Mix.  You can sink the containers in the ground, or simply keep them near the kitchen door for those times when you want to make mojitos, juleps, or other minty specialties.

Always pot mint plants to keep them from taking over.

Harvest mint leaves regularly, as this keeps mints compact and full.  Aim to harvest before the plants flower, as flowering tends to make the mature leaves somewhat bitter.  If you can’t use those leaves right away, preserve them by air drying or freezing. Homegrown, preserved mint almost always tastes better than the dried product available on store shelves.

Mints die back to the ground in cold climates but return in spring and also self-seed readily.  You can also bring potted specimens indoors, and overwinter them on sunny windowsills.  Take cuttings from those plants in spring and root them, ensuring that you will have a supply of healthy young specimens for the growing season.

What Light Do Indoor Succulents Need?

Ask a Garden Expert "What Light do Indoor Succulents Need?" Featured Image

“I’m new to the succulent world. Now that winter is fast approaching, I’m wanting to learn about indoor lighting for the succulents. Any helpful information would be so appreciated. Thank you so much!” Maria of Young Harris, Georgia

Answer: Truly, it depends on the succulent. Most grow best in natural sunlight, while others perform better in bright, indirect sunlight. As a rule, most spined cacti prefer direct sunlight as do many broad-leaved succulents, like kalanchoes, and sedums. A few for bright indirect light are Christmas cactus (Schlumbergera spp.), jade plant (Crassula ovata), and Mother-in-Law’s-Tongue (Sansevieria trifasciata). Here are some more lighting details along with some grow-light options, if you lack sunny windows.

Sunlight for Succulents

South-facing windows are always the sunniest, so place your plants along these or in a sunny room that has excellent direct of indirect light for your succulents. Bright, indirect light can be found just outside of the direct sun rays. It feeds the plants but won’t burn the foliage of more shade-loving succulents.

Grow Lights for Succulents

Here are your indoor grow light options listed from the lowest to the highest price. You can use these if you lack good sunlight in your home.

1. Fluorescent Lights: There are several ways to go with fluorescent bulbs. The cheapest way is to use a balance of warm/red and cool/blue bulbs. Together they cover much of the light spectrum, but not all. Some fluorescent bulbs are specially designed for plant growing and cover more of the spectrum–up to 94%. In general, fluorescent bulbs are not very strong, so they must be placed just inches above plants for best light reception and growth. Most growers choose shop-light fixtures, which support long bulbs.

2. Metal Halide (MH) and High-Pressure Sodium (HPS) Lights – These bulbs can be quite expensive (both the bulbs and fixtures) and have high heat output, but they are stronger and can be used to grow larger plants. MH bulbs cover much of the warm/red light spectrum, which is best for foliage growth, while HPS bulbs cover more of the cool/blue spectrum, which is best for flowering. For this reason, these bulbs are often paired to cover a full spectrum for plant growth. If you want to use both bulb types, choose a fixture that will accept each.

4. LED – Great strides have been made regarding full-spectrum LED growing lights, and they are now superior to both fluorescent and MH-HPS options. They can be pricy, but they are long-lasting, full-spectrum, lack heat output, and require less energy. They are also stronger and can be used to grow larger plants. (Click here to learn more!)

Happy Succulent Growing!

Jessie Keith, Fafard Horticulturist

How To Grow Star Fruit Indoors

How to Grow Sunny Star Fruit Indoors Featured Image

Looking for an easy-to-grow fruit that will bring light and sparkle to your gardening life during the darkest months of the year? Tasty, tropical star fruits (Averrhoa carambola) may be the answer, even if you live in a cold-winter climate. Dwarf trees have made indoor growing possible.

Angular star fruits are succulent and taste much like tangy grapes. At home in the tropics of Southeast Asia, hanging from 20- to 30-foot tall trees, star fruits don’t look very celestial. Yellow-orange in color and 3 to 4 inches long, each sports a waxy skin with five prominent greenish ridges. When the fruits are cut crosswise, those ridges morph into the five points of a star, giving rise to the common name.

A Century in North America

Indoor star fruit tree

Though exotic in appearance, star fruits, also sometimes known as carambola, are not newcomers to the North American scene. The trees first arrived in Florida about 100 years ago and have been grown commercially and in Florida, California, and Hawaii ever since. Early star fruit varieties were smaller and very tart, but breeding improvements have led to the larger, sweeter fruits, that are available in supermarkets today.

Versatile Star Fruit

Chopped star fruit
Crisp, sweet star fruit shows off its starry looks when cut.

All parts of the fruit, including the rind, flesh, and seeds, are edible and provide vitamins A and C, plus minerals. Eaten out of hand or used in salads or desserts, star fruit is both tasty and decorative. Most people can enjoy them regularly, but they are high in oxalic acid, which can cause kidney problems for those with related illnesses, so consult health care providers before eating lots of them.

Growing Star Fruit Indoors

Orange star fruit
Some star fruit varieties have orange mature fruits while others are more yellow or yellowish-green.

If you live in a cold-winter climate, you can enjoy homegrown star fruit if you pick a dwarf variety, like ‘Maher Dwarf’, which has sweet, crunchy fruit, or ‘Dwarf Hawaiian’, which has super sweet fruit, in large containers—at least during the cold weather months. Both varieties bear fruit when trees are just a few feet high, and they are self-fertile, so their clusters of pink flowers don’t require pollination.

To flourish indoors, potted star fruits need well-drained, loamy soil (Fafard® Natural & Organic Potting Mix) with a slightly acid pH (5.5-6.5) and regular fertilizer for acid-loving fruit trees. Provide them with lots of sunshine and enough water to keep the pots just moist. The trees perform best when temperatures are above 60 degrees Fahrenheit and the air is moderately humid.

Dwarf plants are best for pot culture because they are bred to stay compact. Depending on your finances and level of patience, you can begin your star fruit journey with a starter specimen in a 6-inch pot or choose a mature 3- to 4-foot tree. Buying a larger specimen is a faster route to fruit, while smaller plants take a while to produce but are the least expensive.

Either way, give your new potted star fruit a good start by trading its nursery pot for a slightly larger one and filling it with our high-quality, natural and organic potting mix. If the plant will travel between outdoor and indoor locations, opt for a relatively lightweight pot or use a pot platform with casters that can be wheeled back and forth as the seasons change.

Growing Star Fruit Outdoors

Outdoor star fruit
Pick star fruits when they are fully colored. If you are not sure, pick one and test it for sweetness.

As tropical denizens, star fruit trees love warmth. If possible, let them spend the late spring, summer, and early fall soaking up sunshine outside. A protected location shielded from wind will help keep trees healthy and happy. If you choose a starter specimen in a 6-inch pot, expect to see pink flowers and resulting fruit by the time it reaches about 18 inches tall. Strong growth spurts will bring more flowers and fruit.

When outdoor night temperatures fall below 60 degrees Fahrenheit, bring the star fruit indoors. Position it in a situation with as much bright light as possible and make sure that room temperatures do not fall below 60 degrees. If the plant drops a few leaves in the days after the transition, don’t worry. Indoors or out, water when the top few inches of soil feel dry. Higher humidity will improve the growth of these tropical trees.

Feeding Star Fruit

Fafard Natural & Organic Potting Mix pack

Star fruit trees grow most actively in spring and summer, so this is the time to fertilize with balanced, granular fertilizer, added at intervals according to manufacturers’ directions. Growth slows down during the winter months, so feeding can stop at that time. At winter’s end, just as you are about to start fertilizing again, prune back branches that seem weak or unshapely. Dwarf trees generally need relatively little pruning.

If you like the tropical taste of star fruit and relish a horticultural challenge, try adding a dwarf star fruit tree to your house plant menagerie. It may be the start of a tropical fruit tree collection.

(Click here to learn more about growing other tropical fruit trees indoors.)

Bananas for Indoor Growing

Bananas for Indoor Growing Featured Image
Banana plants (Musa spp.) are tropical, tree-like perennials that produce some of the world’s best-loved fruits.  In their native regions, they often soar high into the sky, crowned by giant paddle-shaped leaves, which can be 6- to 10-feet long, and pendulous bunches of fruit.  A mature plant bearing a bumper banana crop is an inspiring sight.
But, bananas don’t have to reach the stratosphere or live in the tropics.  Dwarf and compact favorites can also do star turns as dramatic house plants, even in limited indoor spaces.  All you need to do is choose the right banana, the right spot, and provide a modest amount of care and feeding.  You may or may not harvest fruit, but you will have a fast-growing specimen that will bring a touch of the exotic to your indoor environment.

Choose Your Indoor Banana

'Pink Velvet' banana
The 4-6-foot pink velvet banana (Musa velutina ‘Pink Velvet’) grows well in large, indoor or outdoor pots.

Some of the best bananas for indoor culture are varieties or hybrids of the Cavendish banana (Musa acuminata).  These are also the most likely to produce edible fruit if provided with optimal growing conditions.  In the wild, the species can reach 20 feet tall, but popular varieties like ‘Super Dwarf Cavendish’ and ‘Dwarf Lady Finger’ top out at 3 to 6 feet, respectively.
If you are buying your banana for beautiful foliage, the range of choices is larger.  Japanese fiber banana (Musa basjoo), can survive outside in USDA Plant Hardiness Zones 5  to 10, but it is also happy grown as an indoor plant.  The large green leaves have the characteristic elongated profile, sprouting from thick stalks that can grow up to 8 feet tall indoors.  If your indoor space has high ceilings, Musa basjoo might be just right.

Scarlet banana
Scarlet banana (Musa coccinea) has brilliant red ornamental spikes.

The hybrid banana known as Musa ‘Dwarf Red’, ‘Dwarf Jamaican’ or ‘Macaboo’ bears green leaves with pink to red midribs.  The plant’s “trunk”, which is actually a thickened stem, is a dramatic dark red.  Confined to an indoor container, ‘Dwarf Red’ may reach up to 6 feet in height.
On the smaller end of the banana spectrum is another hybrid, Musa ‘Truly Tiny’, which tops out at just 2 to 4 feet tall.  The plant makes up for its small size with big green leaves, occasionally splashed with red.  It is perfect for a corner, pedestal, or even a table accent.
Scarlet banana (Musa coccinea) is another low grower that reaches about 4.5 feet tall, with large green leaves.  The “scarlet” in its name comes from the brilliant petal-like bracts that enclose the small, true flowers and provide maximum visual interest. Another compact beauty with red color is the 4- to 6-foot pink velvet banana (Musa velutina ‘Pink Velvet’), which quickly bears pinkish-red bananas. The fruits are very sweet but contain large, tough seeds.

Growing Indoor Bananas

Indoor bananas
Bananas need bright light to grow their best indoors.

Like most other plants, bananas do best in conditions that match their native habitats.  Indoors a greenhouse is probably the best situation.  In the absence of a greenhouse, you can still grow banana plants in comfortable living situations with bright light.

Start with cozy temperatures.  Bananas thrive at temperatures that are equally congenial to humans, 60 degrees Fahrenheit and above, but the warmer, the better, especially in the daytime.  High humidity is also helpful.  Place the plants in saucers filled with pebbles and water, or position shallow pans of water near the plant.  Mist regularly.
Choose the right pot for your banana.  Online vendors often sell young plants in four-inch containers.  Transplant to a six or eight-inch container and watch for signs that the Fafard Ultra Potting Mix with Extended Feed and RESiLIENCE packplant is becoming root-bound (roots emerging from drainage hole).  Installing your new banana in a very large container immediately is not a good idea, because a large amount of potting soil will retain water and potentially cause root rot.  Instead, increase the container width by two inches each time you repot.

Eventually, your banana will need a roomy container—at least five-gallon capacity and possibly larger for taller specimens–in order to thrive.
Fill containers with a quality potting mix, like Fafard® Ultra Container Mix with Extended Feed or Fafard® Natural & Organic Potting Soil combined with perlite in a ratio of four parts soil to one part perlite.  If you use a potting mix without built-in fertilizer, feed your banana every month with a balanced fertilizer following package directions.  Stop fertilizing in the winter months when the shorter days and somewhat cooler temperatures slow growth.

Indoors, bananas need as much light as possible and will do best in a south, east or west-facing window.  Position the plant away from drafts and rotate the container on a regular basis for even growth.  Water thoroughly whenever the top of the soil is dry to the touch.
Bananas appreciate a summer vacation outside, provided the container is not too heavy or awkward to move.  Be sure to return the plant to its indoor home when night temperatures fall below 65 degrees Fahrenheit.

Getting Indoor Bananas to Fruit

‘Super Dwarf Cavendish’ banana
This ‘Super Dwarf Cavendish’ banana has produced a nice bunch of bananas indoors.

Bananas grow fast, but fruiting is slow.  If you choose one of the varieties that produce edible fruit, you may have to wait two or three years for the pendulous flower stalk to appear.  When flowering happens, don’t worry about pollination.  Bananas don’t require pollination to set fruit.  The fruit bunches will not be as large or plentiful as those that hang from outdoor banana trees, but they will be a source of much greater satisfaction.
And if you never get any fruit from your banana, take pleasure in its elegant leaves and the fact that with the addition of only one plant, you have established a little corner of the tropics in the temperate confines of your home.

Growing Succulents and Cacti from Cuttings

Growing Succulents and Cacti from Cuttings Featured Image
Got succulents and cacti? Then share them with your friends! These fleshy plants are some of the easiest to propagate from cuttings. So, if you have a special succulent house plant or garden succulent you want to propagate to swap or share, it’s easy to do.
Plants from deserts and other arid lands rarely experience reproduction from seed because water is not plentiful. One common arid plant adaptation is quick rooting of stems and leaves as a means of spreading and reproducing without the need for seeds. For this reason, many dryland plants root quickly from leaf, stem, or tip cuttings. Here are some easy methods for propagating different succulent and cactus types at home.

Leaf Cuttings

Jade plant leaf cuttings
These jade plant leaf cuttings show the progression of rooting and plantlet development.

Common succulents with large leaves, such as aonium (Aeonium arboreum), jade plants (Crassula spp.), and kalanchoe (Kalanchoe  spp.), are all easily propagated from single leaves. The process is simple, and the needed materials are few. Here is what you will need and what to do:

Materials

  1. Succulent leaf cuttings
  2. Sharp knife
  3. Shallow pots with bottom saucers/tray
  4. Perlite or porous growing mix
  5. Grow lights or a bright window
  6. Rooting hormone with an anti-fungal additive (optional)

Method

Succulents with large, fleshy leaves for leaf-cutting propagation
Succulents with large, fleshy leaves are perfect for leaf-cutting propagation.

Use a sharp knife to gently cut healthy leaves from the stem. Dip the bases of the leaves into rooting hormone; rooting hormone hastens the rooting process and reduces rot but is not necessary. Gently moisten the perlite or potting mix and nestle the bases of the leaves into the mix, making sure the bases are partially covered. Place the pots in a spot with bright, filtered light and keep the perlite or mix lightly moist to almost dry. Over a matter of weeks, the bases will root and small plantlets will appear. You can pot them up once they have several leaflets.

Pups

Orostachys
This Orostachys has developed stems of pups that can be cut from the mother plant and rooted.

Many succulents with rosettes, like Agave, aloes (Aloe spp.), Dudleya, tender stonecrop (Echeveria spp.), Gasteria spp., Orostachys, and hens & chicks (Sempervivum spp.), reproduce by sending out stems of new rosettes, called “pups”. These are very easy to snip from the stem and root in fresh, porous mix. In this case, no rooting hormone is needed. Just a small pot of mix will do. Nestle the base of each pup in the mix, and keep the mix lightly moist to dry, and the pup will root in no time.  [Click here to read an article about starting agave pups.]

Stem and Tip Cuttings

Cutting paddle stems of prickly pear
The cut paddle stems of prickly pear will quickly root into whole new plants.

Succulents with smaller leaves, like sedums, or no leaves, like cacti, are best propagated by tip or stem cuttings. Tip and stem cuttings require most of the same materials as leaf cuttings. With tip cuttings, you remove the very tip of a growing point. Simply cut or snip off the tip, remove several of the bottom leaves, dip in rooting hormone and nestle it in perlite or potting mix. Stem cuttings are comparable but you cut a larger stem for a larger, more robust start.
When taking cuttings from cacti, always wear thick gloves. Cut a candle, side stem, or pad from the cactus, dip the cut base in rooting hormone and nestle it in a pot of perlite, which is faster draining and better for cactus starts. In a matter of weeks it should root.

Potting Cacti and Succulent Starts

Colourful succulents
Once your cuttings have rooted, you can transplant them into their own pots of mix.

When your cuttings have set root and begun to grow, it’s time to plant them. Choose small pots that are the right size for each plant, and fill them with Black Gold Cactus Mix, or Fafard Professional Potting Mix amended with a 2:1 ratio of perlite. Both mixes are perfect for growing cactus and succulents. Cover the roots of your new starts, water them in, and keep them just moist to dry. During the winter months, water them very little to none to avoid root rot.
Once you learn how to propagate succulents, swap them with other succulent lovers to add new, exciting plants to your collection. These easy-to-grow house plants are always welcome to any plant lover.

Windowsill Herbs and Vegetables for Kitchen Gardeners

Windowsill Herbs and Vegetables for Kitchen Gardeners Featured Image
A sunny windowsill is all you need to grow a variety of vegetables and herbs.

Homegrown fresh herbs and vegetables are not just a product of the warm growing months. Several can be easily cultivated along a sunny, south-facing windowsill during winter. Then when temperatures grow warmer, you can plant them outdoors to extend your summer gardening efforts.

Herbs for Indoor Growing

Pots of sweet basil and other herbs
Pots of sweet basil and other herbs grow in a sunny window.

Basil– Fresh sweet basil pesto can just be an arms-length away if you have a sunny kitchen window.  Some grocery stores or retail greenhouses sell plants in colder months, but you can also quickly grow your own from seed. Many varieties take only 40-50 days to grow to a harvestable size.

Small bush varieties, such as ‘Piccolino’ and ‘Pluto’, are the fastest-growing sweet basil types to grow from seed. The large-leaved ‘Pesto Party’ is also fast-growing and tasty. Sow seed on the surface of a small pot filled with Fafard Natural & Organic Potting Soil, which is approved for organic gardening. Keep the soil moist and place your pot in a sunny window. In just one week, the seeds should sprout. Give them even moisture, full sun, and they should thrive.

Small bush basil 'Piccolino'
The small bush basil ‘Piccolino’. (Photo by Johnny’s Selected Seeds)

Rosemary– Pruned rosemary plants are often sold in winter for home growing. New growth can be trimmed off to flavor meats and or pasta sauces. Just be sure to give rosemary lots of sun, and turn window-grown plants every few days for even growth. Refrain from overwatering them because their roots are sensitive to rot caused by excessive moisture.

Thyme– Pots of low-growing French thyme (Thymus vulgaris) or lemon thyme (Thymus x citriodorus) look pretty and taste great on vegetables, meats, or added to fresh salad dressings. If you have an outdoor plant, you can easily root cuttings for indoor growing. Simply take 6” cuttings, remove the leaves from the bottom 2-inches of the stems, and place them in a clean glass of water. Refresh the water if it starts to look murky. In just a couple of weeks, they will root and can be potted. Like rosemary, thyme requires light watering and lots of sunlight.

Cilantro in pot
Cilantro is very easy to grow indoors. (Image by Johnny’s Selected Seeds)

Cilantro-This cool-season annual herb is one of the easiest to grow indoors. Like basil, it is best grown from seed—with leaves ready for harvest in just 50 days. Try the tidy variety ‘Calypso’, which resists flowering and produces lots of edible leaves for salsa making. Start the seeds as you would basil.

Parsley-Pot-grown parsley thrives in sunny windowsills and quickly regrows new leaves as you trim fresh foliage for cooking. On occasion, plants are sold at grocery stores or in retail greenhouses, but seed-grown plants are probably your best bet. Parsley takes two months to reach a harvestable size from seed, so it is best seeded in late fall for winter growing. Start it as you would basil.

Vegetables for Indoor Growing

Salinova® Green Sweet Crisp lettuce
Salinova® Green Sweet Crisp lettuce is a cut-and-come-again variety for indoor growing.

Greens—Lettuce, spinach, and arugula are all fast-growing salad greens that grow well in indoor pots. In fact, some compact varieties are specially bred for indoor growing. Lettuces in the Salinova® series are compact, cut-and-come-again varieties that grow fast and produce well in pots. Try the curly Salinova® Green Sweet Crisp and red-leaved Salinova® Red Butter. Surface sow the seeds in a rectangular windowsill pot on a sunny sill, give them light moisture, and they will sprout quickly. In just 45-55 days they will be ready to harvest. The fast-growing ‘Corvair’ spinach (21 days) and ‘Esmee’ arugula (21-40 days) can be grown the same way.

Brazilian beak pepper, ‘Biquinho’
The Brazilian beak pepper, ‘Biquinho’. (Image by Johnny’s Selected Seeds)
Fafard Natural & Organic Potting Soil pack

Peppers– Tiny pepper plants with fruits of all colors and heat levels can be grown in super sunny windows. The Brazilian beak pepper ‘Biquinho’ is a new red hot pepper that reaches only 1 to 2 feet high and yields fruits in just 60 days. Lunchbox mixed sweet pepper plants reach 2 to 3 feet, and bear small green peppers in just 55 days (75 days to turn from green to red and orange).
Start seeds in small pots of Black Gold Seedling Mix, keep them just moist and place them in a sunny window. In one to two weeks they should sprout. When they reach 6-inches high, move them into a 1-gallon pot filled with Fafard Natural & Organic Potting Soil, and add a stake to support growing plants. Feed them regularly with a water-soluble tomato and vegetable fertilizer

Tomatoes– If you have very sunny south-facing window or sunroom, you can grow tomatoes indoors. Bush-type (determinate) tomatoes bred for northern growing will grow and fruit the best. Start them indoors from seed in mid to late fall for winter fruiting. Maintaining room temperatures above 65° F will encourage fruit production. In just 60 days, ‘Gold Nugget’ cherry tomatoes bear small, golden tomatoes on short plants reaching 2-feet. For classic red tomatoes, try the high-yielding, disease-resistant ‘Polbig’, which reaches 2-3 feet. Start tomatoes as you would peppers. Support plants with stakes to manage growth, and prune back any leggy stems

Planting herbs and vegetables indoors this winter will keep fresh food on your table until spring. These attractive edibles also provide welcome indoor greenery to brighten cold, snowy days.

Organic Cucumber Growing

Cucumis sativus
Pickling cucumbers should be picked when they are very small and crisp.

Cucumbers have their fair share of pests and diseases, but growing them organically is not too difficult if you choose the right variety for your area and give them the right care. Experience is the best teacher.

When I first began growing cucumbers, it was a challenge. I failed to amend the soil properly, feed and water them enough early on, and then they developed a bad case of powdery mildew. Cucumber beetles, and the diseases they vector, were also a problem. My plants yielded only a few small fruits. That was about 20+ years ago. Since that unproductive season, I’ve mastered growing these  fast-growing annual vines – and you can, too! The great thing about cukes is once they’re happy, they produce like gangbusters! Before you know it, it’ll be time to break out the tzatziki and pickle recipes and find friends willing to take a few off your hands.

Cucumis sativus
Trellising creates more space for cucumber growing.

Cucumbers (Cucumis sativus) are frost-tender, warm-weather vegetables; which means they grow when days and nights are relatively warm and the sun is at its brightest. They tend to sprawl but can be trained to grow on a support to save space and make harvesting easier.

The vines are lined with large, prickly, green leaves and produce two types of yellow, funnel-shaped flowers, male and female. The pollen-producing male flowers bloom first, followed by the fruit-producing female flowers. Female blooms are easily identified by their elongated, bulbous ovaries at the base, which are destined to become cucumbers. The flowers are pollinated by bees, so smile when these productive insects visit your plants, and refrain from using broad-spectrum, non-organic pesticides that will kill them. (Look out for the small, native squash bees that like to visit cucumber vines!)

Cucumber size, shape and color depend on the type of plant you grow. No matter what variety you choose, proper site selection and good soil preparation can make or break your cuke-growing success.

Cucumber Types

Lots of cucumber types exist. Americans are most familiar with slicing cucumbers, which tend to be large, broad, and thick skinned when mature and have tougher, bigger seeds. In contrast, thin-skinned Asian cucumbers are long, straight and small-seeded as are English types. Pickling cucumbers, which include gherkins, have a pleasing shape when young, dense flesh and are picked immature, when they are most crisp.

Cucumis sativus Slicemaster
‘Slicemaster’ is a common American slicer that’s easy and prolific.

Several varieties are better adapted to hotter, drier growing conditions. These include lemon, or dosakai, cucumbers, which are almost completely round, yellow-skinned, and originate from India. Israeli Beit Alpha cucumbers are smaller, seedless (parthenocarpic), sweet-tasting, and well-adapted to dry climates. ‘Socrates’ is a larger Beit Alpha cultivar worth growing.  Another favorite, heat-tolerant “cucumber” is the curved, thin-skinned Armenian cucumber (Cucumis melo var. flexuosus), which is technically not a cucumber but a melon (Cucumis melo) variety.

Growing Cucumbers

Full sun is essential for good growth and fruit production, so choose a planting location that’s open and sunny. Deep, friable, well-drained soil high in organic matter yields the best crops. The best rule of thumb is to dig and work up the soil to a depth of a foot or more, then amend liberally with good compost. The more room your plants’ roots have to develop, the healthier the plants. If your garden is at a low topography, create raised berms to plant your cucumbers. Enrich the berms with OMRI Listed Fafard Premium Natural & Organic Compost or Garden Manure Blend for best performance. (Generally, I start my seeds outdoors in 4-inch pots and plant them once they’ve reached 3 inches long and the threat of frost has past. Other home gardeners may opt to direct-sow the seeds following packet directions.)

Feeding and watering cucumber vines are simple tasks: Just apply good organic fertilizer (like Black Gold® Tomato & Vegetable Fertilizer) early in the season and make sure established vines get a deep application of water twice a week (by rain or hose). The next consideration is deciding whether or not to trellis your plants.

Cucumis sativus Lemon
‘Lemon’ is a popular Dosakai cucumber that tastes best when picked before the round fruits turn lemon yellow.

Trellising Cucumbers

Trellising has lots of advantages: It saves space, makes harvesting easier and encourages airflow, which discourages foliar diseases. Some standard trellis types are vertical ladder trellises, bentwood or teepee trellises. Trellis-grown cukes will be straighter than ground-grown. If you don’t mind your vines on the ground, be sure to pad the ground with hay or straw. This will keep your cucumbers clean and discourage rot, as well as keep weeds down. If you don’t have a lot of gardening space, you can grow dwarf cucumber varieties in large containers.

Cucumber Pests and Diseases

There are a few cucumber pests and diseases to be mindful of. Striped and spotted cucumber beetles are the worst of them. Both pests are elongated, around ¼ an inch long and have beaded antennae. Striped cucumber beetles have bands of yellow and black stripes, and the spotted ones are tannish-yellow and are typically marked with 12 black spots. Both chew on the leaves and vector a nasty bacterial wilt disease that Fafard Garden Manure Blend packcan kill vines. The best means of defense is to use botanical insecticidal sprays like pyrethrum-based sprays, always carefully following label directions. (Planting disease-resistant strains, Like the small-fruited ‘H-19 Little Leaf’, is also helpful.) Begin to spray when the plants are young, and refrain from spraying when bees are actively pollinating the flowers. Squash bugs are another common pest that can be eradicated using this method. Aside from bacterial wilt, powdery mildew is the second most common disease of cucumber vines. (The organic fungicide, GreenCure®, clears up powdery mildew fast and is safe to use.)

So, whether growing cucumbers for pickling or slicing, feel confident you can cultivate happy cucumbers this year. By fulfilling just a few smart steps, new gardeners can avoid a first-time cucumber catastrophe and enjoy a cornucopia crop instead!