Articles

Easy Vegetables to Grow from Seed

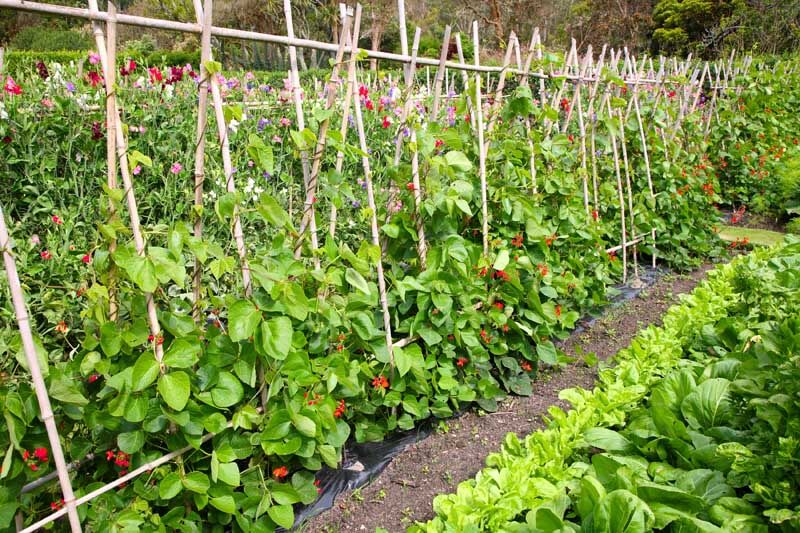
Home vegetable gardening is riding a wave of popularity that is probably unprecedented since the Victory Gardens of World War II.  Salad greens are sprouting on rooftops and potatoes in patio containers.  Home-grown tomatoes seem to be popping up in every other suburban yard.  Explosions of summer zucchini are detonating in community gardens and front roadside “hell strips”.

If you want to get in on that kind of action, but find the prospect a little intimidating, it’s best to start relatively small and simple.  Growing vegetables from seed is inexpensive and easy, provided you pick types that are easy to grow. 

The best advice for beginners is to start with something that you like to eat and don’t go too big.  Shepherding a few vegetables successfully from seed to harvest will give you the confidence to venture further into vegetable gardening in successive seasons.

A few other helpful hints…Make sure the seeds you buy are packaged for the current growing season, not saved over from the last one.  Fresh seed always has a higher germination rate.  Amend your garden soil before planting with a nutritious mixture like Fafard Premium Natural and Organic Compost.   If you are growing your veggies in containers, use a potting mix that will start your seeds off on the right foot. Fafard Ultra Container Mix with Extended Feed will do the job nicely.

Bountiful Squash from Seed

Most bush zucchini produce in as little as 45 days from seed!

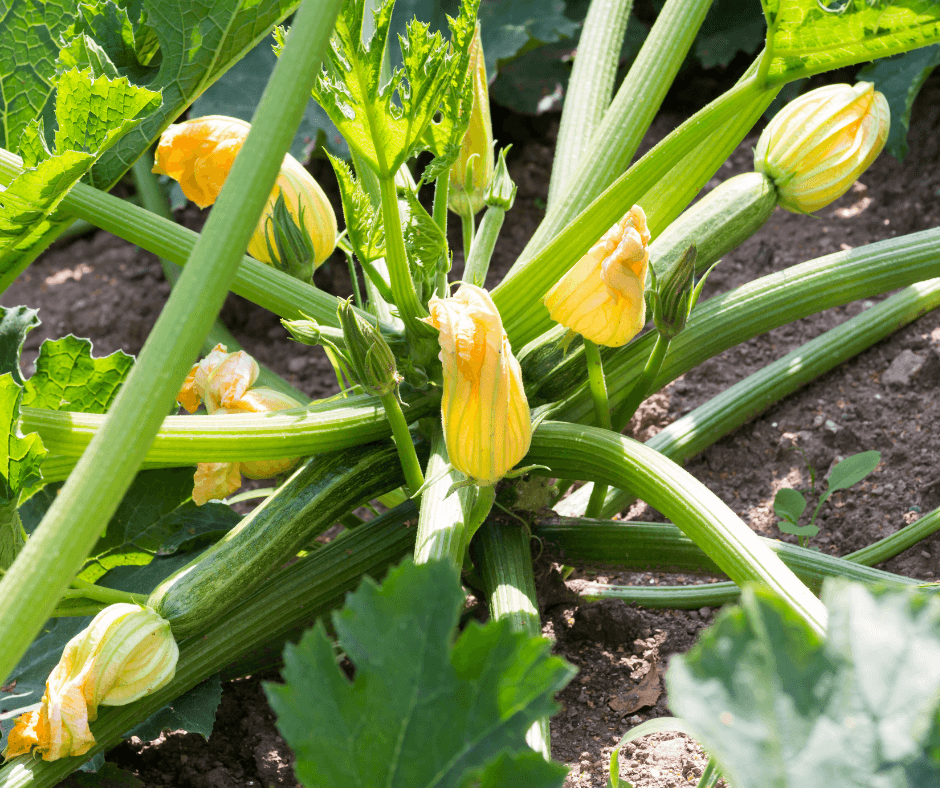
Summer squashes, like zucchini and crookneck squash, are a boon to the novice grower, with big seeds, vigorous habits, showy flowers, and bountiful production.  While seeds can be started indoors, in many places summer squashes will do just fine if they are directly sown in a sunny spot with rich soil or, if they are bush-types, in a large container. Be sure to determine whether squash is vining or bushy before planting. Bush squash are compact while vining forms can reach enormous lengths. Trellising is an option.

Warm soil is a must, so check your area’s last frost date to find out when it is generally safe to plant. (Click here to identify your last frost date by zip code.)

Plant two to three seeds in small hills of soil. Plant them at a depth equal to about two times the width of the seed.  Squashes crave space, so keep those hills separated by at least several feet, depending on the final size of the squash variety.  When the seedlings appear, thin out the weakest one or seedlings by either pulling them out or snipping them off.  Leave the strongest. Water regularly, especially if rain is sparse, but do not drown the plants.  If the top of the soil is wet, and you’ve experienced good rains, skip the watering.

It is important to collar newly sprouted seedlings to keep birds and cutworms from cutting the seedlings from the base and killing them. Seedling collars are easy to make from paper cups, toilet paper rolls, and other materials. (Click here to learn more.)

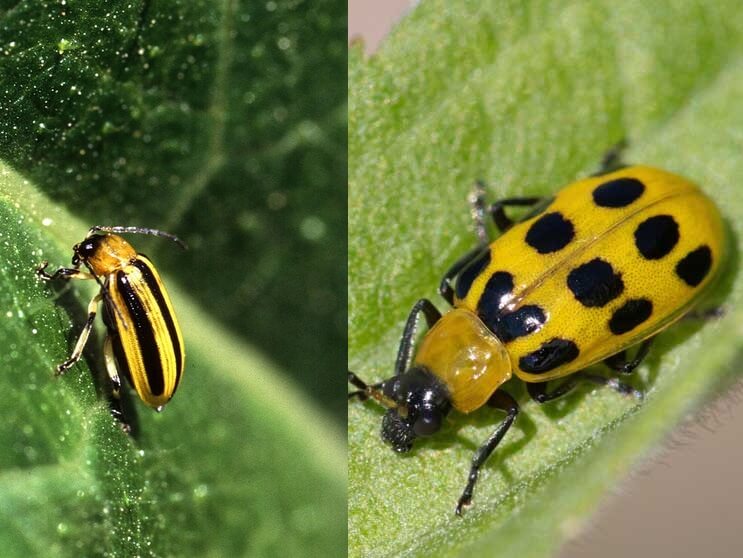
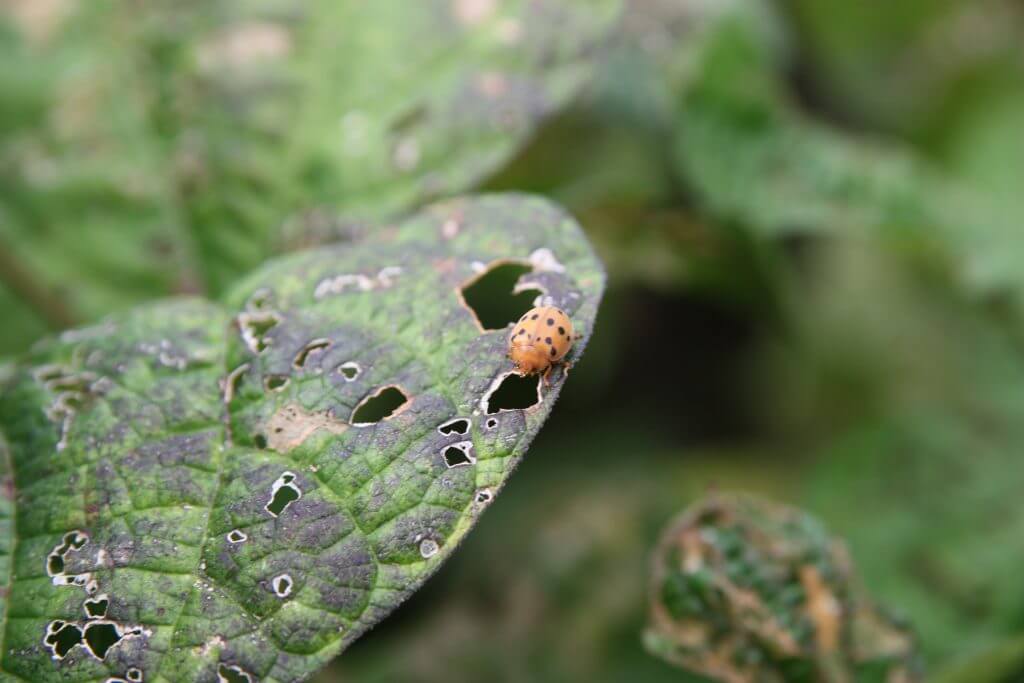
Check leaves for evidence of pests and disease. Large pests can be picked off by hand.  Squash vine borers are a common problem that every squash grower must learn about (click here for management details). If powdery mildew, a fungal disease, appears, remove the affected leaves and spray the remaining foliage with either Neem oil or a solution of one tablespoon of baking soda per gallon of water mixed with a few drops of liquid dish soap.

Check seed packages for time from germination to harvest, but expect fruit in 45 to 60 days. Bushy varieties produce the earliest.

Tons of Tomatoes from Seed

Train your tomatoes for easy care and harvest. Compact bush varieties are recommended for beginners.

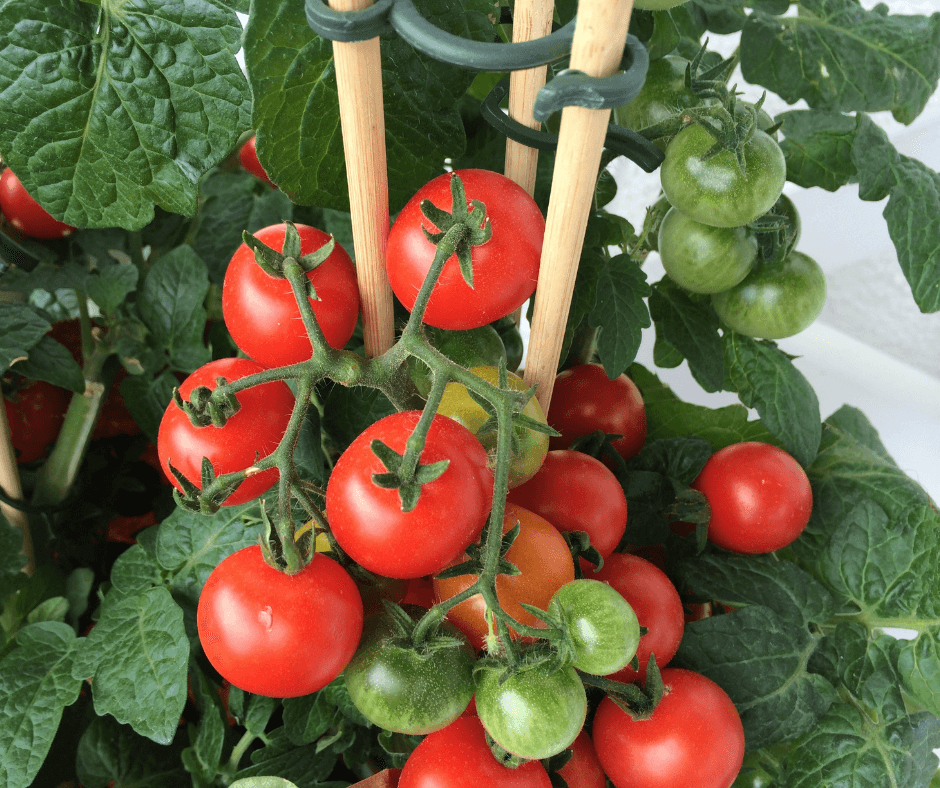
Growing tomatoes from seed offers you a chance to choose from the scores of available varieties—large, small, modern, heirloom, red, green, yellow, or orange.  None are really hard to grow, but many sources suggest determinate (bush) salad or cherry tomato varieties for beginners. Indeterminate (vining) tomatoes are the most productive but reach huge heights and require quite a bit of management, and large-fruited varieties are often more demanding. Cherry tomatoes feature bite-size fruit and bush types are great for container growing because they stop growing once they have reached a certain size and produce only a set number of flowers and fruit thereafter.  Much of the fruit develops at the same time, but harvests can be still quite large. Good disease resistance makes growing even easier. (Click here for a great list of determinate tomatoes from Johnny’s Selected Seeds, and click here for our top 10 list of the best-tasting cherry tomatoes.)

Those harvests will come sooner if you start tomatoes indoors in cell packs or other small containers at least six to eight weeks before the last frost date for your area.  Make sure those containers have drainage holes.  Fill the small pots with moistened potting mix and plant two or three seeds per cell or container, following directions on the seed pack.  Place on trays that can hold water and position in a warm location a bright grow light or South-facing window.  To avoid seedling rot disease, water from the bottom, letting the plants absorb water through their drainage holes. (Click here for more tomato seed-starting tips.)

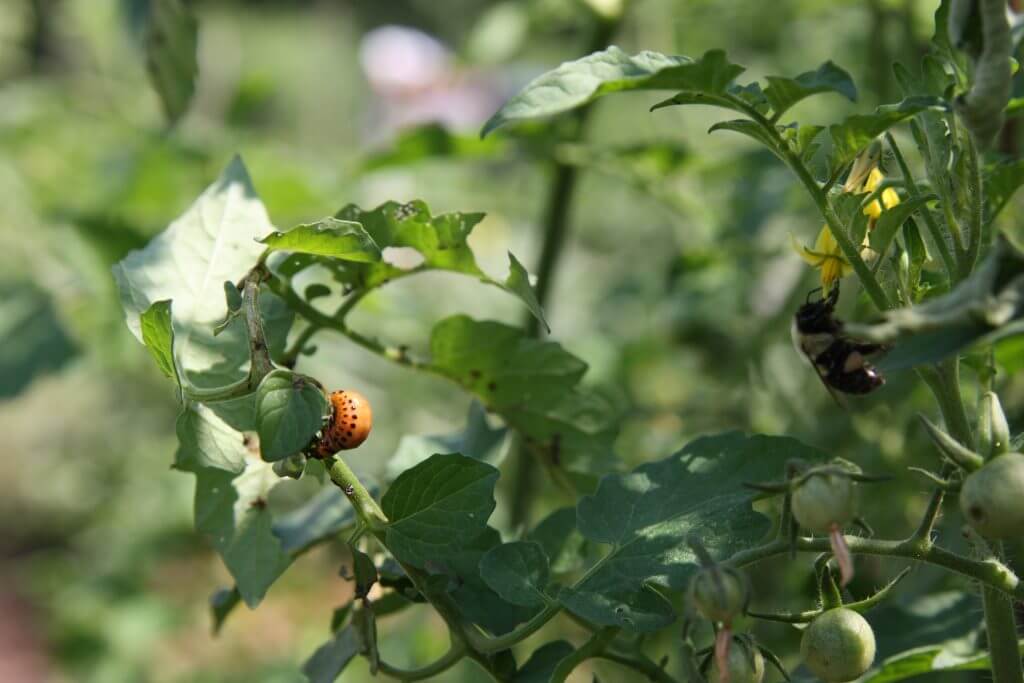
When outdoor conditions are right, with night temperatures above 50 degrees Fahrenheit, take the trays outside and place them in a sheltered spot to acclimate the seedlings.  After a few days of this, plant the seedlings in a location that receives at least six hours of sun per day–eight hours or more is better.  Keep the soil consistently moist, stake or your plants or support with tomato cages, and watch for pests. (Click here to learn more about tomato pest and disease management.)

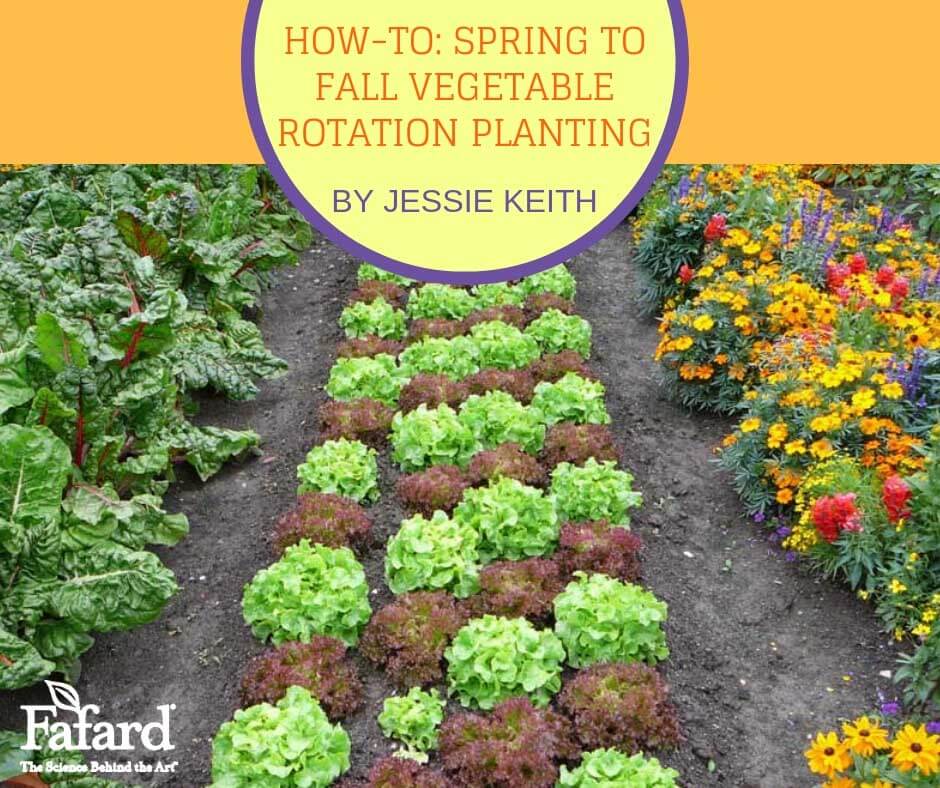
Great Greens from Seed

Spinach is a true cool-season green that grows succulent leaves in a flash.

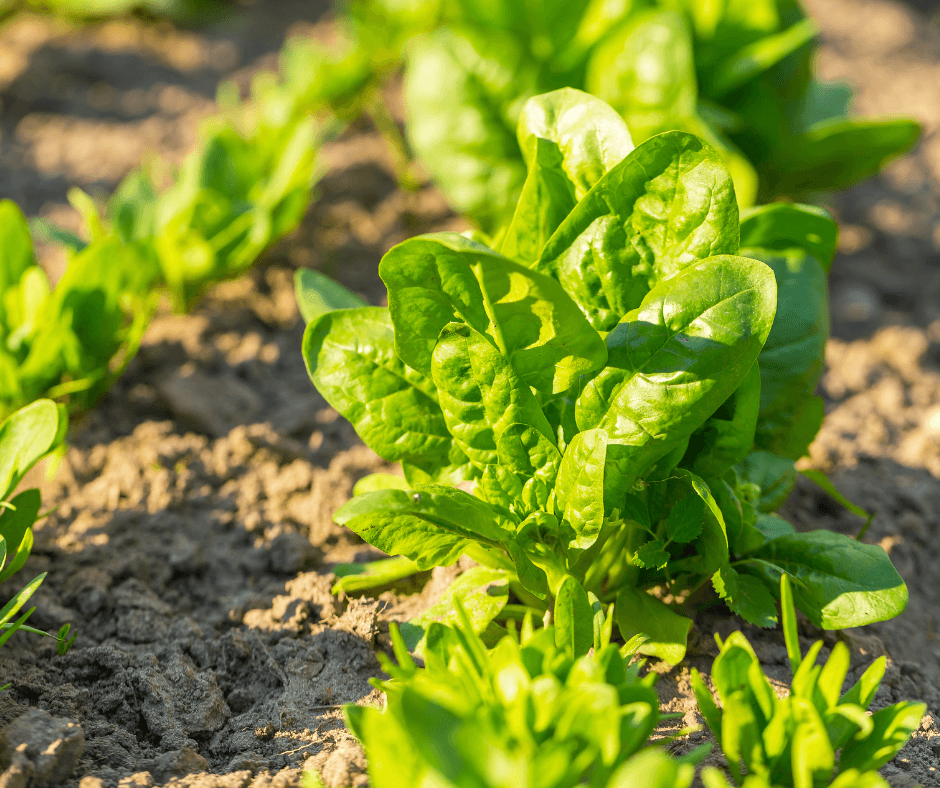
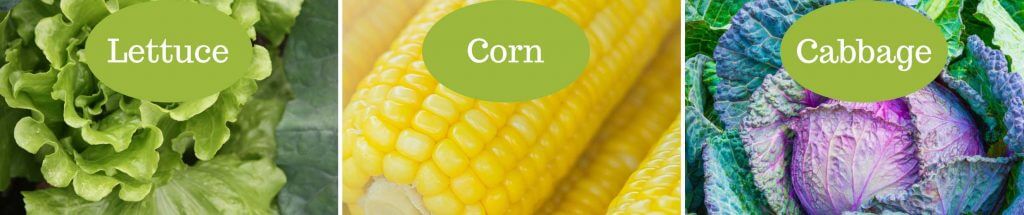
Greens, including the various varieties of lettuce, spinach, and Swiss chard, are among the easiest veggies to grow from seed, and many varieties are as beautiful as they are nutritious.  Lettuce and spinach love the cooler temperatures of spring and fall, while chard thrives in summer. 

Sow lettuce seeds when outdoor temperatures reach about 60 degrees Fahrenheit, and space about 2 inches apart in rows that are separated by about 12 inches. Cover with the thinnest possible amount of soil, because lettuce seeds need light to germinate.  Keep soil uniformly moist and harvest lettuce either as baby greens or mature leaves.  For a continuous harvest, sow smaller amounts of lettuce seed at weekly intervals in spring and very late summer. (Click here to discover ten great lettuce varieties for gardens.)

Larger and leafier, spinach and chard are delicious either raw or cooked.  Plant spinach first, as soon as possible after the last frost date.  Both types of greens should be planted shallowly—about one-quarter inch deep in rows at least 18 inches apart.  Both also need thinning.  Thin spinach seedlings to a maximum of 6 inches apart and the larger chard plants to a minimum of 6 inches apart.  Spinach can also be sown in late summer for a fall harvest.

Growing vegetables can be so satisfying that many gardeners catch the “veggie bug” after the first successful growing season and branch out into multiple varieties in successive years.  Be prepared!

Spring to Fall Vegetable Rotation Planting for Non-stop Garden Produce

How-To: Spring to Fall Vegetable Rotation Planting Featured Image
Row cropping or blocked beds make it easy to rotate crops from one year to the next.

Vegetable gardening is a dynamic process. Gardeners have to shift from cool-season spring vegetables to warm-season summer vegetables back to cool-weather crops. In between, savvy gardeners rotate their crops to maximize their output and health. Here are some seasonal planting and rotation tips that will help vegetables transition effortlessly and produce well from one season to the next.

Planning for Rotation

Raised beds in garden
Raised beds allow for easy yearly rotation and soil and weed maintenance.

Vegetable gardens are not like perennial beds, you cannot establish a set planting design and stick with it from year to year. Instead, vegetable gardens must be divided into planting areas for easy rotation. Raised beds make it easy, but if you are working with standard in-ground rows or blocked beds, plan beds to accommodate a variety of crops of different sizes to anticipate yearly shifts.

A four-square design is a good option because it allows gardeners rotate crops on a four-year basis. Root crops, cole crops, and greens can be planted in one plot, Solanaceous crops (tomatoes, peppers, potatoes, and eggplant) can be planted in another plot, the third plot can be planted with squash, melons, and/or cucumbers, and the fourth plot can be planted with corn, beans, okra and/or sweet potatoes. Each year, the planting combo can be switched for a full rotation.

Rotation for Temperature Needs

Seasonal vegetables
Keep seasonal vegetables in their place. Classic cool-season crops for spring include peas, cabbage, and lettuce. (Image by Jessie Keith)

Longtime vegetable gardeners know that there are vegetables suited for cool months, warm months, and those that will thrive despite temperature fluctuations. Some of the basic crops that fit these temperature requirements include the following:

Cool-Season Vegetables: Cole crops (cabbage, cauliflower, collards, broccoli, broccoli rabe, kohlrabi, and kale), greens (arugula, endive, lettuce, mustard greens, radicchio, and spinach), spring root crops (radishes, potatoes, scallions, spring carrots, and turnips), fall root crops (leeks, parsnips, and rutabagas), and peas.

Warm-Season Vegetables: Artichokes, beans, corn, eggplant, melons, okra, peppers, summer squash, sweet potatoes, tomatoes, and winter squash.

Temperature-Neutral Vegetables: Beets, summer carrots, Swiss chard, cucumbers, and onions.

Rotation for Pest and Disease Prevention

Garden with pest prevention
Rotation and maintaining weed-free beds reduces many crop pests and diseases.

When some vegetables get diseases, the disease-causing pathogens remain in the soil for several years where the infected plants were planted. These include many fungal diseases, bacterial diseases, viral diseases, and crop-specific nematodes. Rotating crops in new planting areas in the garden on a two- to three-year basis will help protect future vegetables from getting these diseases.

The most susceptible crops for soil-borne pests and diseases are carrots, cole crops, cucumbers, lettuce, melons, potatoes, squash, and tomatoes. Cucumbers, melons, and squash get many of the same diseases, so consider this when devising your rotation plan.

Many weeds also harbor diseases that can damage crops, so keeping gardens weed free does more than reduce competition for nutrients and light. Maintaining clean beds benefits crop health.

Rotation for Nutritional Needs

Beans growing on poles
Beans fortify the soil and are a good follow-up for heavy feeders like tomatoes and squash.

Some vegetables are heavy feeders that deplete the soil of nutrients and water, while others take less from the soil or even added essential nitrogen. The most heavy feeders are tomatoes, squash and melons.

It is also essential to feed your soil yearly with rich organic matter and fertilizers formulated for vegetables. Two recommended Fafard products for added fertility are Fafard Garden Manure Blend, which provides natural nutrition and essential soil microbes, and Fafard Premium Natural & Organic Compost.

Cover Crops

Alfalfa
Alfalfa is a top winter cover crop to aid the rotation process.

Winter cover crops are a great help to vegetable gardens. Some, like alfalfa, add nitrogen to the soil and set deep roots to break up difficult, clay-rich soils down below. Others, like winter wheat or rye, add needed cover to protect your beds from heavy infestations of winter weeds. They can also be tilled into the soil in spring for added organic matter.

Spring-Summer-to-Fall Rotation Ideas

If you do not have the space, yearly crop output, or inclination to follow a set yearly rotation schedule, consider planting complementary spring-summer-fall crops in these five sequence options.e

Peas, tomatoes and turnips
Peas are fast and help fortify the soil for summer tomatoes, and cool-season turnips are fast and not heavy feeders.
Carrots, beans and kale
Carrots set deep roots and grow quickly, beans fortify the soil and finish by early fall, and kale is fast and withstands frost.
Spinach, peppers and broccoli rabe
Spinach is fast and finished by late spring, heat-loving peppers take time but produce well into early fall, and broccoli rabe is very fast and takes frost.
Peas, squash and Cole crops
Peas produce quickly and help fortify the soil for summer or winter squash. Cole crops can be planted among dying winter squash vines and withstand frost.
Lettuce, corn and cabbage
Lettuce thrives in cool weather for spring harvest, corn can be planted among lettuce for summer, and cabbage is ready to plant once corn has declined.

Good rotation will improve your vegetable gardens for the long term. Formulate a smart rotation plan and maintain a journal to keep the process in memory.

The Sweetest Spring Carrots

Sweetest Spring Carrots for the Garden Featured Image


Poet John Keats said, “A thing of beauty is a joy forever.” And a spring carrot is truly a thing of beauty, if even if it is covered with dirt when pulled from the ground. Wash off the dirt and take a bite of that carrot. You will discover its inner beauty. Time spent in cool spring soil gives home-grown carrots a fresh sweetness that store-bought roots will never have.

The key to harvesting tasty early carrots is planting the right types. Fortunately, there are plenty to choose from—even if your “vegetable patch” is just a series of containers.

There are two ways to grow carrots for early harvest: let fall-planted carrots overwinter in the ground and harvest them early in spring before they flower. Varieties planted in fall are specialty winter carrots, like the 7-8-inch long, heirloom ‘Imperator’ carrot (75 days), which is ideal for winter growing. If you did not do that, but want carrots as early as possible, sow them in spring as soon as the ground can be worked. Carrots generally mature in 60-75 days, though faster-growing cultivars are available, which mature in as little as 50 days. When you are checking available varieties online, in print catalogs, or seed displays, pay attention to the number of days to harvest and choose those that mature in the shortest time.

Spring Carrot Types

Nantes-type carrots
Nantes-type carrots are typically fast to produce.

Nantes-type carrots are among the best for spring planting, and they are easy to grow, even if your soil is less than ideal. Choose a variety like ‘Nelson’, which matures is only 58 days and produces  6-inch, blunt-tipped little carrots with both sweetness and great orange color. ‘Nantes Half Long’, which matures in about 70 days, is another good choice in this category and does not form a woody central core like some other varieties. The finger-sized ‘Adelaide’ (50 days) is another Nantes type favored as a baby carrot. Harvested at about 3-inches long, it is perfect for salads.

'Adelaide' baby carrots
Baby carrots, like ‘Adelaide’, develop faster and are extra sweet and crisp. (Image by Nanao Wagatsuma)

There are other baby carrot varieties that are fun to eat, easy to grow, and perfect for early planting and harvesting. These are not the “baby carrots” that you buy in the supermarket, which are often processed from broken carrot pieces, but carrots bred for compact size. Not only do these carrots mature quickly, but they are also the right size for raised beds or containers.

The Dutch-bred ‘Yaya Hybrid’ carrot matures in as little as 55 days, producing roots that are 4 to 5-inches long. They are quite sweet, and if you don’t eat them out of hand, they also work well in carrot cakes or muffins. The ‘Caracas’ hybrid is even shorter and rounder than ‘Yaya’, reaching 2 to 3-inches long. At only 57 days to maturity, it will be ready in a hurry. Though not as perfect as the supermarket babies, they are much tastier. ‘Thumbelina Baby Ball’ matures in as little as 60 days and boasts round, 1 to 2-inch carrots with smooth skin. Once washed, they do not need peeling

Long-rooted, specialty varieties, like the red ‘Malbec’ (70 days), crisp, golden ‘Gold Nugget’ (68 days), ivory ‘White Satin’ (68 days), and the award-winning, reddish-purple ‘Purple Haze’ (73 days) are all good choices that will bring extra color to your table.

Growing Spring Carrots

Pulling out carrots
It is important to space carrots 3-inches apart for full development. Otherwise, they will grow in irregular sizes.
Fafard Natural & Organic Potting Soil pack

Whatever variety you choose, soil preparation is important. Since carrots are roots that have to push down through the ground, give them an easy time by making sure the soil is loose, rich in organic matter, and free of stones. If you live in an area with clay soil, incorporate lots of well-aged compost, like Fafard® Premium Natural & Organic Compost, into your soil and work it in well

When soil conditions are simply impossible, plant carrots in raised beds, or grow them in containers filled with rich potting mix, like Fafard Natural & Organic Potting Soil, which is OMRI Listed® for organic gardening. The baby types are excellent for container growing. Follow the seed packet directions for your variety and make note of their days to harvest.

Whether you grow in-ground or in containers, plant carrot seeds in early spring as soon as the soil can be cultivated. They will start growing their best when temperates reach 60 to 70 degrees Fahrenheit. Carrots like a sunny spot and regular moisture. In garden beds, make sure the soil has been loosened to a depth of at least 9 inches. (Click here to learn how to double dig for better root crops.) Sow the seeds in rows; spacing is not an issue because seedlings can be thinned after germination. If you feel uncomfortable handling the tiny carrot seeds, you can purchase larger, pelleted seed. Make furrows about 1/4 inch deep, and cover the seed with a thin layer of soil (adding a top layer of water-holding peat can aid germination). Water gently so that the little seeds stay put. In as little as 14 days, they will germinate, and your carrots will be on their way

Novice gardeners are always hesitant to thin seedlings, but it is important to give your carrots some elbow room. When the seedlings are about 1-inch-tall, thin them so they are spaced 3 inches apart.

Protecting Carrots

Carrots in various colours
Carrots come in all colors and sizes, so be creative when choosing varieties.

To keep Peter rabbit and his vole friends away from your garden carrots, plant them in tall pots or surround them with chicken wire fencing that is at least 3-feet tall. The bottom 6 inches should be below soil level, with the ends of the wire bent away from the garden bed. When you water your plants or check on them, make sure that there are no gaps in the fencing where animals have found their way in.

Vole
Voles and rabbits are two common pests that love carrots.

Mark your calendar for the number of days that your carrot varieties need to mature. When they are ready, let your kids join in the harvest! Before harvest, loosen the ground around the carrot a bit with a garden fork and then pull. Otherwise, the carrot tips may break off in the soil. Harvest what you need immediately. The rest of your crop can stay in the ground a few more weeks, or a bit longer if you live somewhere with very cool early spring and summer temperatures\

Growing carrots is easy and will increase your horticultural self-confidence. It is a great thing to do with kids, and it will bring out your inner kid. You may never want a supermarket carrot again.
 

The Best Vegetables to Grow with Your Kids

The Best Vegetables to Grow with Your Kids Featured Image
The author’s daughter with a pumpkin she grew.

I remember the first time I pulled a carrot from the ground as a child. It was like magic. A simple carrot became a hidden golden-orange gem in the Earth that I could pull and eat! I’d wander the garden, plucking a cherry tomato here, a lettuce leaf there, or snapping off a bean to nibble. It was enjoyable, and I learned to love vegetables in the process. This is why I grow delicious, interesting vegetables with my own children. I’m spreading the garden fun and veggie appreciation.

There were two things I cared about with vegetables as a child: 1. Is it fun to eat? 2. Is it fun to harvest? These are the criteria used for this list. As an added bonus for parents, these vegetables are also easy to grow

Fun Vegetables to Eat and Pick

Cherry tomatoes

Cherry Tomatoes:  There are so many cool cherry tomatoes to try now, and the smaller, sweeter, and more colorful, the better. I recommend ‘Minibel’, which produces sweet red tomatoes on tiny plants, ‘Sun Gold’, which produces loads of super sweet, golden-orange cherry tomatoes, the unusual ‘Blue Cream Berries’ with its pale yellow and blue fruits, and the classic ‘Sweet Million’ which literally produces hundreds of sweet red cherry tomatoes on large vines. Kids also love super tiny ‘Sweet Pea‘ currant tomatoes and ‘Gold Rush’ currant tomatoes, which literally pop with flavor in the mouth. Caging your plants makes harvesting easier—especially for little ones

French Bush Beans

French Bush Beans: My children love French haricot vert bush beans because they are super thin, stringless, and sweet. The best varieties for kids are produced on small, bushy plants. Try the classic green ‘Rolande’ or the golden yellow ‘Pauldor’

Asian Long Beans: These beans look like spaghetti noodles! They are vining, so trellising is required, but they love hot summer weather, and kids love to pick and eat them. ‘Thai Red-Seeded’ is a great Asian long bean for kids because it grows so well, and the super long beans double as green hair or green bean rope.

Beit Alpha Cucumbers

Beit Alpha Cucumbers: These crisp, sweet cucumbers are skinless, practically seedless, and taste great right from the vine. Bring a little water for rinsing, and a little ranch dressing for dipping, and they have an instant garden snack. The new AAS-Winning variety ‘Diva’ is my favorite because it is disease resistant and produces lots of cucumbers.

Miniature Carrots: Mini carrots are easier for kids to pull from the ground, so they get all the fun with no root breakage. Tiny round ‘Romeo’ carrots and the small conical ‘Short Stuff’ are great selections for a kid’s vegetable garden. Both also grow well in containers

Child holding up baby carrots

Yum Yum Mini Bell Peppers: The name says it all! These yummy, sweet, mini bell peppers look like Christmas lights and come in shades of red, yellow, and orange! The peppers are high in vitamin C and fun to pick. Just be sure to plant your Yum Yum mini bell peppers away from any hot peppers you may be growing

Small Pumpkins: Kids love to harvest and decorate their very own pumpkins in fall! The little guys, like ‘Baby Bear‘ and ‘Baby Pam‘ are just the right size for kids. Extras can be processed to make Thanksgiving pumpkin pies. Be sure to give the vines plenty of sun and space and you will be rewarded with lots of fall pumpkins

Strawberry Popcorn: Kids can believe these cute, deep red ears actually pop up to make tasty popcorn! Strawberry popcorn is produced on smaller 4-foot plants and the ears are small too. They are decorative when dry and can be popped up in winter as a happy reminder of warmer summer days.

Strawberry Popcorn

Growing Your Vegetables

Organic gardening is a must, especially when growing vegetables for children. Successful vegetables start with good bed prep and summer-long care. Choose a sunny spot, work up your garden soil, and add a healthy amount of Fafard Premium Natural & Organic Compost and Fafard Garden Manure Blend before planting. Keep your vegetable watered and watch them do their summer magic

When children grow their own vegetables, they eat their vegetables. They look forward to the harvest and enjoy preparing what they have picked. Let them help snap the beans for a salad or clean the carrots before trimming and peeling them for snacking. There’s no better way to enjoy time with your kids while instilling good lifelong habits in the process.

Child picking 'Sun Gold' cherry tomatoes
Picking and eating sweet ‘Sun Gold’ cherry tomatoes is always fun for kids!

Yes, Peas! Growing Edible Pod & Tendril Peas

'Golden Sweet' snow pea
‘Golden Sweet’ snow pea is one of many delicious edible pod peas. (Image by Jessie Keith)

The tendriled vines of peas produce delicious pods in cool spring weather, and their roots naturally fortify soil with nitrogen. Once warm weather comes on, they can be pulled and replanted again in late summer for a second crop in fall. Peas are easily stored—by freezing or canning—making them a great choice for gardeners that preserve the harvest.
There are many edible pod and tendril types to try.  Some create long vines, while others are bush-forming and better suited to small spaces. Fortify their soil, choose a sunny spot, and plant at the right time of year, and they’re a cinch to grow. At least 8-10 weeks are required to raise plants from seed to harvest. Harvest can last for several weeks. Once summer heat comes on, vines stop producing, and slowly turn brown and die.
Edible Pod Peas

'Sugar Snap' peas
Classic ‘Sugar Snap’ peas are the snap pea standard. (Image by AAS Winners)

Snow and snap peas are the two edible pod peas of choice. Snaps are crisp and plump and snow peas are more delicate and slender. Both are very sweet and can be eaten fresh or cooked.  Snaps are favored by most growers, but snow peas are gaining more garden ground.
Two snow peas stand out when it comes to flavor and performance, ‘Oregon Sugar Pod II’ and ‘Golden Sweet’. The productive and vigorous ‘Oregon Sugar Pod II’ consistently gets high reviews by gardeners. It produces super sweet, 4- to 5-inch-long flattened pods on bushy, disease-resistant plants that only reach 2 ½ feet. The pale yellow pods get top marks for flavor and are produced on vigorous 6-foot vines that require trellising. First discovered in India, this variety is also more heat tolerant than most, which extends its window of harvest.
Snap pea culture is dominated by the ever-popular ‘Sugar Snap’ (1979 AAS Winner) and ‘Super Sugar Snap’ varieties. This is because both are crisp, sweet, and prolific. The “super” in ‘Super Sugar Snap’ comes from the fact that these peas are more compact, earlier to produce (60 days), and bear more heavily over a shorter window of time. Reportedly, the mildew-resistant, 5’ vines yield pods that are not quite as sweet as the classic ‘Sugar Snap’.

'Patio Pride' snap peas
‘Patio Pride’ is a new, super compact snap pea perfect for containers. (Image by AAS Winners)

Original ‘Sugar Snap’ peas became a household name for a reason. Nothing has come close to their quality since they were first introduced over 35 years ago. Young pods are relatively stringless, super sweet, reach up to 3 ½ inches in length, and are produced after 62 days. The 6-foot vines are heat tolerant (but not mildew resistant) and produce peas over a long period.
The 1984 AAS Winner, ‘Sugar Ann’, is a super early producer bearing sweet peas in only 52 days. Another compact, early gem is the 2017 AAS Winner ‘Patio Pride’. It only takes 40 days for the ultra-compact, 6- to 12-inch vines to produce plump, edible pods. These can be harvested early or allowed to mature a bit at which point they can be enjoyed as shelling peas.
Tendrils

'Super Magnolia' peas
‘Sugar Magnolia’ peas produce loads of edible tendrils. (Image by Baker Creek Heirloom Seeds)

Pea tendrils can be eaten fresh in salads or cooked in stir fries. Heavily tendriled peas are semi-leafless and referred to as “afila” peas. Their sweet flavor and novel looks have made them popular in restaurants. Only recently have they become available to gardeners.
The new tendriled variety ‘Sugar Magnolia’ produces a wild mess of green tendrils on 8-foot vines in addition to bearing good-tasting purple snap peas after 70 days. ‘Feisty is another vigorous tendril pea that has monstrous vines that can reach 30-feet in length. Harvestable tendrils are produced in 50 days and sweet pea pods are produced after 60 days.
Cultivating Peas

Sugar snap peas in hands
A bountiful harvest of sugar snap peas.

Cool weather, full sun, and fertile soil are required for great pea production. For best results, amend garden soil with a 1:3 ratio of Fafard Premium Natural & Organic Compost to garden soil and lightly feed with an all-purpose organic fertilizer for vegetable gardening. Turn the soil gently to make sure it is light and friable.
Most peas need trellising. The lightweight vines will grow well on a moderately sturdy trellis consisting of bamboo posts fixed with tightly fitted trellis netting. Even bush varieties can benefit from a low bamboo and twine support system.
Once your spring pea crop is spent, remember that you can plant a new crop again in fall. These sweet summer treats are healthy, delicious, and well worth the effort.

Bamboo trellis in garden
A sturdy bamboo trellis fitted with taut trellis netting is perfect for peas. (Image by Jessie Keith)

Beating The Five Most Common Vegetable Garden Pests Naturally

Jessie's daughter picking Colorado potato beetles
My daughter is picking Colorado potato beetles from potato plants.

For the past 11 years, I have grown my vegetables in a community garden plot, which has provided a rough, real education in plant pests, diseases, and weeds. Why? Because these mega veggie gardens are pest hot spots, and summer is the worst time of year for the beasties.  “Bad” insects always attack my beans, cucumbers, tomatoes, and eggplants–threatening to destroy fruits and foliage, and sometimes spreading disease as they munch and crunch along. I must use every tool in the toolbox to fight them. And, if the bugs beat my crop, I often start the crop again, if there is time and the season allows. Sometimes beating pests is just a matter of retooling planting time.

The five most common vegetable garden pests that I battle in mid to late summer are Colorado potato beetles, striped cucumber beetles, eggplant flea beetles, Mexican bean beetles, and harlequin cabbage bugs. Each return year after year with regularity, but some years are worse than others. The severity of the previous winter usually indicates the severity of my pest problems–the milder the winter, the harsher the pest problem. Last winter was pretty warm, so this summer the pests are rampant. Here are some ways that I have learned to overcome them.

Colorado Potato Beetle

Colorado potato beetles
Colorado potato beetles are mating on top of a potato plant.

The surest way to attract Colorado potato beetles to your garden is to plant potatoes, but if you don’t have potatoes, they will go for your tomatoes and eggplant secondarily. (Fortunately, they don’t appear to be attracted to tomatillos.) The fat, striped adult beetles emerge from the soil in late spring to feed on emerging potatoes and then lay clusters of orange-yellow eggs on leaf undersides. They yield highly destructive little orange larvae that eat foliage nonstop and grow quickly. You can kill the insects at any stage, but it’s easiest to pick off the adults and eggs. (Click here to view the full life cycle of these beetles.) The beetles can complete up to three life cycles in a single season, so once you have them, you generally have to fight them all summer.

Colorado potato beetle larvae on tomato
Colorado potato beetle larvae (left) on tomato.

These insects are highly resistant to insecticides, so it pays to choose non-chemical methods of control. Time and time again, well-timed cultural control, and proper winter cleanup have proven to be the best means of battling them. Cultural control is essentially picking off the adults, eggs, and larvae and/or pruning off egg- and larval-covered leaves and branches. I generally smash picked specimens, but you can also drown them in a bucket of water. Good picking should start in mid to late spring and continue until all signs of these pests are gone.
(To learn everything there is to know about Colorado Potato Beetles, visit potatobeetle.org.)

Spotted and Striped Cucumber Beetles

Symptoms of bacterial wilt
The symptoms of bacterial wilt, which is spread by the striped cucumber beetles.

As their names suggest, striped and spotted cucumber beetles favor cucumbers, but they also attack melon vines. Small, striped or spotted cucumber beetles look so cute and innocent, but they are so destructive. Every year my cucumber crop is a crapshoot. Why? It’s not because of the damage they cause by feeding on plants and fruits. It’s the catastrophic bacterial wilt that they spread from plant to plant. Once cucumber vines get cucumber bacterial wilt, there is no turning back. The leaves will start to show droop, and eventually, whole stems will collapse, and the vine will die.

Yellow beetle

These pests may have two to three cycles in a season and are next to impossible to control, even with harsh chemical insecticides. Floating row cloth cover can keep them at bay, but it is a hassle and does not allow pollinators to reach the plants. For me, the best course of action is to choose bacterial-wilt-resistant cucumber varieties. Cornell University Extension offers a great list of resistant cucumber varieties from which to choose. Of these, I have grown the short-vined slicer ‘Salad Bush,’ which is great for container growing. Two more reliable varieties are ‘Marketmore 80‘ and ‘Dasher II.'(Click here to learn more about striped cucumber beetles.)

Eggplant Flea Beetle

Eggplant flea beetle damage on eggplant leaf
Eggplant flea beetle damage on an eggplant leaf.

Tiny jet-black eggplant flea beetles are the smallest summer pests in this list, but they can devastate an eggplant in a matter of days. The small but numerous insects leave little pockmarks all over a host plant’s leaves. Badly damaged leaves barely photosynthesize, resulting in poor, weak plants that produce puny fruits.

If you want to grow eggplant, you have to protect them from eggplant flea beetles. There are plenty of insecticides that will kill these insects, but only a few non-chemical cultural practices will stop them. The best method that I have found is protecting plants with summer weight floating row covers that transmit a lot of sunlight while physically keeping insects from the plants. The key is covering plants early and then securing the row covers at the base, so the tiny beetles cannot crawl beneath them. Holding cover edges down with bricks, pins, and even mulch or compost works. The only caveat is that you may need to hand-pollinate plants for fruit set.

Good fall cleanup of infested crop plants will also keep populations down from year to year. On average, eggplant flea beetles will complete up to four generations in a single season.
(Click here to learn more about these pests.)

Harlequin Cabbage Bug

Harlequin adult bugs on summer broccoli
Harlequin bug adults do damage to summer broccoli.

These ornamental stink bugs are the worst enemy of summer kale, broccoli, and other brassicas. They suck the juices from the leaves, causing pockmarks all over them. The most striking destruction I have ever witnessed was with enormous Portuguese kale that I had nurtured to a bold 2′ height through spring. Once the numerous beetles started to attack in early summer, the plant had no chance.

There are a few management practices that will help stop these bugs. Floating row covers can also be used, as was suggested for the eggplant flea beetles, but harlequin cabbage bugs are big enough to pick off by hand if you have the time and can handle the slightly stinky smell they emit when disturbed. Small nymphs are also susceptible to treatment with OMRI Listed® insecticidal soap.

Two to three generations of harlequin cabbage bugs can occur each season. By late summer, they are no longer a problem so that you can plant your fall cabbages and kales with confidence.
(Click here to learn more about these pests.)

Mexican Bean Beetle

Mexican bean beetle larvae on bean leaf
Mexican bean beetle larvae and their damage on a bean leaf.

Like Colorado potato beetles, it’s the larvae of Mexican bean beetles that do the harshest damage to bean plants. The adults emerge in late spring, but they rarely cause major problems on bean plants until midsummer. The adults are orange, black-spotted beetles that lay clusters of orange-yellow eggs below the leaves, much like the Colorado potato beetle. The unusual larvae are fuzzy, bright yellow, and devastate leaves as they feed along the leaf bottoms.

Beetle on damaged leaf

Tou can control these pests as you would Colorado potato beetles with one exception – destructive harvesting. Destructive harvesting is the harvest and total removal of infested plants from the garden. After picking, infested plants should be pulled, bagged, and taken far from your garden. (Click here to view a YouTube video from the University of Maryland about destructive harvesting.) Beans can be replanted as late as mid-August for early fall harvest.

In general, regular weeding, good plant care, and excellent garden clean up, in summer and fall, will help keep pest populations down. Clean the ground of all leaf litter and weeds, and amend the soil with top-quality amendments for vegetables, such as Fafard® Garden Manure Blend or Natural & Organic Compost, and your plants will be more robust to resist the many garden pests that threaten to destroy them.

Growing Salad Greens in Spring

Spinach and romaine lettuces
A suite of spinach and romaine lettuces growing in late March.

This is the time of year to start your seeds for salad greens, such as spinach, lettuce, and arugula. Getting a head start indoors will ensure that you will have fresh greens by late March to early April when daytime temperatures are warm enough for growing and nights are still cool and crisp. Once transplanted in the garden in early March, your seedling starts should take off, if your beds have been well prepared.
Lettuce (Lactuca sativa) is the most variable green—coming in lots of shapes, lead densities and colors. Some of the most common and popular types include the upright romaine or cos lettuce (popular in Caesar’s salads), crisphead or iceberg lettuce, and looseleaf types, which include butterhead and oakleaf varieties, among others. Colors vary from bright chartreuse green to deep green, purple and bronze. Speckled varieties also exist, such as the Austrian ‘Forellenschluss’, which essentially translates to “trout-like”. Reliable starter varieties, such as the classic heirloom looseleaf variety ‘Black Seeded Simpson’, super tight-headed romaine ‘Spretnak’, and unusually beautiful French crisphead, ‘Reine Des Glaces’, are all quite easy and delicious.

Lactuca sativa 'Reine Des Glaces'
The French crisphead lettuce ‘Reine Des Glaces’ looks beautiful and has more flavor than your average iceberg lettuce.

Spinach and arugula grow under the same conditions as lettuce—requiring cool weather for best growth and flavor. Both are less variable in appearance, but there are quite a few cultivated varieties with special characteristics that set them apart. Spinach may have smooth or savoyed leaves and some varieties are slower to bolt (set flower) in spring than others. The 1925 heirloom ‘Bloomsdale’ has large, savoyed leaves and is slower to bolt than most. I contrast, ‘Corvair’ has large, smooth leaves and is resistant to downy mildew. Some cultivars, such as ‘Baby’s Leaf‘, are recommended for growing “baby spinach”. Arugula cultivars vary somewhat in leaf shape, color and heat. The popular ‘Wasabi’ is an easy-to-grow selection with leaves that truly taste of hot wasabi. The new ‘Dragon’s Tongue’ is a visually pretty, finely cut variant with purple-red venation.

Lactuca sativa (SALANOVA® RED INCISED-LEAF, SALANOVA® SERIES)
Looseleaf lettuce varieties can come with variable leaf shapes and colors.

There are a few things to know when growing these greens. To begin with, they must have cool germination temperatures. Lettuce seed, for example, germinates best at temperatures between 70 and 40 degrees F, with those at the higher end sprouting faster. Most other greens do, too. The small, almond-shaped seeds of lettuce also require light to germinate, so be sure not to cover the seed—just gently pat it down and wet its soil completely. Arugula seed is also small and should be surface sown, but spinach seed is larger and can be planted just below the soil’s surface. For planting all these seeds, it is vital to select a quality seed-starting mix with a fine texture, such as Fafard Seed Starting Mix with Resilience. (For more seed-starting tips, click here.)

Tidy open beds
Tidy, open beds and good spacing are needed for healthy, vigorous greens.

Before planting, be sure to harden seedlings off, slowly exposing them to outdoor temperatures and sunlight until they are acclimated. Soil should be fortified with a quality organic amendment.  I recommend Fafard Garden Manure Blend for greens. Work it in evenly before planting your seedlings. Once seedlings are planted around six to eight inches apart, water them well and apply a light solution of water-soluble, all-purpose fertilizer.
In no time, you should have harvestable greens. In is not uncommon for most greens to take between 45 to 50 days to produce after planting. Harvest depends on the green. Spinach, arugula, and looseleaf Fafard Garden Manure Blend packlettuce can be harvested leaf by leaf while romaine and crisphead lettuce are harvested whole by the head. The easiest way is to cut the head with a harvest knife from the point where it meets the ground.
It is not uncommon for a few stray greens to begin bolting before they are harvested. If this happens, let them bloom and set seed. After plants have bolted, wait for the seed to mature and dry. Then collect the seeds for planting later in the season when growing conditions are cool once again.

New Vegetables for 2016

Black Beauty tomatoes
The new slicing tomato ‘Black Beauty’ is darker than any other black tomato and has incredible flavor. (photo care of Baker Creek Heirloom Seeds)

Each year I boost my passion for vegetable gardening by adding some of the latest new varieties to the garden repertoire. Those that pass the flavor and productivity tests may have a permanent place in my yearly garden while those that don’t shine will make space for new plants to trial next year. Last year’s winner was the flavorful, uniform, and high producing, AAS-winning ‘Chef’s Choice Orange’ slicing tomato. (Its deepest orange fruits were so sweet!) Just glancing at my growing pile of vegetable garden catalogs makes me excited about the fresh suite of new vegetables for 2016.

Candyland Red Tomato (Currant) Color Code: PAS Kieft 2017 Fruit, Seed 08.15 Elburn, Mark Widhalm Candyland01_02.JPG TOM15-19648.JPG
The new AAS Winner ‘Candyland Red’ is a sweet new currant tomato for the garden. (Photo care of All America Selections)

Let’s start with tomatoes and close relatives, like tomatillos, eggplants, and peppers. By far, the most exciting tomato being offered is the succulent, pure black slicing tomato ‘Black Beauty’. The Wild Boar Farms introduction has meaty flavorful flesh that is dark red to black. A classic red tomato on the table is the hybrid ‘Madame Marmande’ from Burpee that boasts beautifully lobed fruits packed with rich tomato flavor. Cherry tomato lovers should consider ‘Candyland Red’—a high-producing red currant tomato that’s super sweet. Pair it with the golden currant tomato ‘Gold Rush‘ for fun, colorful snacking.
There’s a great pick of peppers for 2016, hot and sweet. Promising hots include the Brazilian ‘Biquinho’ hot pepper, which looks like a bright red teardrop when ripe and is said to have a fruity, smoky flavor, and the fire-red ‘Flaming Flare’ pepper with its sweet, slightly hot flavor. Sweet pepper lovers should check out the golden sweet ‘Escamillo’ pepper. This prolific early bearer is an AAS winner for 2016. All of these peppers will pair well with the new, heavy-bearing ‘Gulliver’ tomatillo for salsa making.

Escamillo yellow peppers
The golden yellow pepper ‘Escamillo’ is another AAS winner with great taste and performance. (Photo care of All America Selections)

Though eggplant can have challenges due to susceptibility to flea beetles and Colorado potato beetles, I am excited about the new ‘Meatball’ hybrid eggplant from Burpee. The large, meaty fruits are supposed to be extra tasty.
Gardeners seeking something unusual may consider the Mexican sour gherkin, also offered by Burpee.  The tiny fruits are crisp and sweet but also slightly sour. Add these to a salad along with slices of the remarkable ‘Sakurajima’, the world’s largest radish. Offered by Baker Creek Heirloom Seeds, these massive daikon radishes can reach 15 pounds and just beg to be grown by adventurous vegetable gardeners with lots of mouths to feed.
Spring greens are some of the first veggies to go into the ground and new varieties, such as the super spinach ‘Gangbusters’ and/or beautiful heirloom lettuce ‘Yugoslavian Red’, are sure to make easy work of the salad garden. Throw in some vigorous Fidelio flatlead parsley or unusual saltwort Japanese greens for added interest and flavor.

'Yellowbunch' carrots
The bright, uniform ‘Yellowbunch’ Carrot is a sweet new offering for 2016. (Photo care of Johnny’s Selected Seeds)

Unusually colored carrots are becoming more and more popular and Johnny’s ‘Yellowbunch’ Carrot looks like a real winner with its straight, crisp, sweet roots of bright yellow. Other new root crops of interest include the pure white ‘Avalanche’ beet, an AAS Winner with mild, sweet flavor and uniform roots.
This list would not be complete without something sweet. Said to have the highest Brix score (15!) of any other canteloupe, Park’s Select ‘Infinite Gold’ hybrid is bursting with flavor and highly disease resistant. Vines are high-yielding and fruits have very deep orange flesh.
Whether growing greens, tomatoes, or melons—your vegetable garden will only be as good as the soil and nutrients you provide. Give this year’s new offerings and old favorites the best chance possible for success. Feed your soil with quality garden compost, such as Fafard Premium Natural & Organic Compost, or quality manure, such as Fafard Garden Mature Blend. Both will enrich garden soil to the maximum for large fruits and big roots. Feed with a fertilizer formulated for vegetables—we like Black Gold Tomato and Vegetable Fertilizer—and your new garden vegetables will perform to their fullest.

Historical photo of Sakurajima Radish with child
Adventurous gardeners should consider growing the giant ‘Sakurajima’ radish. (Photo care of Baker Creek Heirloom Seeds)

How to Grow Your Own Garlic

How to Grown Your Own Garlic Featured Image
Freshly harvested and cleaned hardneck garlic.

Growing garlic is easy and gratifying. For starters, it tastes infinitely better than store-bought. Secondly, there are also tons and tons of wonderful cultivated varieties to choose from that vary in size, color, heat, and flavor. Garlic isn’t just garlic when you become tuned into its diversity (just check out the offerings at The Garlic Store). And fall is the time to plant it.

Planting Garlic

The cultivation process begins in fall when the soil is still workable, usually between October and December. Just like any other root crop, the best bulbs develop in well-drained, friable garden loam. Then amend with compost, such as Fafard Premium Natural and Organic Compost, and add some bulb fertilizer for assured success

Child digging a hole for planting
Garlic should be planted in fall in fertile, amended loam.

For planting, dig holes 3 to 6 inches deep and 12 to 16 inches apart. Set a single clove in each hole with the tip pointing upwards and the blunt root base down to a depth of 4-5 inches. Cover with soil, water, and wait. Within a couple of weeks, sprouts should rise from the soil, and the plants may reach 6 inches or more before heavy frosts hit. Garlic will overwinter in an evergreen to semi-evergreen state where winters are mild but will die back in colder zones.

Garlic Growth Cycle

In spring, garlic plants will emerge and leaf up, and by late spring to early summer each will produce a heronesque flower or bulbil bud. The buds should be removed as soon as they appear or they’ll deplete the precious garlic bulbs underground. Just clip the stems back to the main plant, but don’t throw away the buds. They’re also good eating and look and taste great stir-fried or sautéed.

Some garlic varieties produce earlier in the season and others produce later, so it’s nice to plant a seasonal variety that will mature at different times. On average, most cultivars are harvestable by midsummer. You will know they are ready when their tops begin to turn brown. Refrain from watering the plants at this time to keep bulbs from rotting.

When the tops start to turn dry and begin to bend down, the cloves are ready to harvest. Dig the bulbs and allow them to dry in a cool, airy place away from sunlight. The drying technique depends on the garlic type. Softneck garlic can be hung to dry in braids, and the tops of hard-neck types can be cut and the bulbs dried on a dry, breathable surface. Store in a cool, dry place.

Softneck and Hardneck Garlic Varieties

Child with garlic cloves
It’s amazing to see what a handful of garlic cloves planted in fall will become the following season.

Choosing the right garlic for you depends on where you live and the flavor your favor. The key distinction between types is whether they are soft or hardnecked. Softneck garlic is the most popular type grown in Europe and the American South. It grows better in milder climates (but will still grow well pretty far north), stores for longer, and has flexible necks that allow mature bulbs and plants to be easily braided into hanging garlic braids.

There are two softneck forms, silverskin and artichoke. Silverskin soft-neck garlic has smooth, silvery skin, more cloves and keeps for a very long time. Artichoke has coarser skin, fewer, larger cloves and a milder flavor. Still, heat, pungency, and flavor vary widely from cultivar to cultivar, so consider this when choosing garlic to grow.

Hardneck garlic is more commonly grown in northern and eastern Europe, Russia and North-Central Asia. It grows better in cooler climates, has a shorter storage life, and stiff necks that attach to the bulbs. This type produces fewer, larger cloves, which are fragrant and vary in flavor depending on the cultivar. Hardneck types are believed to be more closely related to wild garlic.

Garlic scapes
Garlic scapes appear in summer and are very good to eat.

The rewards of growing garlic are great. Homegrown bulbs have superior taste, you can grow lots of different types that vary in flavor, and they are cheap. Specialty varieties usually sell out early in the season, but gardeners wishing to experiment with garlic growing this late in the season still have an option. Garlic cloves from the grocery store (which are always softneck) work just as well. Just separate the cloves and plant away.

Miniature Pumpkins

Small pumpkins at a market
If you didn’t grow your own small pumpkins this season, they are easily found at local orchards and markets! (photo by Jessie Keith)

Miniature pumpkins are so irresistible they almost beg to be picked up and held. Varieties like the bright orange ‘Jack-B-Little’, striped ‘L’il Pump Ke-Mon’, tangerine orange ‘Bumpkin’, and the ghostly white ‘Baby Boo’ stand about two inches tall and three inches wide, their sides creased with deep ridges. Whether you use them for decorating, cooking or party favors, one baby pumpkin is never enough. In October retailers offer bins full of the little charmers, but it is also easy to grow them at home. Raising mini pumpkins can be a great, kid-friendly gardening project.
Fafard Premium Natural & Organic Compost Blend pack

Growing Mini Pumpkins

These smallest pepos are part of the same squash or cucurbit family as their larger relations and favor similar growing conditions—plenty of sunshine—at least six hours per day–and consistently moist soil enriched with organic amendments like Fafard ® Premium Natural & Organic Compost. The vines will sprout happily in large containers or in-ground settings. As befits their smaller size, minis take somewhat less growing time than the orange behemoths, maturing in 90 to 100 days from seed. Under good conditions, each vine should produce eight to ten miniature pumpkins.

If you live in an area with a short growing season, start minis indoors two or three weeks before the last frost date for your area. Otherwise, sow outdoors in mid-May to ensure a supply for harvest-time decorations. Follow package directions, making sure to give the young plants plenty of room. Grow the pumpkins in vegetable or ornamental beds, or on sunny decks or terraces. Proximity to some kind of support—fences, trellises or bamboo teepees—is helpful, though the vines can also be allowed to sprawl along the ground or cascade from porches or raised beds.

'Jack-B-Little' pumpkins
The cute little ‘Jack-B-Little’ is one of the cutest and most common little pumpkin. (photo by Marian Keith)

Lilliputian Jack-o-lanterns are very amenable to container culture. Almost any sturdy vessel will work, as long as it has drainage holes. A ten-gallon container will support a single mini pumpkin vine. To grow several vines in one pot, select one that will hold twenty to twenty-five gallons, preferably with a diameter of at least thirty-six inches. Whatever container you choose, fill with a fifty/fifty mix of quality potting medium like Fafard® Ultra Potting Mix With Extended Feed With Resilience™ and Fafard ® Premium Natural & Organic Compost.

In-ground or in containers, if you decide to support the young pumpkins, tie them with soft ties–pieces of old pantyhose or any other flexible material. As you tie the vines, you will notice that the young fruits start out rather pale in color. Rest assured, the orange-fruited varieties will turn tawny in time.

Critter control is a must because varmints like raccoons, squirrels, and groundhogs are extremely fond of miniature pumpkins. Spray the developing minis with an organic critter deterrent to keep them away. Remember to re-spray after every rainstorm.

Mini Pumpkin Harvest and Use

You will know your minis are ripe when the vines appear dried-out and the stems greenish-brown. If you are using the pumpkins as decorations, let them cure in a cool, dry place for about a week before piling in baskets, mounting on wreaths, carving into votive candle holders or arranging on the mantle. Minis also make clever place cards for birthday or dinner parties.

Cucurbita pepo 'Bumpkin' pumpkins
‘Bumpkin’ is another sweet little pumpkin worth seeking out this season. (photo by Jessie Keith)

Though less fleshy than larger varieties, ‘Jack-B-Little’s and their kin can also be used in cooking. The little pumpkins make eye-catching individual containers for baked eggs or savory hot dishes containing combinations of meat, vegetables and/or grains. Sprinkle the insides with a bit of brown sugar, dot with butter and roast for a simple dessert.

Minis can also be used as colorful ramekins for sweet baked concoctions like custards, bread puddings or fruit crumbles. Because the sides of the pumpkin are somewhat thicker than most ceramic vessels, you may have to add extra cooking time to standard recipes.

In fall, the garden is full of big specimens—giant squash, “dinner plate” dahlias and cushion mums big enough to seat a giant. Miniature pumpkins are a reminder that good garden things also come in small packages.