Articles

How To Force Spring Bulbs In Water

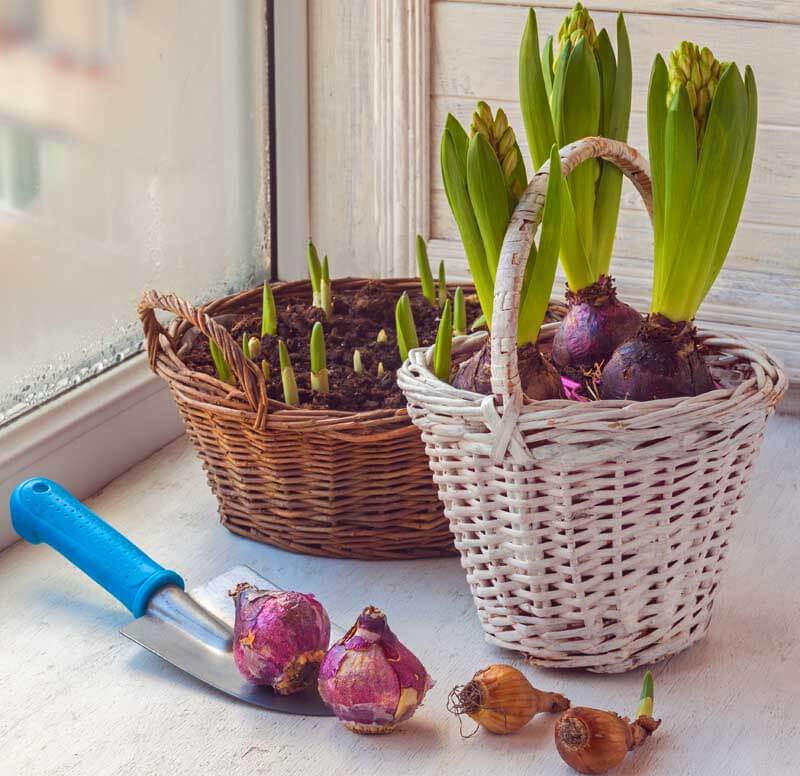
Flower bulbs, water, and a vase (or two) are all you need to bring a splash of spring to your windowsill this winter. It’s as simple as plant-growing gets. The water provides moisture for the bulbs’ roots. The vase provides a container for the water and support for the bulbs’ stems and leaves. And the bulbs take it from there. Everything’s inside these miraculous little plants-in-a-package: the buds, the roots, and the stored food that fuels roots and top growth. Give them the proper stimulus, and they’re off and blooming – no soil required, in many cases.

The author grows paperwhites in water each year around the holidays. (Image by Russell Stafford)

Paperwhites

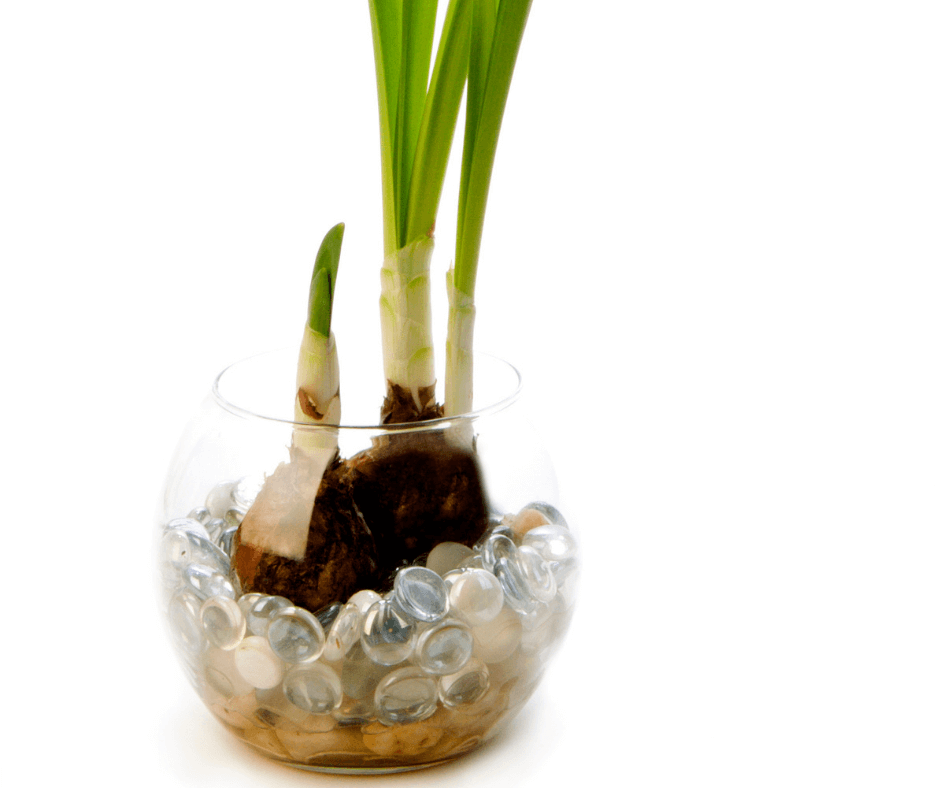
Simplest of all are paperwhite narcissus, which require nothing more in the way of stimulus than a hit of water. Place several of them at the bottom of a bubble vase (illustrated) or a tall cylindrical glass vase (6 inches wide by 10 inches deep is an ideal size). Add around an inch of water (don’t worry – they’ll be fine). Move the vase to a cool dimly lit location. Finally, bring the vase out into cool full light when the bulbs begin to push roots. Re-water when necessary. In 3 to 5 weeks, you’ll have paperwhite blooms, their stems neatly propped by the sides of the vase. To further counteract flopping, amend the water with a touch of alcohol, which promotes compact growth.

Paperwhites set lush roots in water and bloom beautifully without chilling.

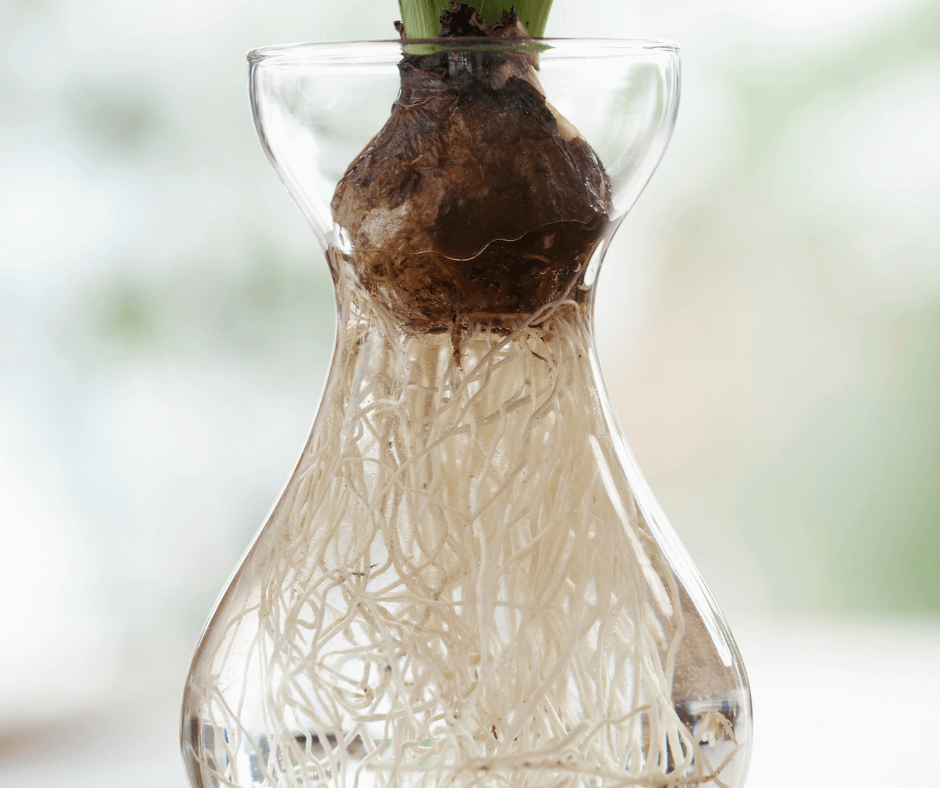
Most other bulbs are generally not as fine with sitting in an inch of water. Fortunately, you can buy forcing jars made just to address this challenge. The bulb nestles in a bowl-shaped receptacle at the top of the jar, which is filled with water just to the bulb’s base. Add water as needed to keep the developing roots immersed.

Amaryllis

Amaryllis are very easy to force in water/

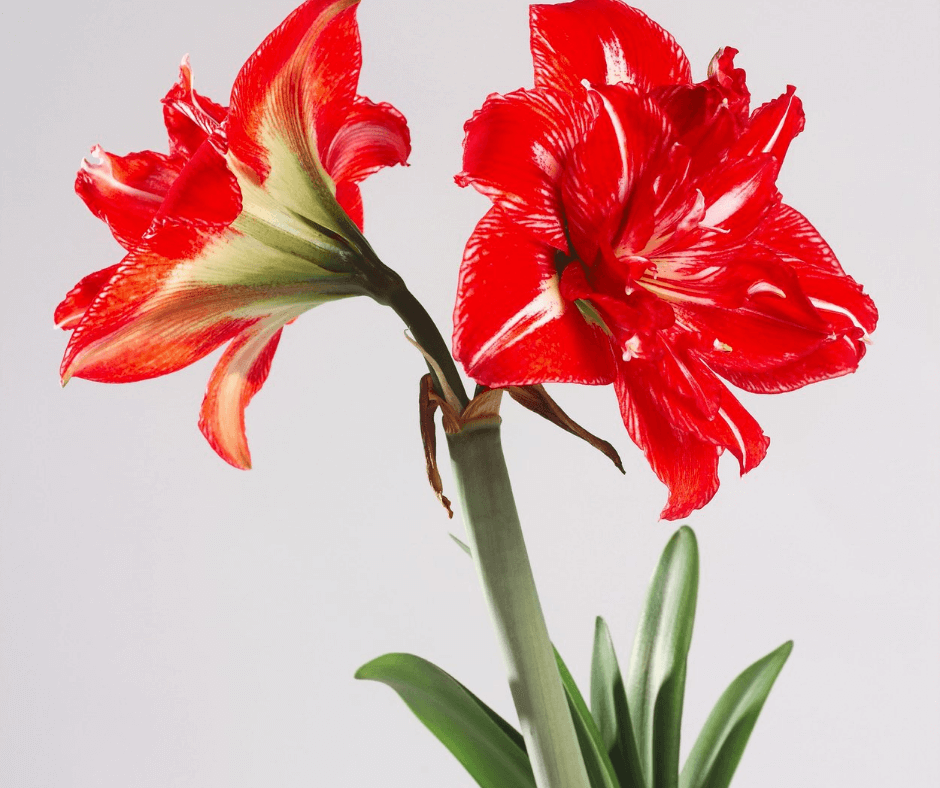
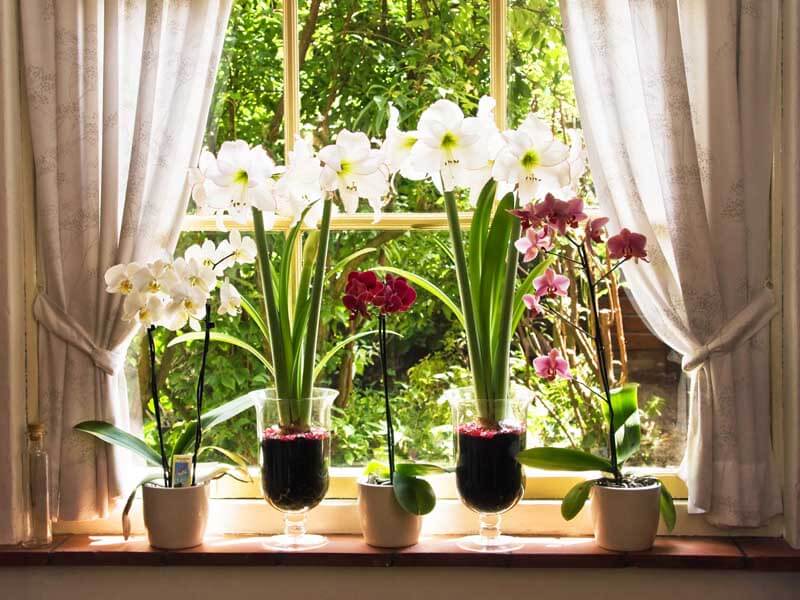
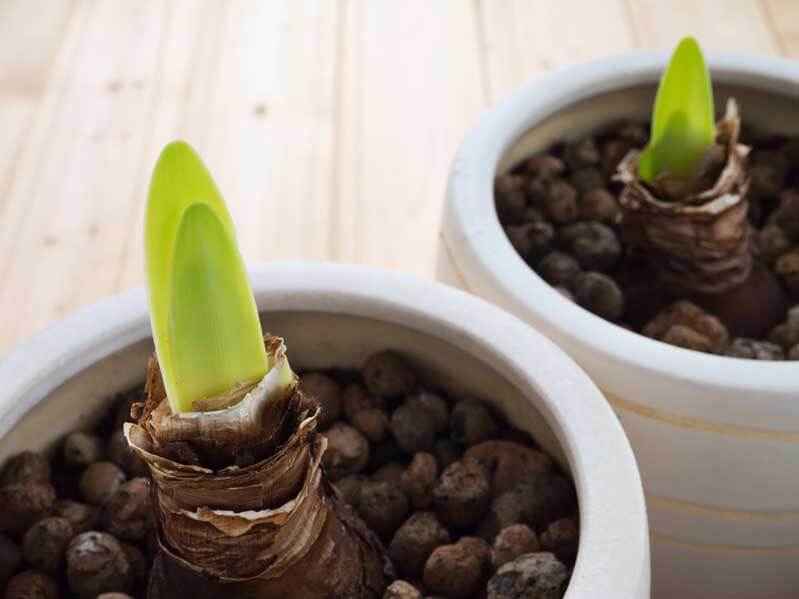
Bulb-jars purpose-made for amaryllis (botanically known as Hippeastrum) are available from several suppliers. Some are vase-like bulb supports, while others provide space for pebbles to be placed at the base for root support. As with paperwhites, newly bought amaryllis can be forced directly with no pretreatment necessary. Within weeks, you’ll reap the reward of a spectacular display of huge, richly hued, trumpet-shaped blooms. (Click here to learn more about growing Amaryllis.)

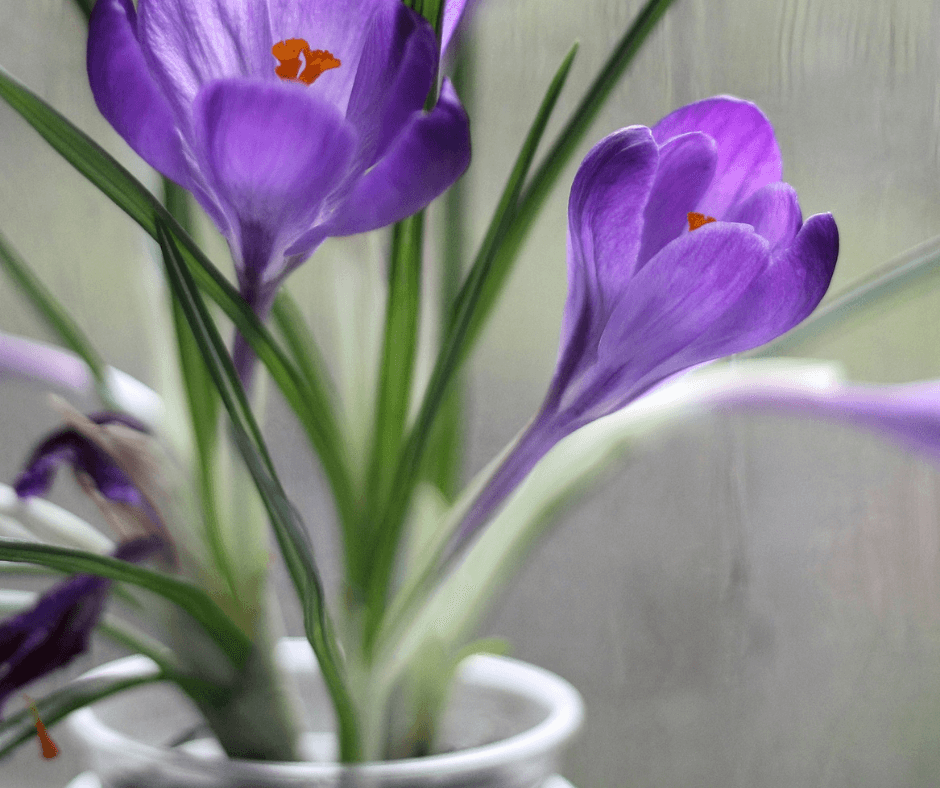
Hyacinths, Crocus, and More

Crocus require a chilling period before they can be forced.

You’ll also find bulb-jars designed specifically for hardy bulbs such as hyacinths, crocuses, or whatever else will fit (scillas, grape hyacinths, trumpet daffodils, and early tulips are among the other bulbs that force well). Hardy bulbs present a special pretreatment challenge, though: many of them won’t send up flowers until they’ve experienced a few weeks of cold and have started rooting. One easy solution is to put the jarred bulb in a refrigerator or other chilly, dark place for several weeks, and move it into the light and warmth once roots extend and plump buds appear. Some hardy bulbs, such as Tazetta narcissus (including ‘Geranium’ and ‘Cragford’) and double hyacinths, need only cold; no rooting required. A few weeks in the refrigerator in a paper bag and they’re ready to head for their jars and get growing.

Forced crocus provide winter with a bit of cheerful spring color.

Or you can make your own “bulb jar”. Place pebbles in a narrow cylindrical vase, leaving a few inches of space at the top. Place the bulb (or bulbs) on the pebbles, and add water to the bulb’s base. Proceed as above. In a couple months, you’ll have spring in winter

How To Force Bulbs for Winter Cheer

How to Force Bulbs for Winter Cheer Featured Image
So many beautiful bulbs can be easily forced indoors. (photo by Jessie Keith)

Daffodils, hyacinths, and tulips in winter? For many of us, this would seem the stuff of fantasy, absent a visit to the florist. Yet, with only a modest investment of money, time, and effort, even a beginning gardener can know the joy of bringing these and other spring bulbs into bloom during the coldest and darkest days of the year. Forcing bulbs is that easy.

Flower bulbs are little marvels. Those that grow in cold climates usually leaf and flower in spring, retreating from summer through winter to a tiny condensed underground storage organ known as a true bulb, corm, tuber or rhizome (we’ll just call them all bulbs here). Give them a warm summer followed by 2 or 3 months of chilly temperatures and moist soil, and they’re primed to grow and flower as soon as temperatures turn milder. By providing these cues, along with a nice pot, we can have them up and blooming indoors weeks (even months) before their outdoor kin make their appearances.

Bulb Forcing Pots and Mix

Hyacinth and daffodil bulbs in baskets
Hyacinth and daffodil bulbs can both be forced in winter.

So what does it take to stage this little miracle? Aside from the bulbs themselves (which we’ll get to in a minute), you’ll need a container, some potting soil and a chilly place for the bulbs to cool their heels. Containers of various sorts and sizes will do fine, but wide shallow pots (sometimes known as “bulb pans”) are ideal. Look for something in the 6- to 8-inch-wide and 4- to 5-inch deep range. Clay pots look especially nice and have the added advantage of not tipping as easily as plastic ones.

I recommend a light, well-drained, quality potting mix such as Fafard Professional Potting Mix, which is also perfect for bulbs and contains less added fertilizer. A fertilizer-enriched mix is not necessary unless you’re planning to relocate the bulbs to the garden after they’ve bloomed.
Now for the stars of your planting projects: your plants!

Bulbs for Forcing

Amaryllis by the window
Amaryllis are some of the most common bulbs to be forced.

Many bulbs “force” well. Perhaps the most rewarding are those that smell as nice as they look. Among these are numerous daffodils, including Narcissus tazetta hybrids like ‘Geranium’ and ‘Cragford’, the delightfully double-flowered ‘Cheerfulness’ and ‘Yellow Cheerfulness’ and ‘Sundial’ and other hybrids of N. jonquilla. Netted irises (Iris reticulata and hybrids) also offer beautiful flowers and a heady scent, as do many grape hyacinths and some tulips and crocuses. And of course, there’s the bulb that practically defines floral fragrance – the hyacinth. Other bulbs worth trying include Grecian windflower (Anemone blanda), Siberian squill (Scilla siberica) and fumewort (Corydalis solida).

Assemble all your materials in early to late fall (either on a potting table or just a kitchen counter festooned with newspaper) and you’re ready to go!

How to Force Bulbs

Two amaryllis sprouts in pots
Two amaryllis sprouts in the pots

Start by filling your container with enough slightly moistened potting mix so that the tips of the bulbs will be an inch or so below the container’s rim when set on the soil’s surface (large bulbs such as hybrid daffodils can be planted with their noses above rim level). Then place your bulbs on the soil, spaced closely but not touching. Fill the container to just below the rim with more potting mix, water until the drainage holes begin to drip, then move the container to a dark location where temperatures will remain above freezing but well below the comfort range of shirt-sleeved humans (40 degrees F is just right). An attic or attached garage may be suitable, but keep in mind that bulb-loving critters might be afoot. If no other place is available, the refrigerator will do nicely, as long as the bulbs don’t have overripe fruit as fridge-mates. Refrigerated containers are best kept in paper bags, to retard drying. Water the containers lightly if the top layer of soil dries.

And now you wait. At about 7 or 8 weeks, start checking for signs of root development. When roots are evident at drainage holes, or if bulbs offer significant resistance if gently twisted or tugged, your bulbs are ready to party. (The appearance topside of leaves or fat buds is a further sign that flowers are in the offing.)

Fafard Professional Potting Mix pack

So let the show begin: Bring your container into a cool, shady room for a few days, to acclimate the prepped bulbs to “spring.” Then move it to a sunny – but not too warm – niche, and watch the miracle happen. Most bulbs will flower 2-4 weeks after coming into the light. Water when the soil surface dries.

After they bloom, either discard them or plant them in the garden once the soil becomes workable. (If you replant them in your outdoor beds, just be patient: Your transplanted bulbs will likely be bloomless for a year or two in the garden before they flower again.)

What better antidote for winter than a windowsill brimming with brightly blooming bulbs? You might even find yourself in the market for a spare refrigerator.