Articles

Tall Sedums for Fall Gardens

Tall Sedums for Fall Gardens Featured Image
Sedum ‘Autumn Fire’ mingles with a well-designed mix of textural perennials and shrubs.

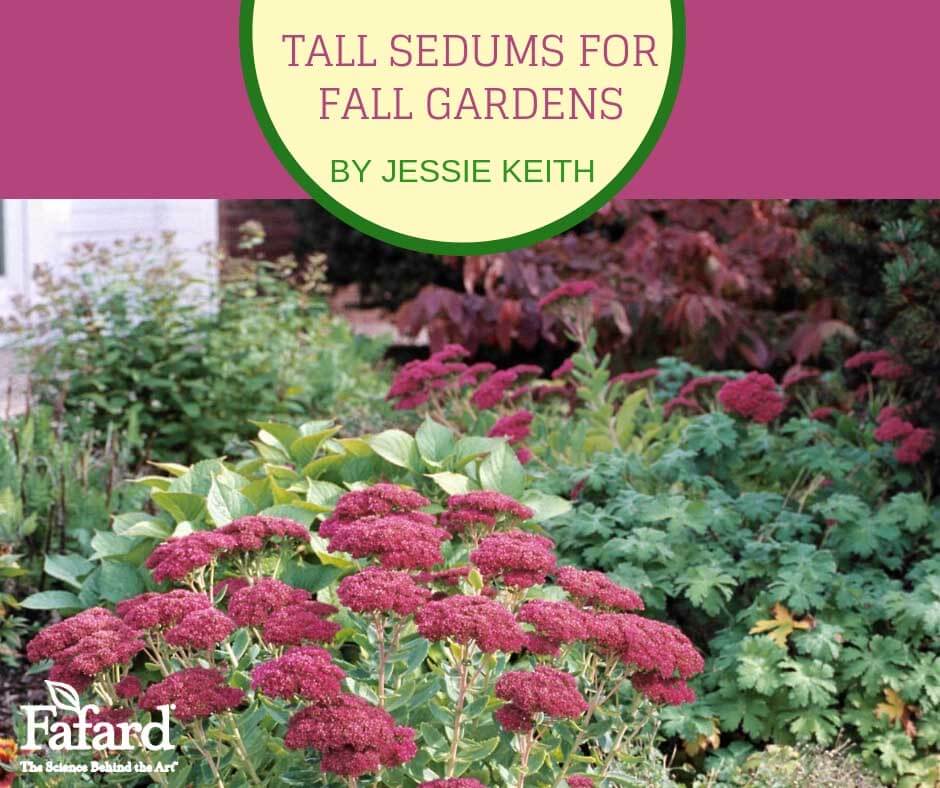
Tall sedums (Sedum spectabile hybrids) provide mounds of lush, blue-green foliage through summer, but late summer and fall are when they really shine. Their sturdy stems support rosy-pink blooms that glow in the late-season sun. New varieties make growing and designing with these tried-and-true perennials even more gratifying and fun.

Bold Tall Sedums & Planting Combos

New tall sedums have broken the mold of the old-fashioned, dusky pink ‘Autumn Joy’ of grandmother’s garden. Extra bright flowers and unique foliage colors, like bronze, purple and near-black, mark some of the newer varieties. Some are extra tall while others are very compact and more densely flowered.

Sedum ‘Thunderhead’

Sedum 'Thunderhead' has some of the deepest rose-pink flowers. (photo care of Terra Nova, Nurseries)
Sedum ‘Thunderhead’ has some of the deepest rose-pink flowers. (photo care of Terra Nova Nurseries)

Take the ‘Thunderhead’ introduction by Terra Nova Nurseries, its giant, bright, rose-red flower heads stand on strong, 18-inch stems above bronzy green foliage. For a great combo, plant it in swaths alongside soft, mounding, blue-green ‘Blue Zinger’ sedge and bright yellow-flowered Helianthus ‘Low Down’, which only grows to 2 feet high.

Sedum ‘Dark Magic’

'Dark Magic' blooms
The deepest rose-purple blooms of ‘Dark Magic’ are emboldened by the orange-red flowers of Coreopsis ‘Ladybird’. (Image thanks to Terra Nova Nurseries)

One for outstanding foliage as well as flowers is the 2015 introduction ‘Dark Magic’, which has deepest burgundy foliage all season and large heads of burgundy pink flowers in late summer and fall. The compact plants only reach 12-inches high, making this a great plant for border edges. Its upright habit complements lower, mounded grasses and perennials like evergreen, lavender-flowered germander (Teucrium chamaedrys) or tidy thyme (Thymus spp.) plants.

Sedum ‘Crystal Pink’

'Crystal Pink' flowers
‘Crystal Pink’ has sparkling pale pink flowers on low, mounding plants. (Image thanks to Terra Nova Nurseries)

For a lighter more silver-pink flower try the compact ‘Crystal Pink’, which becomes completely covered with clouds of palest green and pink flowers in late summer or fall. Plants reach no more than 12-inches, and their light flowers complement taller, darker-colored annuals and perennials.

Sedum ‘Frosty Morn’ and ‘Autumn Delight’

Frosty Morn
Variegated leaves add to the visual appeal of ‘Frosty Morn’

Another cheerful sedum is the cool ‘Frosty Morn’. This variegated counterpart to ‘Autumn Joy’ is surprisingly vigorous. Its bright mounds of foliage complement darker-leaved plants and are best planted in clumps of five to seven plants to show off the effect of the ivory-edged leaves. Late in the season, they become topped with subtle, dusty pink flowers. A bolder variegated sedum is ‘Autumn Delight’, which sports chartreuse and blue-green variegated leaves and bright rose flowers.

'Autumn Delight' flowers
The deep rose flowers of ‘Autumn Delight’ look lovely against its variegated leaves.

Sedum ‘Autumn Fire’

Gardeners looking for classic tall sedum looks but more exciting flowers might consider ‘Autumn Fire’. Their flattened clusters of rose-pink flowers are rich rosy pink, and the plants themselves have a significant presence in the landscape with their dense stems that reach 2 to 3 feet high.

Growing Tall Sedums

Bees on sedum flowers
Bees and butterflies are attracted to tall sedum flowers.

Growing Tall Sedums

Tall sedums prefer drier feet, but they aren’t as drought tolerant as some of the short, spreading Sedum species able to withstand really high heat and drought. Plant tall sedums in porous, mineral-rich soil with added organic matter, such as Fafard Premium Natural & Organic Compost, for perfect rooting.

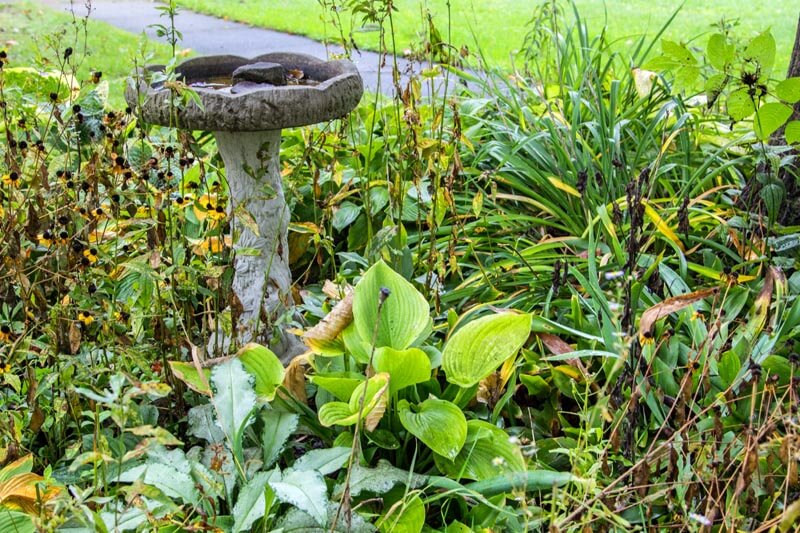
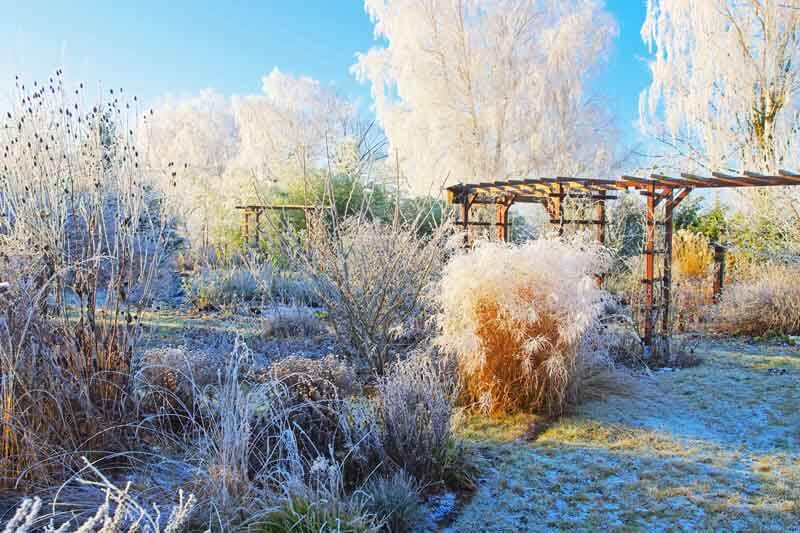
All sedums attract bees and butterflies,  making them perfect for pollinator gardens. After fall flowering, the seedheads should be left until they are no longer ornamental. In early winter, they hold up moderately well before being flattened by snow. Cut them back on a dry midwinter’s day, and wait until the soils warm in spring and their rosettes of fleshy leaves begin to grow again.

Homemade Caramel Apple & Pear Fig Honey Butter Recipes


Tart, spicy, fragrant fruit butters are great winter treats that can be canned and shared as holiday gifts. Apples and winter pears are in season, so there are no better fruits for making dessert-quality spreads perfect for spreading on buttery toast, dipping with salty pretzels, or dolloping onto spice cookies. If you have your own apple and pear trees, even better! [Click here to learn how to grow your own winter pears!}
These butters are simple to make but require some patience. The key to their deliciousness is perfect caramelization and thickness, so be sure they are perfectly cooked before canning! As pre-preparation, be sure to have sterile canning jars on hand. Well-cooked spreads such as these are perfect for those just learning to can at home (canning instructions are below). Place a pretty label on the jar, top it with a bow, and bring a few jars to your next holiday party!

Caramel Apple Butter

apple butter on wood background. toning. selective focus
Caramel apple butter is a delicious holiday treat!

Tart apples are rounded by the milky sweetness of caramel. Sweet/tart sauce apples like ‘Gravenstein’, ‘Jonathan’, ‘Cortland’ and ‘McIntosh’ make excellent butter. A touch of salt is crucial for flavor. Can this yummy spread for holiday gift giving or personal enjoyment. It’s decadent stuff!
Ingredients

  • 3 lbs. apples (about 9 medium apples) – peeled, cored and roughly chopped
  • ½ cup water
  • ¾ cups light brown sugar
  • ½ teaspoon ground cloves
  • ½ teaspoon allspice
  • 1 ½ teaspoons ground cinnamon
  • 1 teaspoon kosher salt
  • 15 caramels

Directions

  1. Add the apples and ½ cup of water to a large, sturdy sauce pan. Cover and simmer until the apples are soft but intact (15–20 minutes).
  2. Allow the apples to cool, and then strain them in a colander to remove any excess liquid.
  3. Transfer the apples into a food processor and puree them until smooth.
  4. Place the apple puree back in the pot and set the stove to medium-low heat. Reduce the heat to low if it starts to bubble.
  5. Add the sugar, caramels, and salt, then simmer, stirring occasionally.
  6. After 3–4 hours the butter should be thick and caramel-colored.
  7. Use the dab test to check if the butter is ready. Dab a bit onto a plate; if no residual liquid oozes from the edge, and the butter remains mounded, it’s ready.
  8. Add the spices  and stir. Keep the butter on low heat until you’re ready to can it.

This recipe makes around four 4-oz. jars of butter that can be canned or stored in airtight containers for freezing or refrigeration.

Apple Butter Sm
Caramel Apple Butter Ingredients

 
IMG_1391
Start by peeling and roughly chopping the apples

IMG_1395
Cook the apples are soft but intact (15–20 minutes).

IMG_1401
Puree the softened apples and then return them to the pot.

IMG_1403
Add the caramels, brown sugar, and salt, and cook the butter down on low heat for 2-3 hours.

IMG_1416
Do the dab test. The butter on the right is fully caramelized and ready. The butter on the left is still watery and underdone.

IMG_1449
Can and label your finished butter using the instructions below.

Pear Fig Honey Butter

This decadent fruit butter tastes great on morning toast or dolloped between crisp butter cookies.

IMG_1442
Honey, Fig, Pear Butter ingredients

Ingredients

  • 9 soft Bosc or Comice pears – peeled, cored and chopped
  • 1/2 cup raw, wildflower honey
  • 1 cup chopped dried figs
  • the juice of one lemon
  • Pinch of salt to taste

Directions

  1. Puree pears and figs in a food processor until smooth.
  2. Place the puree in a sturdy, large pot and set the stove to medium-low heat. (Reduce to low if it starts to bubble).
  3. Add the honey and salt, and mix until blended.
  4. Cook uncovered, stirring occasionally, until the butter becomes reduced by half. This should take around 2-3 hours (sometimes more).
  5. The finished butter should be fully caramelized, thickened and ready to can.

This recipe makes around four 4-oz. jars of butter. Enjoy!

Canning Instructions

Materials:
Canning Pot with Jar Rack
Four 4-oz or two 8-oz jars for canning
Canning Jar Lifter
Canning Lids and Screw Bands (new)
Labels and Permanent Marker
Ladle
Wide-mouthed Jar Funnel
Steps:

  1. Wash your hands and work space before starting.
  1. Sterilize jars by filling a large pot with water to a depth that will cover them. Submerge the jars, screw bands, and lids into the hot water. Bring the water to a rolling boil, and boil for 10 minutes. Remove the hot jars with clean tongs while gently pouring the hot water out before removal. Place the jars upside down on a clean towel. Only touch the jar exteriors (Keep the canning pot with hot lids simmering.)
  1. Using a clean ladle and wide-mouthed funnel, fill the jars with hot, prepared fruit butter. Fill until there is an inch of head space at the top of the jar. Wipe messy jar rims with a clean cloth.
  1. Remove the sterilized lids and screw bands from the hot water and place them on the jars–being sure not to touch the inner lids. Make sure the lids are firmly down and screw bands lightly tightened. Manufacturer’s instructions may vary so follow those on the box.
  1. Place the jars on the jar rack and lower them into the pot of hot canning water, if you have no rack lower the jars in with a canning jar lifter being sure to keep jars from touching. Cover the canning pot and keep at a low boil for 10 minutes.
  1. Remove the jars from the pot and place them on towels to cool. Fully tighten the screw bands. Once cool, dry the outsides thoroughly and apply labels. Include the butter type and date.
  1. After jars have set for 12 hours, check for success.  If the lids are tight, air free and cannot be pressed down, they’re fine. If they pop down, they are improperly sealed, but don’t throw them away. You can either put them in the refrigerator for immediate use or try to re-cap them using steps 4 through 6. As a general rule, canned food is best used in the first year. Store your butters in a cool dry place.


Reap the Fall Garden Harvest and Make the Beds for Winter

Girl holding a squash
Now is the time to reap the end-of-season harvest. (Image by Jessie Keith)

Bringing in the sheaves,” goes the old hymn, “bringing in the sheaves.  We will come rejoicing, bringing in the sheaves.”
Mid to late fall is when gardeners “bring in the sheaves”, not to mention the tomatoes, pumpkins, cool season greens or whatever crops might still be growing in beds, borders, and containers.  As night temperatures dip, it is time to harvest your produce or risk losing it, except in a few cases, like carrots, kale, and collards, where flavor actually improves with a little frost.

Dahlia 'Deerwood Erika'
Once the tops of the dahlias have died back, it is time to dig their tuberous roots and store them indoors through winter. (Image by Jessie Keith)

Collect Seeds and Dig Dahlias

Edible crops are not the only harvest items.  It is also time to collect seeds from heirloom annuals—flowers and vegetables—that you want to save for next year.  (Click here to learn more about saving heirloom seeds.) Sort and store your seeds in labeled paper packets and keep them in a cool dry place through winter.  If you live in a cold-winter climate, that same cool dry place can provide an out-of-season home for tender dahlia tuberous roots and gladiolus corms. When digging dahlias, be sure to clean them gently while keeping the roots and lower stems intact. Be sure not to disturb any of the growing points, or “eyes”, located just below their stems.

Once they have been dug, allow the corms and roots to dry off for a few days, then nestle them into labeled boxes, tubs, or bags full of dry vermiculite, perlite or peat moss. The stored roots should be kept moderately dry, but not bone dry. In winter, check and mist the contents periodically to keep them from completely drying out.
The late-season garden just on the cusp of frost time. (image by Jessie Keith)

Bring in House Plants

It is not exactly harvesting, but fall is also the season to bring tender container specimens, like tropical foliage plants and citrus, into the house. Before bringing them indoors, clean off and inspect both pots and plants carefully for hitchhiking pests. Clean plants from top to bottom with insecticidal soap, if you are concerned that they may harbor unwanted pests. You may also consider repotting incoming houseplants in Fafard Natural & Organic Potting Soil. (Click here to learn more about cleaning and repotting house plants.)

Clean Up Beds

But even as you bring crops, plant materials, and potted specimens into the house, a good many chores await outside.  Brisk, or at least moderate, fall weather and the beautiful change of leaves make these outdoor tasks a bit easier.

Dill Seed
Seed collecting is an important part of the fall harvest process. (Image by Jessie Keith)

First, decide what you want to do with your ornamental beds and borders. (Click here to learn the best ways to clean your fall landscape!) Some gardeners, especially habitat-conscious ones, leave lots of seedhead-bearing plants standing to provide late fall and early winter rations for birds and wildlife.  If you are one of them, remember to keep pulling up the weeds that sprout around those plants as long as the ground is workable.  This will make life much easier come spring.

If neatness is a priority, pull out spent annuals and cut down stalks of perennial plants.  Compost the remains.  If your spring planting scheme features some unfilled spaces, now is the time to plant bulbs like daffodils, tulips, and hyacinths.  Once the ground has frozen, mulch with several inches of pine straw, clean hay or chopped leaves to protect plants from the effects of winter frost heaves.  Use extra mulch around shallow-rooted ornamentals, like the popular Heuchera and Scabiosa, not to mention anything that is only marginally hardy in your climate zone.  Delicate shrubs, like some roses, can be surrounded with stake-supported “cages” covered with hardware cloth or burlap.  These can be filled with chopped leaves to insulate the plant from cold winter winds.

Fafard Natural & Organic Potting Mix with RESILIENCE packPlant a Cover Crop

Another option for enriching the soil of a productive plot is to sow a fall cover crop of vetch or crimson clover.  This kind of “green manure crop” fixes nitrogen in the soil and can be tilled in or turned under in spring, which allows it to do one final good garden deed as a soil amendment. Cover crops also protect the soil by reducing erosion.

As you do these chores, remember that these are the last acts in the seasonal play that is gardening.  Applying a little extra effort in fall is an investment in next year’s flowers, vegetables, and fruits.

Fall Garden Cleanup

Fall Garden Cleanup Featured Image
By mid-fall, garden beds need to be cleaned and last season’s annuals cut back.

Putting your garden to bed will result in a prettier, healthier garden from fall to spring. It’s essential to know what areas to clean, what to prune, what to leave undisturbed, and what to protect. Simply taking a leaf blower to your beds and landscape is a start, but there’s more to the process if you want to do it right.

Clean Beds

Waning perennial garden
A waning perennial garden before the first frost.

When cleaning your garden beds, consider bed appearance as well as plant appearance and health. This means determining what should be cut back and cleaned and what should be left alone until spring.

Begin by cleaning out loose-leaf material by hand or blower with a focus on the most visually conspicuous areas. Smart gardeners are wise to leave some leaf litter in beds to provide added winter protection for more tender plants and help support overwintering pollinators. (Some species of overwintering native bees and butterflies use undisturbed leaf litter as essential winter habitat. Click here to learn more.) After clearing away unwanted leaves, give your fading garden plants needed attention.

Dead or dying annuals are the first thing to cut back or pull. If some have mature seed heads, consider scattering their seeds in hopes of getting a few extra seedlings in spring. Once annuals are removed and beds smoothed, start work on your perennials and shrubs.

Many perennials look great over winter and their crowns are protected by leaving the top growth intact. Leave all healthy evergreen perennials, such as lavender and sage, alone. Most ornamental grasses, coneflowers, asters, and black-eyed-Susans can also remain up until late winter. Some of these perennials, such as grasses, coneflowers, and asters, produce seed heads that naturally feed overwintering songbirds. Hardy perennials that die to the ground, such as daylilies, hardy geraniums, hostas, Shasta daisies, and salvias should be cut all the way back to keep gardens looking tidy.

Edge and Cover Beds

Garden covered in frost
Edge and provide some cover while leaving attractive perennials up for winter.

After cleaning beds, cut fresh bed edges (Click here for a how-to video about edging.), and apply mulch. Lots of mulches will work, but dark, earthy leaf mulch is landscape gold. Not only does it look good, but it breaks down quickly to naturally feed soil, and it is easy to create from yard leaves. [Click here to learn how to turn your fall leaves into mulch.] Screened, partially composted bark mulch is another good option for broadcast mulching. For small garden spaces, Fafard Premium Natural & Organic Compost can be applied as a high-quality, fortifying mulch.

When mulching, work around perennials and shrubs. Many plants will die or perform poorly if their crowns and trunks are thickly layered with mulch. Succulents, alpines, rock garden plants, hosta, and heuchera should never have heavy mulch applied on or around their crowns.

Fall Pruning

Use clean shears and wear gloves when pruning in autumn

In fall, start by cutting back any dead, unhealthy, or crossing branches from trees and small shrubs. When pruning out dead, diseased, or infested wood, prune just below the point where growth is still fresh and healthy. If you think that a plant you are pruning is diseased, be sure to clean your pruning shears in a 10% bleach solution before pruning another plant. If additional pruning of flowering trees and shrubs is needed to shape the plants, first determine whether your shrubs bloom on old or new wood. It is okay to prune new-wood bloomers in fall but not old-wood bloomers.

French lilacs (Syringa vulgaris), azaleas and rhododendrons (Rhododendron spp.), forsythia, most viburnum, serviceberries (Amelanchier spp.), and some hydrangeas, such as oakleaf hydrangea (Hydrangea quercifolia), all bloom on old wood—meaning they set their flower buds for the next year shortly after they bloom. These plants should never be pruned in fall unless you want to cut off next year’s flowers. Old- or second-year wood bloomers are best pruned right after they flower. Butterflybush (Buddleja davidii), crepe myrtle (Lagerstroemia indica), and some hydrangeas, such as wild hydrangea (Hydrangea arborescens), bloom on new wood, so fall pruning is an option.

Pruning techniques vary from plant to plant. As a general rule, shrubs that bloom on new wood are forgiving and can be hard pruned, or cut back nearly to the ground. In fact, hard pruning is recommended for more aggressive shrubs, like Buddleja.

Toss it or Compost It?

Bed cleaning creates lots of waste. Some of the waste is perfect for composting and some is best discarded. Loose leaf matter makes great compost. Fall grass clippings and leftover edging pieces can also be thrown into the compost heap. Old perennial and annual waste can also be composted, if it appears to be clean and disease free. Healthy woody branches can also be chipped and added to the bin. Any material thought to have pests or disease should be thrown away. This is especially the case for vegetable waste, such as last-season’s tomatoes, which commonly develop early and late blights. Rose clippings should also be kept far away from the bin because of the many diseases they can harbor. [Click here to learn more about rose diseases and pests.]

Clean, coiffed beds with crisp edges look great and will make spring prep a breeze. They will also make it easier to plan and implement fall bulb plantings and decorate for the winter holidays.

Saccharum ravennae
Grasses, such as this Ravennagrass (Saccharum ravennae) can be left up into winter.

Easy Pumpkin Spice Cupcakes with Cinnamon Buttercream

Zucchini CupcakesIf you have fresh or canned pumpkin, try this sweet seasonal dessert! These pumpkin cupcakes are something the whole family will love, and they are so easy.
If pumpkin is not available, you can also use shredded zucchini, carrot, or mashed sweet potato in its place. Gather the following ingredients and preheat the oven to 350° F.

Cake Ingredients

  • 1 package (18-1/4 ounces) spice cake mix
  • 1-1/3 cups water
  • 1/4 cup canola oil
  • 3 eggs
  • 1 cup canned pumpkin or fresh processed pumpkin
  • 1/2 cup golden raisins (optional)
  • 1/4 chopped walnuts (optional)

Directions

In a large bowl, combine the cake mix, water, oil and eggs. Beat these ingredients on low speed for 30 seconds, then increase the speed to medium for another 2 minutes. Stir in the pumpkin, raisins, and walnuts. Line a cupcake pan with muffin cups. Fill the cups a little over half way with batter.
Bake the cupcakes at 350° for 18-22 minutes. Before removing from the oven, test a cake with a toothpick. If it comes out clean, they are done. Allow the cakes to cool for 10 minutes before removing them from the pan. They must be completely cool before frosting. Be sure to add a generous amount!

Cinnamon Buttercream Frosting

  • 2 sticks butter, softened
  • 2 cups confectioners’ sugar
  • 1 teaspoon pure vanilla extract
  • 1/2 teaspoon ground cinnamon
  • 1/8 teaspoon ground nutmeg
  • 1 to 2 tablespoons whole milk

Directions

For frosting, in a small bowl, beat butter until light and fluffy. Beat in the confectioners’ sugar, vanilla, cinnamon, nutmeg and enough milk to achieve a spreading consistency. Add the frosting to a piping bag, and pipe it on to make it look extra pretty.

Processing Fresh Pumpkin

Fresh pumpkin and winter squash make recipes taste better. Small pie pumpkins are easiest to process because of their manageable size.
Begin by cutting your pumpkin in half and cleaning out the seeds. (Set aside the seeds for roasting!) Place the pumpkin halves face down in a large pan filled with 2 to 3 inches of water. Set the pan on high heat and bring the water to a rolling boil. Once boiling, take the heat down to a low boil, and allow the halves to steam for 20 minutes or until the pumpkin is soft. Allow the halves to cool before scooping.
If the pumpkin is stringy, puree it in a food processor until smooth. Processed fresh pumpkin is great for baking or adding to soup.

Gorgeous Garden Goldenrods

Canada goldenrod
Canada goldenrod (Solidago canadensis) is one of the most common field species in North America. (Photo by Jessie Keith)

It is hard to think of goldenrod (Solidago spp.), as something precious and special when it is so extraordinarily ubiquitous.  Native to all of North America, it bursts into bloom in late summer and early fall, lining field edges, roadsides and just about every sunny space where it can gain a foothold.  In its native land, it is often damned with faint or non-existent praise.  Even worse, it is unjustly damned as the source of pesky, end-of-summer hay fever attacks.

'Little Lemon' goldenrod
The compact ‘Little Lemon’ is a tidy, small goldenrod fit for border edges and containers. (Photo by Jessie Keith)

Ragweed, goldenrod’s seasonal fellow traveler, is the true cause of most late-season allergies.  Ragweed is a stealth allergen. It’s so visually nondescript with its humdrum green flowers that people overlook it in their quest to point accusing fingers at goldenrod’s bright plumes.  Like many hay-fever-trigger plants, ragweed is wind pollinated. It relies on the breeze to complete its pollinating chores, sending tiny pollen granules flying through the air where they meet up with sensitive human beings.

Goldenrod, on the other hand, is pollinated by bees and other insects, meaning its pollen never becomes airborne and causes us no harm.
Common and condemned, goldenrod had to go all the way to Europe to lose its bad reputation.  Europeans, untroubled by hay-fever concerns, common origins, and supposed coarse appearances, fell in love.  When plant people on the other side of the Atlantic got hold of the winsome field flower, that love translated into hybridizing.  The result of international travel and human-initiated plant hanky-panky is that gardeners have the option of getting their goldenrod two ways—wild or bred into garden-worthy forms.

Solidago 'Crown of Rays' is a tidier cultivated form for the garden. (Photo by Jessie Keith)
Solidago ‘Crown of Rays’ is a tidier cultivated form for the garden. (Photo by Jessie Keith)

Goldenrod’s lineage makes it natural for the home garden.  At first glance, the resemblance is hard to see, but Solidago is in the daisy family, Asteraceae.  Each lush flower panicle is made of up of many miniature golden daisies that can be seen up close. Loaded with pollen, they attract bees, butterflies, and many other insects.  If you have ever eaten wildflower honey collected in fall, you have most likely tasted the autumnal richness of goldenrod.

In the garden, these hardy perennials ask for little. Established plants can tolerate dry spells in fine fashion, and some species are tolerant of moist soils. Sunny space is ideal for the plants, although some will also prosper in light shade, sporting somewhat fewer flowers per stem.  Anyone familiar with field goldenrod, which is frequently, but not always, Solidago canadensis, knows that it can grow 3 to 6 feet high and forms large clumps due to its vigorous, spreading root systems.  Clearly, this is not ideal for all gardens.  Fortunately, breeders have come up with more civilized, compact garden goldenrods that are perfect for small spaces or containers.

Fafard Natural & Organic Potting Soil with RESILIENCE packOne of those compact varieties is Solidago ‘Little Lemon’, which reaches only 12 to 18 inches tall. It looks cute in seasonal containers, but this perennial should be replanted along a border edge before frost descends.  The popular ‘Crown of Rays’, which grows 18 to 24 inches tall, is another compact form to consider. For a medium-tall variety, try the popular Solidago rugosa ‘Fireworks’, which grows 3 to 4 feet tall and spreads less aggressively than some wild forms. The winter seed heads of all goldenrod add garden beauty by attracting the lovely, yellow-feathered goldfinch.

To make potted goldenrod thrive, fill your chosen container with Fafard Natural and Organic Potting Soil. This premium mix is full of the kind of rich organic materials that goldenrod would choose for itself if it were able. Amend garden soils with Fafard Premium Natural and Organic Compost before planting.

The word “Solidago” comprises two Latin words that mean “to make whole”.  “Solidago” shares a common root with the English word “solidarity”.  This seems perfect for goldenrod, which finds solidarity with a variety of plants that bloom at the same time.  The most prominent of them is the blue-purple Symphiotrichum novae-angliae (New England aster).  Mums, especially those in burnt orange or dark red shades, also make good companions.  In the fields, the waving golden wands harmonize with the last of summer’s true blue chicory, not to mention purple ironweed (Vernonia spp.) and lots of airy native grasses.

Goldenrod is a great garden plant, but it also makes an excellent cut flower.  Best of all, since no one has ever been inclined to pick ragweed and add it to a vase, you can enjoy goldenrod’s sunny fall flowers indoors without resorting to allergy medicine or the tissue box.

Strands of Solidago rugosa 'Fireworks' with red dahlias and Salvia elegans 'Golden Delicious'
Strands of Solidago rugosa ‘Fireworks’ intermingle with a fall planting of red dahlias and Salvia elegans ‘Golden Delicious’. (Photo by Jessie Keith)

Elegant Spider Chrysanthemums

Chrysanthemum x morifolium 'Kishinonishi'
Spider chrysanthemums, such as ‘Kishinonishi’, produce long tubular ray florets which may coil or hook at the ends. (Photo by Jessie Keith)

There’s so much more to chrysanthemums than the ubiquitous “garden mum”.  Spider chrysanthemums are a wonderful and weirdly beautiful example.   Like common “garden mums”, they trace their origin to hybrids of Chrysanthemum indicum, first developed in China more than 2000 years ago.  Over the centuries, these so-called “florist’s chrysanthemums”, known botanically as Chrysanthemum morifolium, have diverged into a dizzying array of forms and colors, some of them bordering on the bizarre.

Which, brings us back to spider mums.  As described by the National Chrysanthemum Society, this class of florist’s chrysanthemums produces blossoms with “long tubular ray florets which may coil or hook at the ends.”  The masses of spaghetti-thin, curling “petals” do indeed have a spidery, or medusa-like, or starburst effect – spectacular in some cases, and almost sinister in others.  Their distinctive form makes them favorites in wedding bouquets and other special-occasion floral arrangements.

Fafard Professional Potting Mix with RESILIENCE packAs with most of the 13 classes of Chrysanthemum morifolium, spider mums have been bred and selected mainly for cut-flowers rather than for garden use.  Consequently, few can tolerate frozen winters.  Their October bloom times also leave them vulnerable to fall frost, limiting their usefulness as annuals to regions where frost comes a bit later (USDA zones 6-7 and warmer).  Where suitable, they make choice additions to cut-flower borders and attention-grabbing (but relatively fussy) alternatives to common garden mums.

In the garden, spider mums are best planted in spring after the danger of frost has passed. They thrive in full to partial sun and friable, fertile, humus-rich soil. Numerous cultivars are available by mail order from specialty growers, with a few sometimes finding their way to local nurseries and greenhouses.  Among the most notable are ‘Descanso’, which bears huge medusa blooms in shades of bronze and apricot, the white-flowered ‘Chesapeake’, and ‘Fleur de Lis’ with its fountains of lilac-pink “petals”. To find these and other spider mums, visit King’s Mums.

Of course, in whatever climate, spider chrysanthemums can be grown the traditional way: in containers.  Young plants purchased in late winter or early spring will prosper indoors or out (after danger of frost) in a coarse, fertile, compost-based potting mix, such as Fafard Professional Potting Mix.  A deep 4-inch pot is good to start, but vigorously growing plants should be moved to larger containers every couple of months.  After plants flower, they can be cut back and kept relatively dry in a cool, frost-free location.

For the full traditional effect, these mums should be disbudded.  This involves pruning out all but a few stems and removing most or all of their side shoots.  Only one to several flower buds are left to develop at the tip of each stem, resulting in exceptionally large blooms – just the thing to wow greenhouse visitors or chrysanthemum show judges. If you don’t disbud, you will get more flowers, but they will be smaller.

Chrysanthemum x morifolium 'Kokka Senkin'
Chrysanthemums come in many other forms, such as this irregular incurve, ‘Kokka Senkin’. These and many others can be viewed at select Chrysanthemum shows across the country.

Several U.S. public gardens – including Smith College Botanical Garden in Northampton, Massachusetts, and Longwood Gardens in Kennett Square, Pennsylvania – offer the ultimate in chrysanthemum “wow”, staging lavish displays of hundreds to thousands of florist’s chrysanthemums, grown (and disbudded) to perfection.  Spiders, Anemones, Quills, and all manner of other chrysanthemums take center stage at Lyman Conservatory at the Botanic Garden of Smith College from November 5 to 20, and at Longwood’s 4-acre conservatory from October 22 to November 20.  These chrysanthemum celebrations will convince even the most jaded observer that there’s far more to mums than the cushion mounds at the local garden center.

Best-Tasting Winter Squash

Best-Tasting Winter Squash Featured Image

Fall time is winter squash time. Whether you plan to make squash soup, a pie, or pasta, some varieties taste better than others. Here are some of the very best to seek at the market and consider growing in the vegetable garden. Many are beautiful and all have outstanding flavor.

Winter Squash Types

Sunshine Kabocha Squash

Several of the varieties mentioned were bred outside of North America, but all winter squash originate from the New World. Species were first cultivated by Native Americans and developed over thousands of years. There are three primary culinary species known to cultivation—C. maxima, C. moschata, and C. pepo. True pumpkins and acorn squash are C. pepo, butternut squash are in C. moschata, and turban and kabocha squash are in C. maxima.

Across the board, the winter squash on this list rate at the top for flavor, according to countless formal and informal trials and reviews. Gardeners can be confident in choosing any one, if good taste is what they value in a squash. Most are also high performing in the garden.

Kabocha Squash

Kabocha (C. maxima) are squat, orange, green or gray-green squash that originates from Japan. They have dense, dry flesh that is bright orange. Two of the more common, and nicest tasting are ‘Red Kuri’ (92-100 days) with its orange-red skinned fruits and smooth flesh that is less sweet but nicely flavored, and the gray-skinned ‘Winter Sweet’ (95 days), which has dry, sweet flesh.

Acorn Squash

Acorn Squash
Cream of the Crop Acorn Squash

Acorn squash (C. pepo) are wonderfully sweet, deeply lobed, acorn-shaped, and great for roasting. The cream-, gold-, and dark-green-striped cultivar ‘Jester’ (95 days) is just as pretty as it is tasty. Another comparable variety with super sweetness is ‘Sweet Dumpling’ (90-100 days) with its smaller, squatter, ivory and green fruits, and honeyed orange flesh. A less sweet, but colorful, variety is the orange-, cream-, and dark-green-splashed ‘Festival’ (90-100 days). ‘Cream of the Crop’ is a pretty ivory colored variety with good, mild flavor.

Pumpkins

Baby Pam Pumpkin
Baby Pam Pumpkin

One of the finest pumpkins for pie is the tender-skinned C. pepo ‘Winter Luxury’ (105 days). Each year this variety, and the small, pie pumpkin ‘Baby Pam’ (105 days), are the pumpkins that I choose for making homemade pie. The ‘New England Pie’ pumpkin (105 days) is an old heirloom from the 1800s that is also highly recommended. The unusual, lumpy, blue-gray-skinned C. moschata ‘Marina di Chioggia’ (100 days) is an Italian heirloom turban squash with dense, sugary, orange flesh great for pies, soups, and desserts.

Butternut Squash

Butternut Squash
Butternut squash have some of the best flavor of all!

Butternut cultivars are pretty consistent when it comes to flavor. All have richly sweet, nutty flesh favored for all kinds of fall and winter cookery. The compact variety C. moschata ‘Butterbush’ (75 days) is short-vined and bears small butternut squash that are dark orange, dense and very sweet on the inside. Vines are quite productive and early to bear.

Other Winter Squash Types

Delicata Squash
Delicata Squash

The cream- and green-striped, elongated fruits of Cucurbita pepo ‘Delicata JS’ (100 days) are thin-walled and have sweet, nutty, golden flesh. The small, ornamental fruits of ‘Sweet Lightning’ (100 days) look like tiny pumpkins striped with cream. Its sweet, stringless, pale orange flesh is said to be even better tasting than that of ‘Delicata JS’.

Cultivating Winter Squash

Winter squashes need to be started in spring for fall harvest. Be sure to plant them outdoors after the threat of frost has passed. It pays to plant them on berms (click here to read all about berming) amended with lots of organic matter. Fafard Premium Natural & Organic Compost, and Fafard Garden Manure Blend are recommended for spring soil enrichment.
Full sun and space are essential for these sprawling, vining plants. Many may require as much as a 12’ to 15’ patch to grow to their fullest. You will know the fruits are ready to harvest when they are hard, have full color, and their supporting vines start to wither.

Winter Squash Pests and Diseases

There are several pests and diseases that cause squash vines real trouble. Powdery mildew is a common fungal disease that damages leaves and gives then a white, dusty appearance. (Click here to learn how to manage powdery mildew.) Squash vine borers bore into vines and cause them to quickly wilt and die. (Click here to learn how to manage squash vine borers.)

By fall, you should be able to find these squash at farmer’s markets and orchards. You might also consider planting one or two in your garden next year.

Cucurbita pepo 'Sweet Lightening'
Cucurbita pepo ‘Sweet Lightening’

Bulb Specialist Russell Stafford on the Best Spring Bulbs

Iris reticulata 'Michael's Angel'
The clear blue color of Iris reticulata ‘Michael’s Angel’ pairs beautifully with golden crocus.

Flower bulbs can’t be beat for bringing bursts of color to the garden. And they do it in such delightful fashion – their shoots thrusting up almost magically from the seemingly unoccupied ground in sudden crescendos of bloom. Then, just as suddenly, they pass from the scene, returning to the ground to wait out the months until their next brief fling.

The Siberian trout lily 'Altai Snow' is rare but worth seeking out.
The Siberian trout lily ‘Altai Snow’ is rare but worth seeking out.

Most garden bulbs (which botanically speaking comprise plants that grow from tubers, rhizomes, corms, true bulbs, or other underground storage organs) owe their fast and furious above-ground lifestyle to the short growing seasons that prevail in their native haunts. Many hardy “bulb” species, for example, hail from regions that receive most of their annual precipitation from late fall to early spring. The steppes and uplands of Central Asia – the ancestral home of many garden bulbs – are a place of long dry summers, cold bitter winters, and brief springs. Long, arid summers also characterize the climates of the bulb-rich Mediterranean and South African Cape regions.

Other bulb species are native to localized plant habitats that experience seasonal shortages of moisture or sunshine. Deciduous woodlands are the spawning ground of many of the most familiar shade-loving bulbs, which complete their above-ground growth in early spring before the canopy chokes out rain and sunlight.

Whatever their land of origin, most hardy bulbs need relatively moist, cool to cold winters and relatively dry summers, developing their roots in late autumn and winter and putting in an above-ground appearance for only a few weeks in spring or fall. Frost-tender bulbs, on the other hand, often come from regions in which rainfall and growth are concentrated in summer.

Corydalis, such as this Corydalis malkensis, come in many forms, all beautiful for spring.

This is something to keep in mind when placing bulbs in the garden. Of course, a massed annual bedding display of hybrid tulips or hyacinths can be great fun and will work in just about any reasonably good soil. But a perennialized planting of less highly bred bulbs, artfully deployed in the appropriate garden habitat, can be equally compelling. Any garden niche that roughly mimics the conditions of a Central Asia steppe or a
Mediterranean chaparral or a temperate forest understory is fair game for a scattering of naturalized bulbs, which mingle beautifully with herbaceous and woody perennials that derive from the same natural habitat.

Reticulated irises (Iris reticulata and its hybrids) and “species tulips” (such as Tulipa humilis) make natural companions for penstemons, dwarf campanulas, plumbago (Ceratostigma plumbaginoides), low sedums, and other perennials that occur naturally in rocky steppe habitats. Likewise, crocuses, colchicums, cyclamens, and tuberous anemones look right at home with lavender, perennial candytuft (Iberis sempervirens), shrubby sages, and other small shrubs from the Mediterranean. And just about any partly shaded garden niche could benefit from a colony of woodland bulbs such as corydalis (including Corydalis solida) and trout lilies (Erythronium spp.).

A sunny garden site that dries out somewhat in summer is likely to be favorable for most sun-loving bulbs. In areas that are subject to summer rain and humidity, a well-drained soil works best. Rock gardens and troughs; embankments; wall plantings; sandy berms – all are ideal locations for grape hyacinths (Muscari spp.), ornamental onions (Allium spp.), and other steppe and Mediterranean natives. Quite a few sun-lovers (including many fritillaries and irises) absolutely require a dry summer rest, rotting away in warm moist conditions. Conversely, most woodland bulbs are relatively unfussy, thriving in just about any partly shaded site.

Species tulips (Tulipa bifloriformis shown) are often reliable perennials that spread over time.

Whatever their favored exposure, bulbs tend to do best in relatively rich soil, and will usually benefit from a sprinkling of high-potassium fertilizer in early fall or spring. For excessively dry or heavy soil, incorporate a good amendment for fertility such as Fafard® Sphagnum Peat Moss and/or Compost. A general rule of thumb is to plant bulbs at a depth of 2 to 3 times their diameter (from the soil surface to their tips). Bulbs (such as crocuses and tulips) that are favorite morsels for chipmunks and squirrels may need protection such as a hardware cloth barrier (or interplant them with bulbs that rodents tend to avoid, such as narcissus and alliums).

The right bulbs in the right place will add a seasonal spark to any garden. Plant some this fall to reap your reward next spring, and beyond!

How to Grow Your Own Garlic

How to Grown Your Own Garlic Featured Image
Freshly harvested and cleaned hardneck garlic.

Growing garlic is easy and gratifying. For starters, it tastes infinitely better than store-bought. Secondly, there are also tons and tons of wonderful cultivated varieties to choose from that vary in size, color, heat, and flavor. Garlic isn’t just garlic when you become tuned into its diversity (just check out the offerings at The Garlic Store). And fall is the time to plant it.

Planting Garlic

The cultivation process begins in fall when the soil is still workable, usually between October and December. Just like any other root crop, the best bulbs develop in well-drained, friable garden loam. Then amend with compost, such as Fafard Premium Natural and Organic Compost, and add some bulb fertilizer for assured success

Child digging a hole for planting
Garlic should be planted in fall in fertile, amended loam.

For planting, dig holes 3 to 6 inches deep and 12 to 16 inches apart. Set a single clove in each hole with the tip pointing upwards and the blunt root base down to a depth of 4-5 inches. Cover with soil, water, and wait. Within a couple of weeks, sprouts should rise from the soil, and the plants may reach 6 inches or more before heavy frosts hit. Garlic will overwinter in an evergreen to semi-evergreen state where winters are mild but will die back in colder zones.

Garlic Growth Cycle

In spring, garlic plants will emerge and leaf up, and by late spring to early summer each will produce a heronesque flower or bulbil bud. The buds should be removed as soon as they appear or they’ll deplete the precious garlic bulbs underground. Just clip the stems back to the main plant, but don’t throw away the buds. They’re also good eating and look and taste great stir-fried or sautéed.

Some garlic varieties produce earlier in the season and others produce later, so it’s nice to plant a seasonal variety that will mature at different times. On average, most cultivars are harvestable by midsummer. You will know they are ready when their tops begin to turn brown. Refrain from watering the plants at this time to keep bulbs from rotting.

When the tops start to turn dry and begin to bend down, the cloves are ready to harvest. Dig the bulbs and allow them to dry in a cool, airy place away from sunlight. The drying technique depends on the garlic type. Softneck garlic can be hung to dry in braids, and the tops of hard-neck types can be cut and the bulbs dried on a dry, breathable surface. Store in a cool, dry place.

Softneck and Hardneck Garlic Varieties

Child with garlic cloves
It’s amazing to see what a handful of garlic cloves planted in fall will become the following season.

Choosing the right garlic for you depends on where you live and the flavor your favor. The key distinction between types is whether they are soft or hardnecked. Softneck garlic is the most popular type grown in Europe and the American South. It grows better in milder climates (but will still grow well pretty far north), stores for longer, and has flexible necks that allow mature bulbs and plants to be easily braided into hanging garlic braids.

There are two softneck forms, silverskin and artichoke. Silverskin soft-neck garlic has smooth, silvery skin, more cloves and keeps for a very long time. Artichoke has coarser skin, fewer, larger cloves and a milder flavor. Still, heat, pungency, and flavor vary widely from cultivar to cultivar, so consider this when choosing garlic to grow.

Hardneck garlic is more commonly grown in northern and eastern Europe, Russia and North-Central Asia. It grows better in cooler climates, has a shorter storage life, and stiff necks that attach to the bulbs. This type produces fewer, larger cloves, which are fragrant and vary in flavor depending on the cultivar. Hardneck types are believed to be more closely related to wild garlic.

Garlic scapes
Garlic scapes appear in summer and are very good to eat.

The rewards of growing garlic are great. Homegrown bulbs have superior taste, you can grow lots of different types that vary in flavor, and they are cheap. Specialty varieties usually sell out early in the season, but gardeners wishing to experiment with garlic growing this late in the season still have an option. Garlic cloves from the grocery store (which are always softneck) work just as well. Just separate the cloves and plant away.