What makes a garden weed the worst? Four attributes make weeds very difficult to manage. These are 1) deep perennial roots, 2) re-sprouting roots, 3) lots of fast-to-germinate seeds, and 4) fast robust growth. Then you have the added bonus of weed nasties that are toxic and prickly. These are the weeds that take a productive garden bed and turn it into an impossible mess fast. If you have any of these in your garden, weekly weeding will be a necessity until they’re eradicated.
Noxious garden weeds vary based on where you live nationally, so those covered are ubiquitous across the whole of the US, though some are more regionally problematic.
Field Bindweed
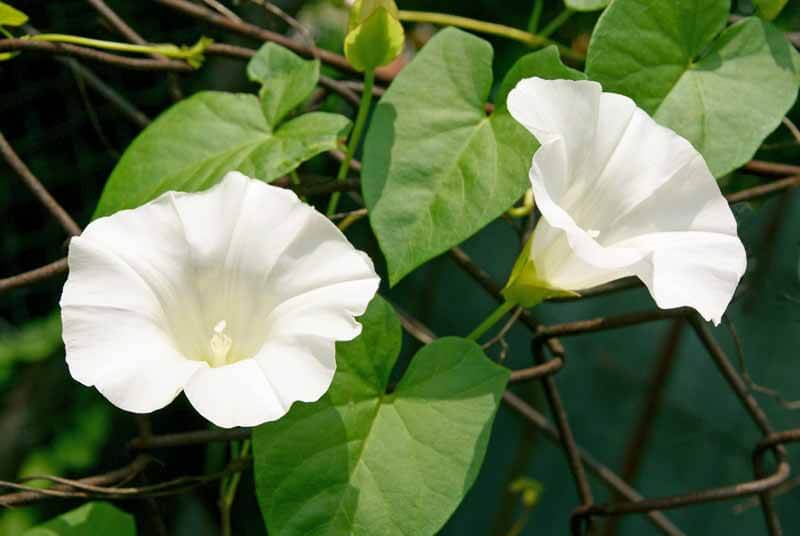
If you have a field bindweed (Convolvulus arvensis) infestation, you are in trouble. This fast-growing vine is one of the most aggressive, difficult perennial weeds to remove, and its little white morning-glory-like flowers produce lots of seeds. The main problem is with its white-rooted runners that spread deep and wide, making it very difficult to dig out. Leave just a piece, and it will resprout. These roots then become mixed up with shrub and perennial roots and are hard to reach. Moreover, weed killers won’t touch it. Managing the weed in a three-step process is the only way to get rid of it.
- Methodically dig out the white underground runners. Gently loosen the soil around each with a trowel, following them until the growing points are reached and the roots are fully removed. If you keep even a small piece in the ground, it will regrow.
- If the runners are intertwined with perennial roots, dig up the perennials, and remove the bindweed roots in full. (Before replanting, amend the soil with Fafard Premium Natural & Organic Compost for faster re-establishment.)
- To keep underground roots from returning in really infested areas, cover the area with mulch cloth and mulch it over. After a season, all parts should be smothered, and you can pull up the mulch cloth and resume gardening as usual.
Burdock
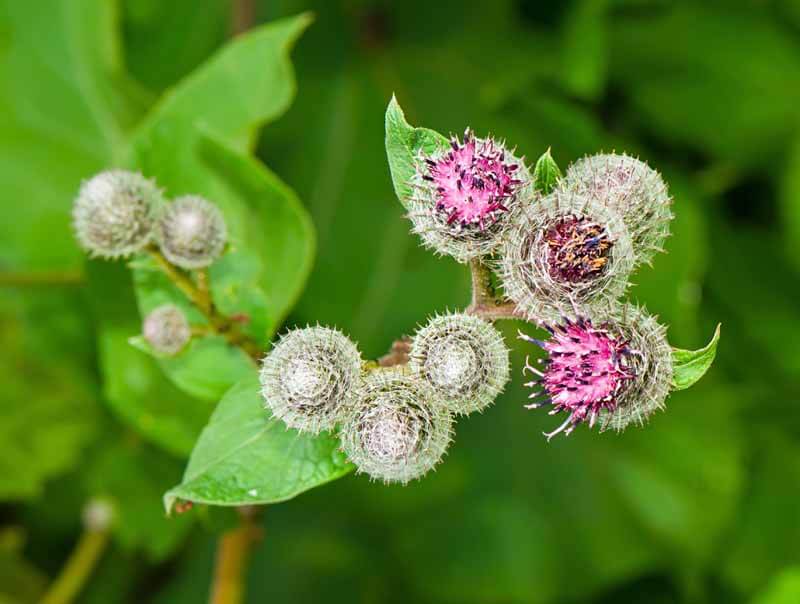
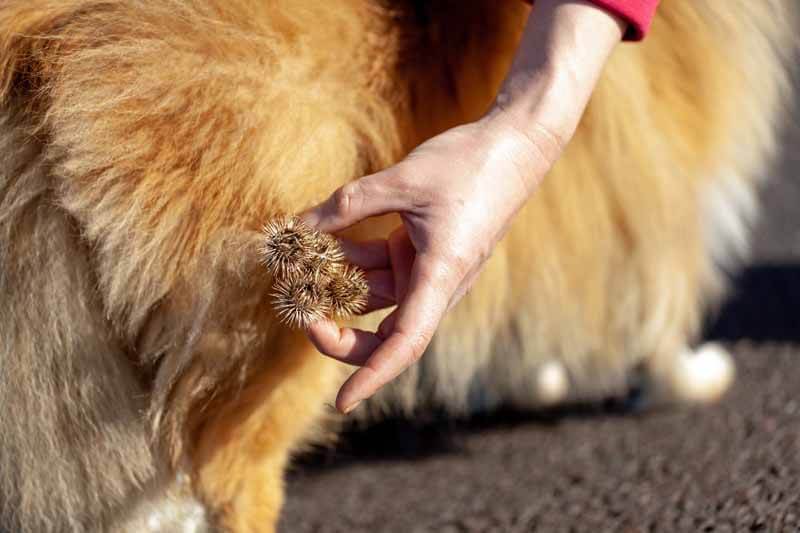
Burdock (Arctium spp.) is a huge, pesky weed of landscape and garden that has the added annoyance of developing giant burrs that attach to pet fur and are hard to get out. If you let a burdock plant go, it will develop a giant clump of huge leaves supported by a giant taproot that reaches deep into the ground. The flower heads look like little thistles and develop into large barbed burrs. The only way to remove a mature plant is with a long, sharp spade. Be sure to dig the root out in full.
Ground Ivy
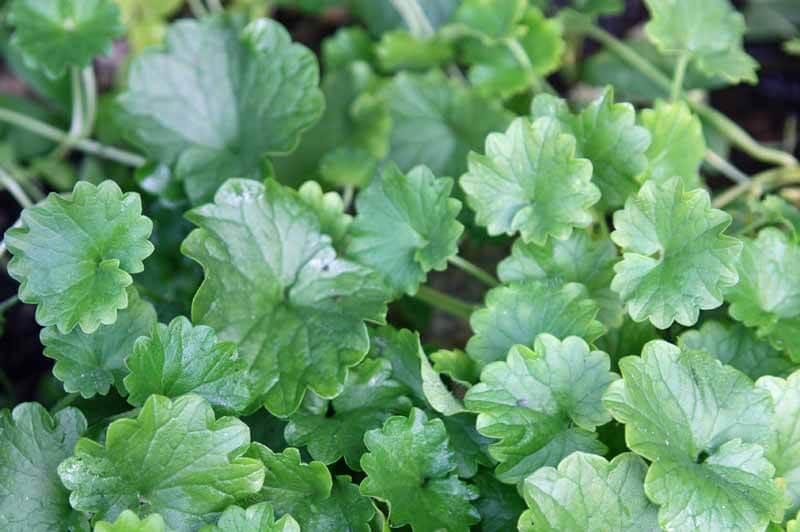
Ground ivy (Glechoma hederacea) aggressive member of the mint family is a low grower with creeping stems that form a weedy mat over your garden in no time. It also thrives in lawns, so you will need to rely on a broadleaf herbicide for the lawn if you want to truly get rid of it. (Corn gluten is an organic broadleaf herbicide option.)
Thankfully, this weed is very easy to pull, but it seeds in fast, and if you leave even the tiniest piece in the ground it will root and regrow. The best way to manage it is to remove it from garden beds first thing every spring and then apply a good layer of mulch. If some little pieces try to break through, pull them out quickly.
Canada Thistle
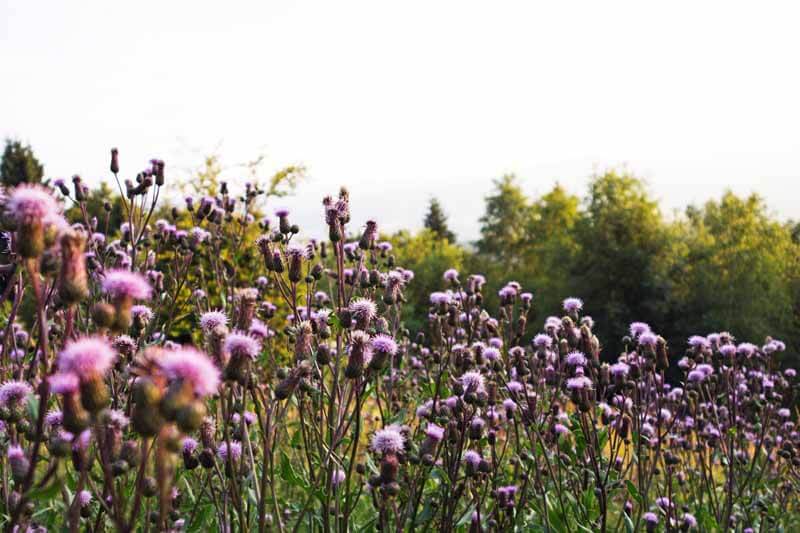
Canada thistle (Cirsium arvense) is another of the most notoriously difficult garden weeds. The painfully prickly plants produce copious puffy seeds that get caught in the wind and spread everywhere. Once they become established, a single plant will create a dense colony connected by deep, rooting rhizomes that are impossible to dig out entirely. If you leave just one piece, it will form a whole new plant. Plus, it is resistant to herbicides.
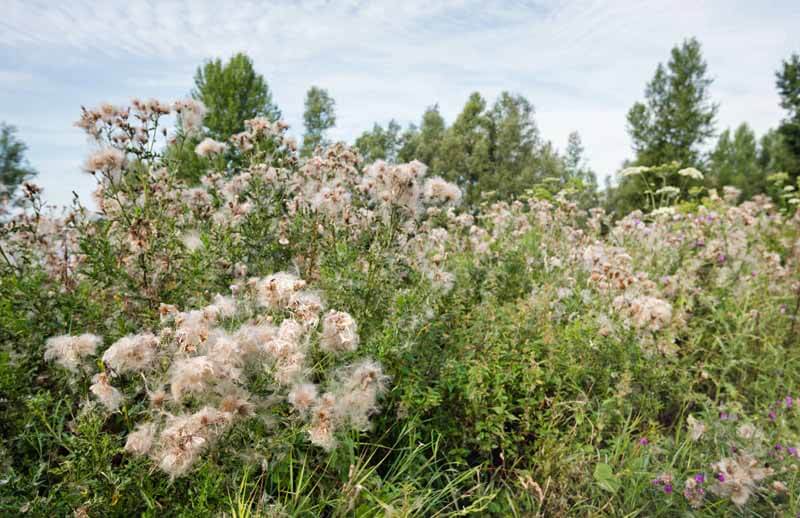
To remove Canada thistle, the best method is smothering plants with weed cloth and mulch until they are gone. This one will also creep into the grass, so try to keep lawn specimens under control with broadleaf herbicide. You also don’t want to let this one go to seed anywhere near your yard or garden.
Johnsongrass
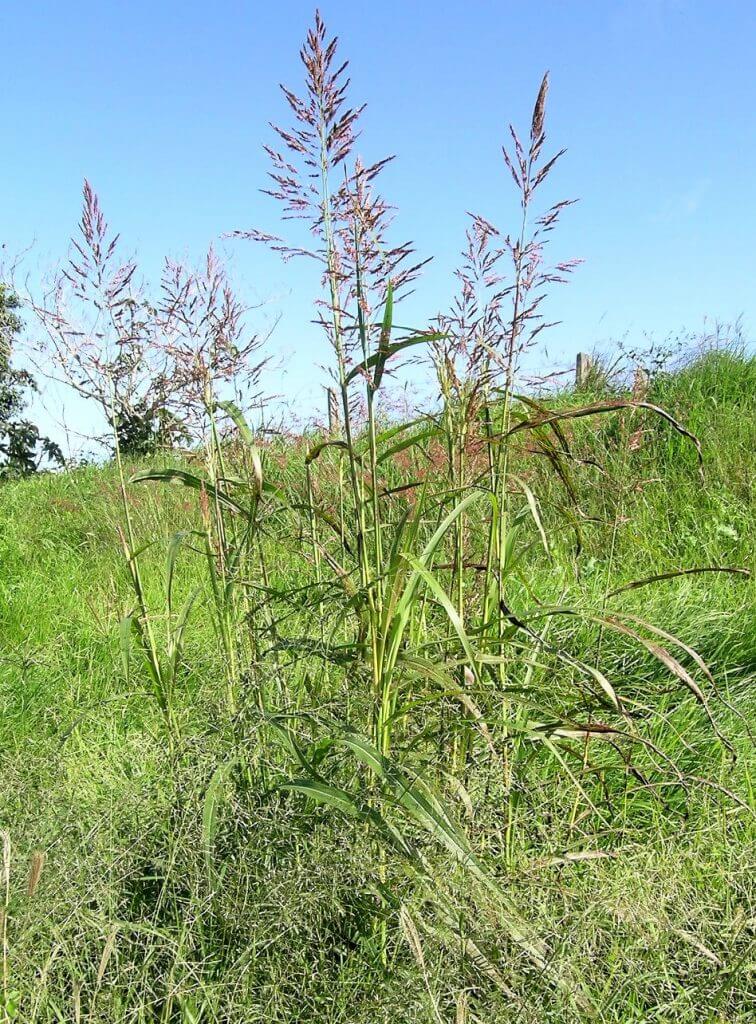
The pattern with these perennial weeds is that most have underground stems and roots that spread and resprout if one piece is left in the ground, and they all produce tons of seed that gets quickly spread hither and yon. Johnsongrass (Sorghum halepense) does this, too. This tall, tough grass requires a spade to remove, and gardeners must follow the trailing stems to capture all underground parts. The tip of each root is sharp, so beware.
Thankfully, most of its underground runners stay close to the soil surface, so they are easier to remove. You also want to get rid of specimens before they bloom and set seed in summer.
Mugwort
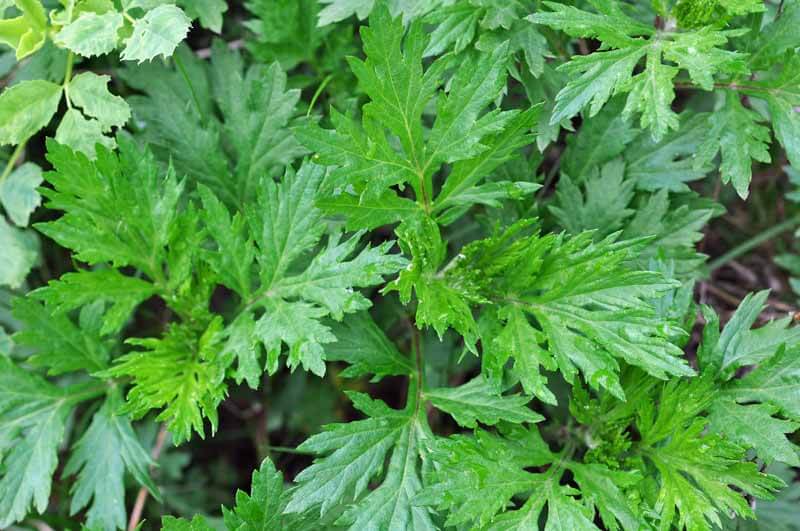
Mugwort (Artemisia vulgaris) is another massively aggressive spreader. And, sadly, this plant was brought to the states as a medicinal herb and flavorant for ale. It has since spread across the eastern United States and the whole of Canada.
The plant has a strong, resinous smell and spreads by the most aggressive lateral underground runners ever. Like Johnsongrass, these mostly remain near the soil surface, but they are so numerous that one has to dig extensively to remove the whole underground plant. I suggest a sharp spade and trowel and lots of elbow grease. Manage it as you would field bindweed.
Nutsedge
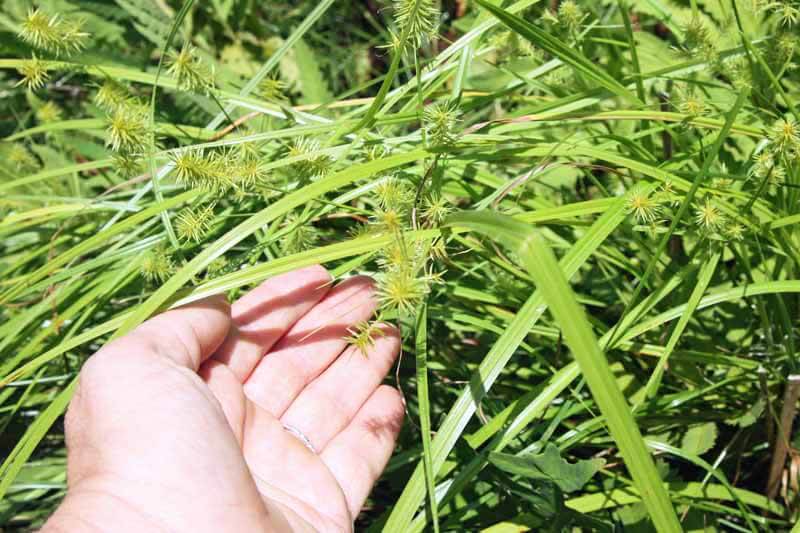
There isn’t a gardener that has not had the “pleasure” of weeding out nutsedge (Cyperus esculentus). This aggressive sedge establishes itself in the garden via copious seeds and fine, spreading roots that develop small, brown nutlet tubers. Leave just one of these tubers in the ground, and they will sprout into a whole new plant. (One side note is that the nutlets can be harvested and eaten.)
This sedge is not herbicide resistant, but its tubers are resistant. For this reason, dig out the plants rather than just pulling or spraying them. In the process, be sure to get all of the tubers. Then mulch the area over and diligently pull any small sedge sprouts as you see them.
Poison Ivy
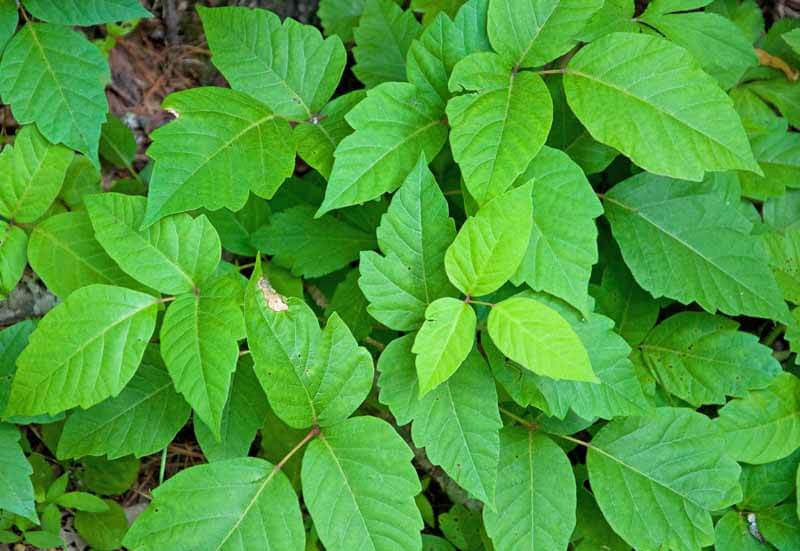
Safety and knowledge are needed when removing this toxic, much-feared weed. First, it is important to realize that you can get a poison ivy rash from any “dead” portion of the plant, from stem to root, and dry plant pieces will remain toxic for years. This is because its toxic oil (urushiol) is very chemically stable and remains potent for ages. That’s why you need more than a bottle of herbicide to remove it. Careful removal by hand is surprisingly the safest method, but you have to prepare well and do it carefully.
There are several things you will need to remove poison ivy without putting yourself in danger. Body Coverings: long thick pants, a long thick shirt that covers your wrists and body, long rubber gloves, and closed-hole shoes (rubber gardening boots are perfect). Tools: a sharp spade or trowel, pruners or loppers, and hole-free plastic bags large enough to contain all plant parts.
All plant parts must be removed. For smaller plants, fully dig them up and cover them with a plastic bag. Grab them with bag and enclose them without touching them. For large vines, cut the base with pruners or loppers, and remove as much of the upper part of the vine as you can. Do not pull it for fear it may fall on you. Once again, cover and grab the plant pieces with a plastic bag to reduce contact. Then dig out the roots with a spade and bag the pieces, too. T=Secure and trash all of the bags when finished.
Cleaning Up After Poison Ivy
During the removal process, watch everything that may have come in contact with the plant (tools, clothing, gloves, trashcan lid handle, door handles, etc.) You will need to clean everything properly.
Clean up: Toss the gloves and wash all possibly contaminated tools and surfaces with a coarse cloth and soap. Degreasing spray can be very effective. Remove all contaminated clothes and washcloths and wash them in a hot water cycle with the maximum amount of a strong detergent. (If you are really worried, you can prewash them in a bucket of hot water and detergent.) Lastly, wash and shower up completely using strong soap, a textured washcloth, and lots of friction. (Friction and good, strong soap should remove all the oil from your skin. If you are really sensitive, wash twice.) Technu soap is made to remove poison ivy oil and is a good choice. [Read here for further information from the USDA about rash prevention.]
Two more essential poison ivy warnings: Poison ivy will contaminate compost, so never add it to your pile. And, if burned the toxic oils of poison ivy become airborne, causing an extra dangerous rash on the skin and in the lungs.
Mowing and chemical sprays can cut poison ivy back, but they will not remove it, or its dangers. Take the time to carefully remove your plants, and your yard will be poison ivy free in no time.
