Articles

Easy Vegetables to Grow from Seed

Home vegetable gardening is riding a wave of popularity that is probably unprecedented since the Victory Gardens of World War II.  Salad greens are sprouting on rooftops and potatoes in patio containers.  Home-grown tomatoes seem to be popping up in every other suburban yard.  Explosions of summer zucchini are detonating in community gardens and front roadside “hell strips”.

If you want to get in on that kind of action, but find the prospect a little intimidating, it’s best to start relatively small and simple.  Growing vegetables from seed is inexpensive and easy, provided you pick types that are easy to grow. 

The best advice for beginners is to start with something that you like to eat and don’t go too big.  Shepherding a few vegetables successfully from seed to harvest will give you the confidence to venture further into vegetable gardening in successive seasons.

A few other helpful hints…Make sure the seeds you buy are packaged for the current growing season, not saved over from the last one.  Fresh seed always has a higher germination rate.  Amend your garden soil before planting with a nutritious mixture like Fafard Premium Natural and Organic Compost.   If you are growing your veggies in containers, use a potting mix that will start your seeds off on the right foot. Fafard Ultra Container Mix with Extended Feed will do the job nicely.

Bountiful Squash from Seed
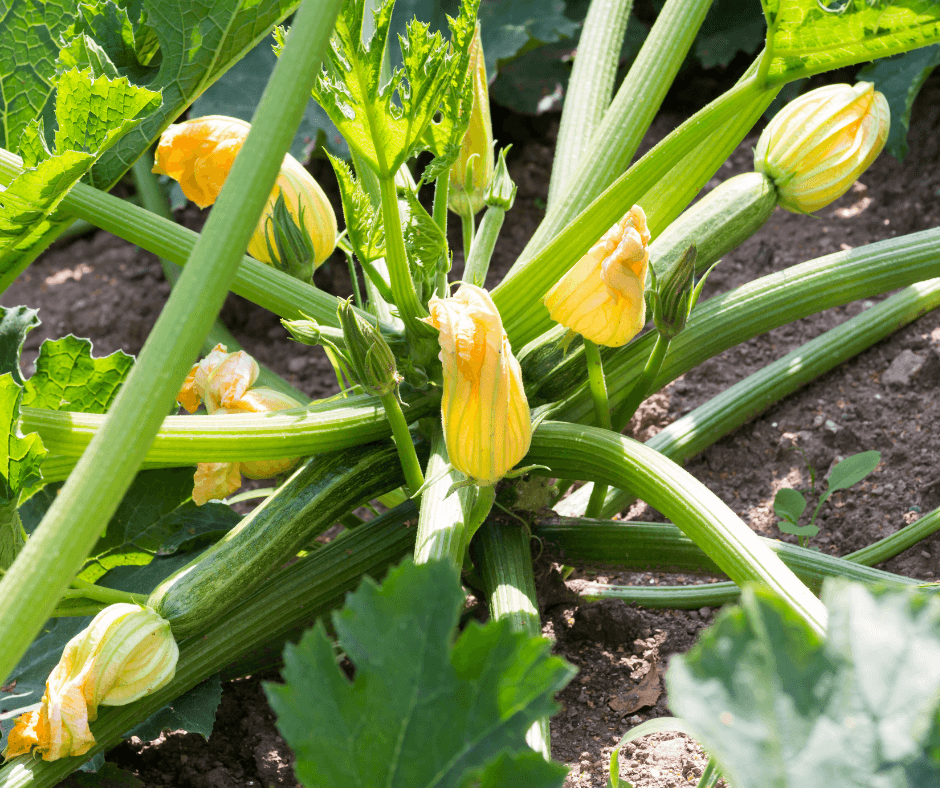
Most bush zucchini produce in as little as 45 days from seed!

Summer squashes, like zucchini and crookneck squash, are a boon to the novice grower, with big seeds, vigorous habits, showy flowers, and bountiful production.  While seeds can be started indoors, in many places summer squashes will do just fine if they are directly sown in a sunny spot with rich soil or, if they are bush-types, in a large container. Be sure to determine whether squash is vining or bushy before planting. Bush squash are compact while vining forms can reach enormous lengths. Trellising is an option.

Warm soil is a must, so check your area’s last frost date to find out when it is generally safe to plant. (Click here to identify your last frost date by zip code.)

Plant two to three seeds in small hills of soil. Plant them at a depth equal to about two times the width of the seed.  Squashes crave space, so keep those hills separated by at least several feet, depending on the final size of the squash variety.  When the seedlings appear, thin out the weakest one or seedlings by either pulling them out or snipping them off.  Leave the strongest. Water regularly, especially if rain is sparse, but do not drown the plants.  If the top of the soil is wet, and you’ve experienced good rains, skip the watering.

It is important to collar newly sprouted seedlings to keep birds and cutworms from cutting the seedlings from the base and killing them. Seedling collars are easy to make from paper cups, toilet paper rolls, and other materials. (Click here to learn more.)

Check leaves for evidence of pests and disease. Large pests can be picked off by hand.  Squash vine borers are a common problem that every squash grower must learn about (click here for management details). If powdery mildew, a fungal disease, appears, remove the affected leaves and spray the remaining foliage with either Neem oil or a solution of one tablespoon of baking soda per gallon of water mixed with a few drops of liquid dish soap.

Check seed packages for time from germination to harvest, but expect fruit in 45 to 60 days. Bushy varieties produce the earliest.

Tons of Tomatoes from Seed
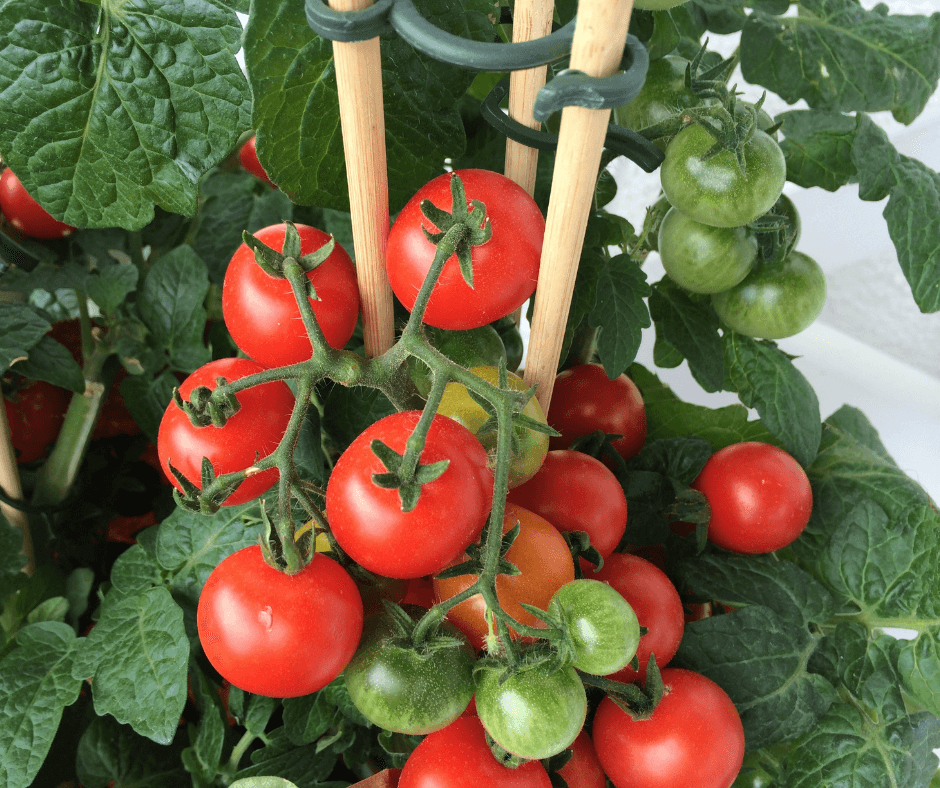
Train your tomatoes for easy care and harvest. Compact bush varieties are recommended for beginners.

Growing tomatoes from seed offers you a chance to choose from the scores of available varieties—large, small, modern, heirloom, red, green, yellow, or orange.  None are really hard to grow, but many sources suggest determinate (bush) salad or cherry tomato varieties for beginners. Indeterminate (vining) tomatoes are the most productive but reach huge heights and require quite a bit of management, and large-fruited varieties are often more demanding. Cherry tomatoes feature bite-size fruit and bush types are great for container growing because they stop growing once they have reached a certain size and produce only a set number of flowers and fruit thereafter.  Much of the fruit develops at the same time, but harvests can be still quite large. Good disease resistance makes growing even easier. (Click here for a great list of determinate tomatoes from Johnny’s Selected Seeds, and click here for our top 10 list of the best-tasting cherry tomatoes.)

Those harvests will come sooner if you start tomatoes indoors in cell packs or other small containers at least six to eight weeks before the last frost date for your area.  Make sure those containers have drainage holes.  Fill the small pots with moistened potting mix and plant two or three seeds per cell or container, following directions on the seed pack.  Place on trays that can hold water and position in a warm location a bright grow light or South-facing window.  To avoid seedling rot disease, water from the bottom, letting the plants absorb water through their drainage holes. (Click here for more tomato seed-starting tips.)

When outdoor conditions are right, with night temperatures above 50 degrees Fahrenheit, take the trays outside and place them in a sheltered spot to acclimate the seedlings.  After a few days of this, plant the seedlings in a location that receives at least six hours of sun per day–eight hours or more is better.  Keep the soil consistently moist, stake or your plants or support with tomato cages, and watch for pests. (Click here to learn more about tomato pest and disease management.)

Great Greens from Seed
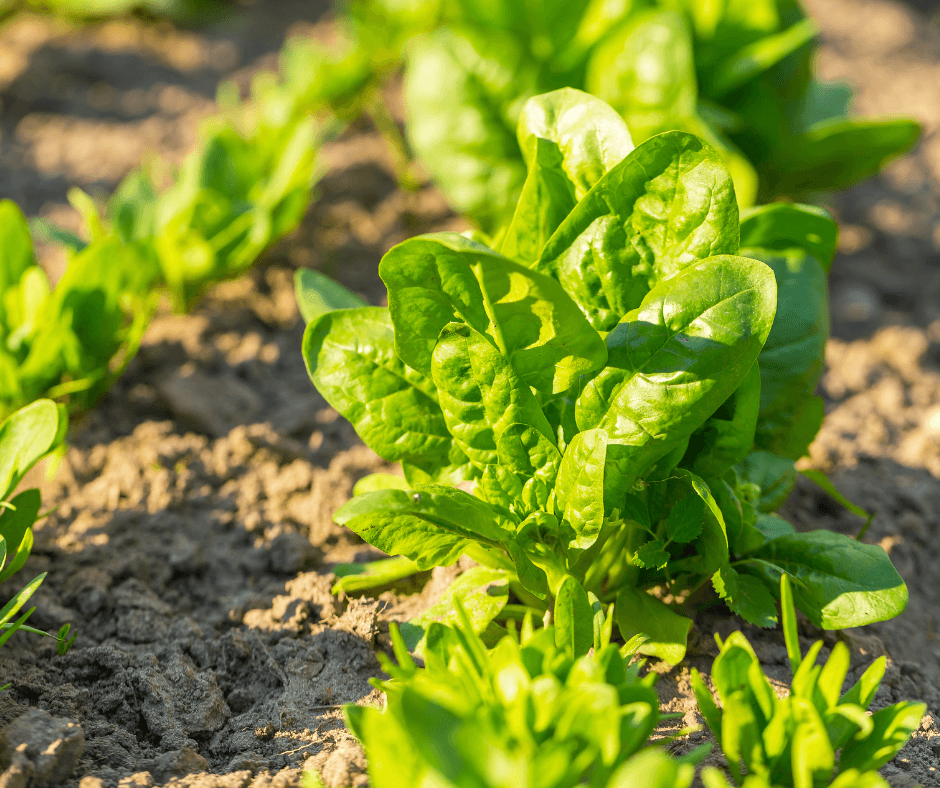
Spinach is a true cool-season green that grows succulent leaves in a flash.

Greens, including the various varieties of lettuce, spinach, and Swiss chard, are among the easiest veggies to grow from seed, and many varieties are as beautiful as they are nutritious.  Lettuce and spinach love the cooler temperatures of spring and fall, while chard thrives in summer. 

Sow lettuce seeds when outdoor temperatures reach about 60 degrees Fahrenheit, and space about 2 inches apart in rows that are separated by about 12 inches. Cover with the thinnest possible amount of soil, because lettuce seeds need light to germinate.  Keep soil uniformly moist and harvest lettuce either as baby greens or mature leaves.  For a continuous harvest, sow smaller amounts of lettuce seed at weekly intervals in spring and very late summer. (Click here to discover ten great lettuce varieties for gardens.)

Larger and leafier, spinach and chard are delicious either raw or cooked.  Plant spinach first, as soon as possible after the last frost date.  Both types of greens should be planted shallowly—about one-quarter inch deep in rows at least 18 inches apart.  Both also need thinning.  Thin spinach seedlings to a maximum of 6 inches apart and the larger chard plants to a minimum of 6 inches apart.  Spinach can also be sown in late summer for a fall harvest.

Growing vegetables can be so satisfying that many gardeners catch the “veggie bug” after the first successful growing season and branch out into multiple varieties in successive years.  Be prepared!

Easy Okras for Hot Summer Gardens

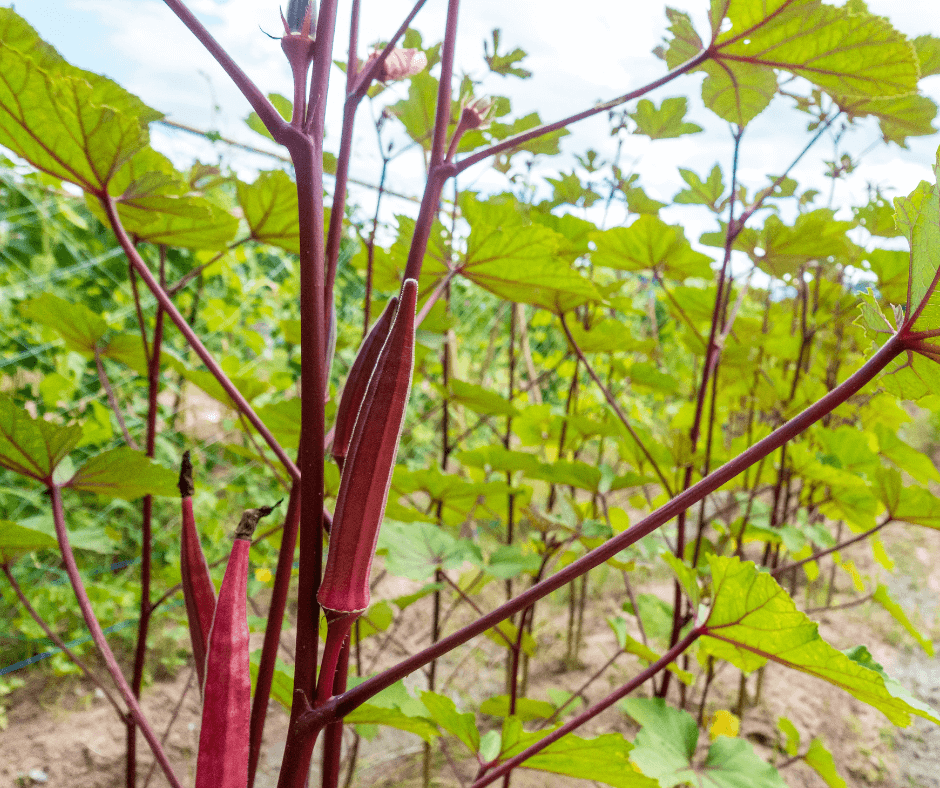
Red, burgundy, and purple okra varieties are extra pretty in the garden.

Okra is a southern staple crop for several reasons. The tasty podded vegetable thrives in heat and even drought, and it is so easy to grow. Newer varieties are more tender, prolific, and lack painful spines. As an added bonus, you can let the pods mature and become woody at the end of the season, and then cut them and bring them indoors. They last for years and add an architectural flair to everlasting arrangements.

About Okra

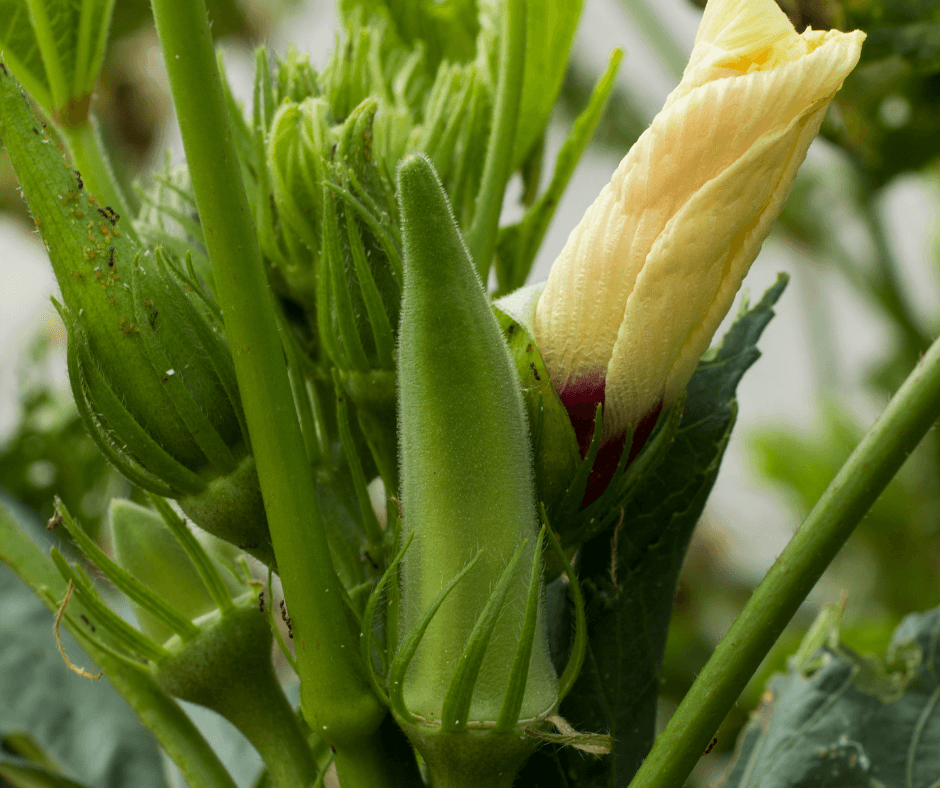
Okra flowers are quite pretty and attract bees.

Okra (Abelmoschus esculentus) is a tender perennial with native roots extending from Africa to Southeast Asia. Historically, it was brought to the Americas through the slave trade in the late 1600s and is noted as becoming a southern staple crop in the United States by the early 1800s. It is a nutritious vegetable (technically a fruit) that requires little nurturing to produce pods, so it certainly helped feed those with little resources early on in the South. It is an essential ingredient of Louisiana gumbo and is also enjoyed fried, pickled, and added to mixed meat and vegetable dishes.

Okra is an essential ingredient in Louisiana gumbo.

The plants are tall, upright, and have large, lobed, palm-shaped leaves. They are members of the hibiscus or mallow family, so their purple-centered, mallow-like flowers of pale yellow, ivory, or pink, are quite pretty when in bloom. Bees are the primary pollinators, so refrain from using pesticides around okra, not that they should be needed. The plants don’t have many severe pest and disease problems, aside from Japanese beetles where these pests are present (click here to learn how to manage Japanese Beetles). Aphids also cause occasional, but not severe, problems. The upright pods should be harvested when they are tender and young. Once they are woody, you can no longer eat them.

Good Okra Varieties

Large okra varieties, like ‘Bowling Red’ need lots of space to grow.

There is a surprising amount of variability in okra forms. Pods may be purple, red, or various shades of green. The most essential traits to seek out are cultivated varieties with numerous tender pods and continuous production. Height is another factor to consider. Some varieties can reach 8 feet high, while compact forms may only reach 3 feet. Here are seven exceptional varieties to try.

  1. Annie Oakley‘ (53 days from seed to harvest) is the first okra that I ever grew, and it sold me on okra for life. The compact plants produce lots of small to mid-sized okra pods that are green and very tender.
  2. Bowling Red‘ (57 days from seed to harvest) is a large okra (7-8 feet) that bears lots of long, slender, tasty pods of deep purplish-red. Pods are noted for remaining tender at a larger stage. The variety dates back to 1920s Virginia.
  3. Carmine Splendor‘ (51 days from seed to harvest) is a high-yielding heirloom with somewhat small, uniform, reddish pods and are fast-to-produce. It should bear fruit from midsummer to late summer or early fall.
  4. Clemson Spineless‘ (60 days from seed to harvest) is a 4-5-foot heirloom that is noted for being one of the first spineless types developed. Its pale green, pods are tasty and prolific.
  5. Heavy Hitter‘ (55 days from seed to harvest) is a 5-foot okra that appears to be on steroids because its crops are so large. Single plants are reported to produce as many as 250 pods over a season! Give the large plants plenty of space.
  6. Jambalaya‘ (50 days from seed to harvest) is compact, early, and bears smaller pods heavily through summer. This is the okra to try if you have little space.
  7. Louisiana 16 inch‘ (60 days from seed to harvest) has long, palest-green, extra flavorful pods that remain tender for a long time. If you like to eat lots of okra, choose this variety! Keep in mind, it becomes huge (to 8-feet). Some report it growing into the trees, so plan to give it lots of space.
‘Clemson Spineless’ Okra is truly spine-free! (Please note the aphids on the fruit. They can be problematic but are easily spritzed off with a jet of water from the hose before harvest.)

Planting and Growing Okra

Okra grows best in full, hot sun for a minimum of 8 hours per day. It will tolerate poor to average soil, but adding fertile amendments to the garden will boost performance and production while reducing the need to water as often. Fafard Garden Manure Blend is a great amendment for okra planting.

Okra seeds are large, so it is a good direct-sow crop, meaning you can seed them in on-site. Plant them when the soil is warm and the threat of frost has passed. Topping the seeds off with added organic matter provides extra moisture and light cover to help them germinate more readily.

Space plants according, based on their final estimated plant size, and expect them to grow large quickly. Wayward branches can be pruned off to keep plants in bounds. Large plants may require staking, especially if you live in an area where high winds are common.

Harvesting Okra

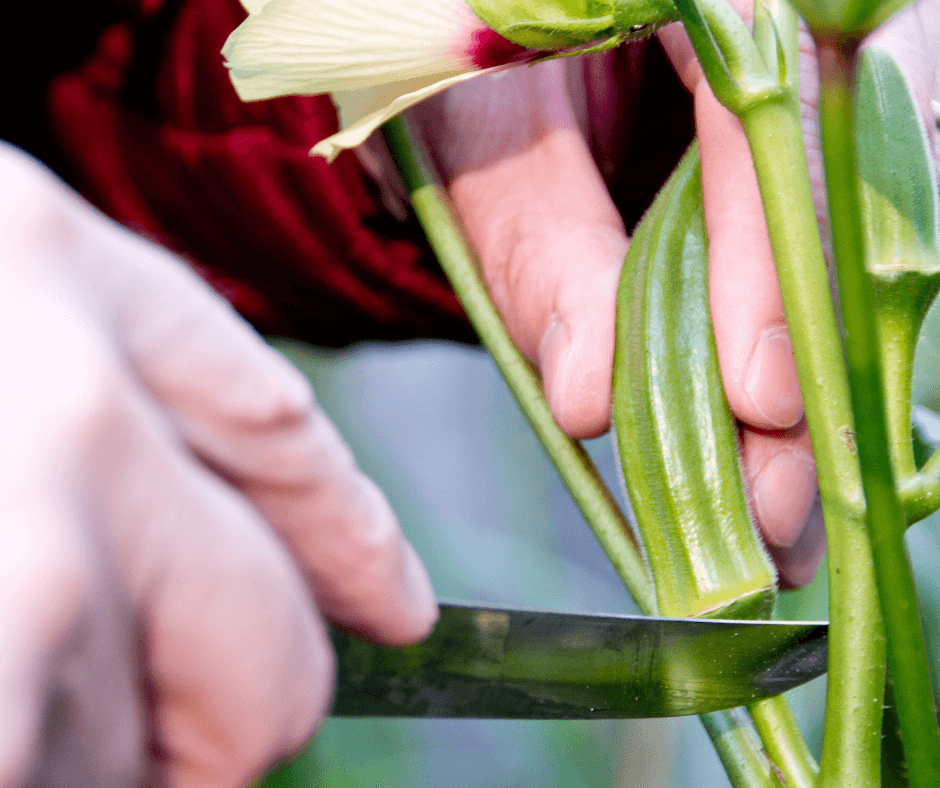
Harvest pods with a sharp knife, pruners, or shears.

When it comes to harvest, timing is everything. The pods develop so quickly that they can turn from tender to woody in just a day or two, so plan to pick them daily during harvest season. Harvest them then they are small, tender, and bendable, or squeezable. Cut them from their tender base, and store them in the refrigerator to keep them fresh. The faster you cook the pods, the better they will taste!

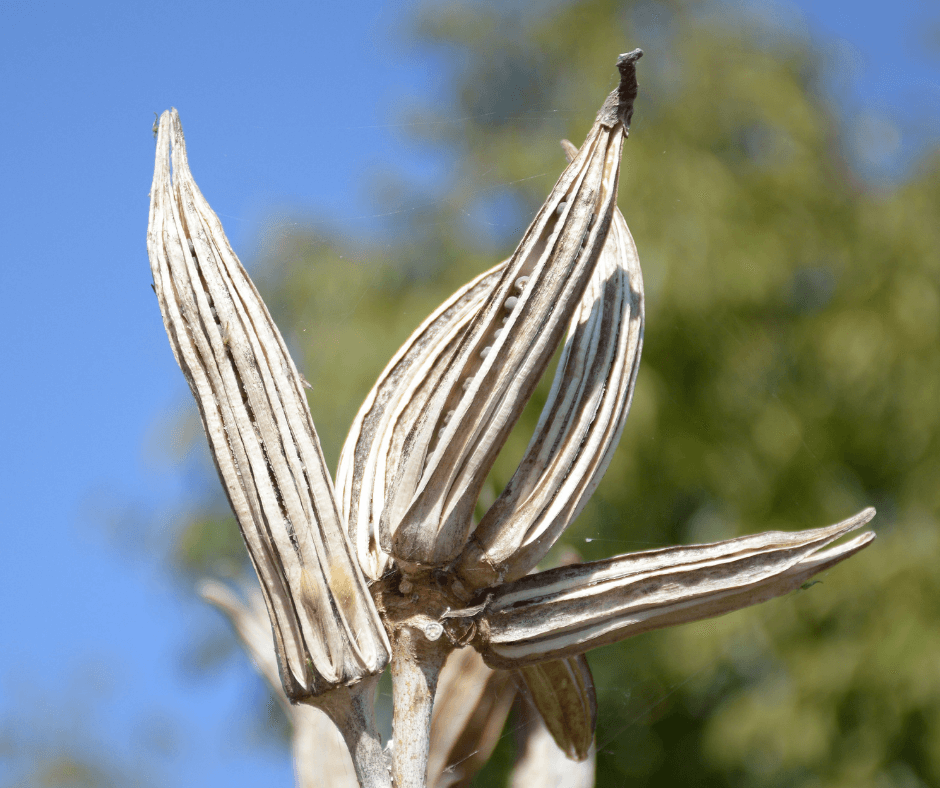
As fall becomes chilly, okra stops producing. At this time, I recommend leaving a stem or two to fully mature and dry. The woody stems and fruits add decorative flair to dry arrangements. It is also the perfect time to collect seeds for the following season.

Vining Vegetables for Vertical Gardening

Vining Vegetables for Vertical Gardening Featured Image
Vining Vegetables for Vertical Gardening

Don’t have as much space for growing vegetables? Then maybe it’s time to go the way of Jack with his beanstalk. Numerous veggies are vines perfectly suited for training up a trellis, thereby taking advantage of upright, aerial space. Vertical veggies also hold their fruits clear of the ground, reducing their susceptibility to rot. Three-dimensional gardening offers multiple advantages.

There are a couple of common trellis types. Crosswise bamboo trellises fitted with trellis netting is an easy way to go. Twine strung between sturdy stakes or posts provides an excellent trellis for most vertical vegetables. Run a horizontal length of twine along one side of the plant row, then loop it back on the other side to secure the stems. Add a new tier of twine every 8 to 12 inches or so to keep pace with the vines. Alternatively, you can secure your climbers with twist ties or snippets of string. Some veggies help by self-attaching with “grasping” structures such as tendrils.

Fafard Garden Manure Blend pack

Orient the trellis rows north to south, so both sides get similar amounts of sun. If the soil needs more organic matter, till in a couple of inches of Fafard® Premium Natural & Organic compost or Garden Manure Blend before constructing the trellis and sowing seed.

I featured three climbing veggies – Malabar spinach, scarlet runner beans, and purple pole beans – in last month’s “Easy, Attractive Vegetables for Any Garden”. Now we’ll go further.

Pole Beans

Pole beans
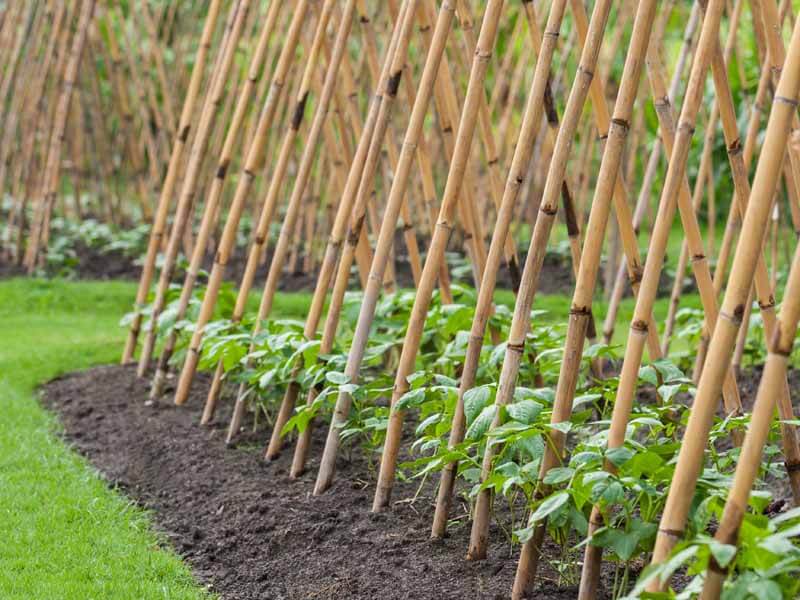
These pole beans have each been given a pole to climb.

String or snap beans (Phaseolus vulgaris) are undoubtedly the aerial champions of the veggie tribe. The ever-popular snap (or string) bean comes in a variety of twining forms, including the purple-fruited varieties profiled in last month’s article. All are wonderful for threading through a twine trellis, or for growing up a teepee of tall stakes.  They include:

Broad romano beans
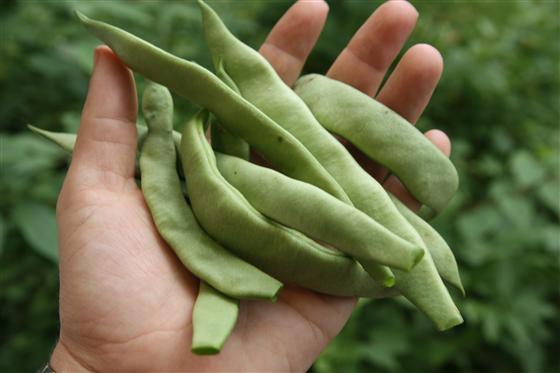
Broad romano beans are surprisingly tender. (Image by Jessie Keith)
  • Standard-issue green beans. Heirloom favorites ‘Blue Lake’ and ‘Kentucky Wonder’ both are available as climbers (many gardeners favor them over the bushy versions because they are more productive). More recent introductions include ‘Fortex’, featuring long slender pods that ripen relatively early, and somewhat shorter-podded ‘Malibu’.
  • Speckled beans. The tan, purple-streaked pods of the heat-tolerant variety ‘Rattlesnake’ are borne most prolifically in areas with long growing seasons, making it a great choice for Mid-Atlantic and Southeast gardens. Speckled varieties for cooler climates include ‘Cascade Giant’, a prolific producer of large beans that are similar in coloration to ‘Rattlesnake’.
  • Flat, Romano beans. Among the best romano varieties for cooler climates is ‘Northeaster’, with tender 7-inch beans that ripen some 55 days after sowing. For a later, longer harvest, try ‘Helda’, which produces tasty 9-inch pods for much of the summer.
  • Yellow wax beans. The 5-inch pods of ‘Grandma Nellies Yellow Mushroom’ have a wonderful rich complex flavor that really does have hints of chantarelle. Many of the best wax pole beans are also golden romano types. These include ‘Goldmarie’ and the Italian heirloom ‘Marvel of Venice’, which also has pinkish-purple flowers.
  • Shelling beans. Grown for their colorful and flavorful seeds that are shucked from the pods late in the season, these varieties are sometimes also excellent as snap beans. One such variety is the heirloom ‘Cherokee Trail of Tears’, whose tasty pods yield shiny black seeds if left on the vine. Another excellent multi-purpose American Indian heirloom variety is the white-seeded ‘Hidatsa Shield Figure’, named for the seeds’ oblong tan markings.
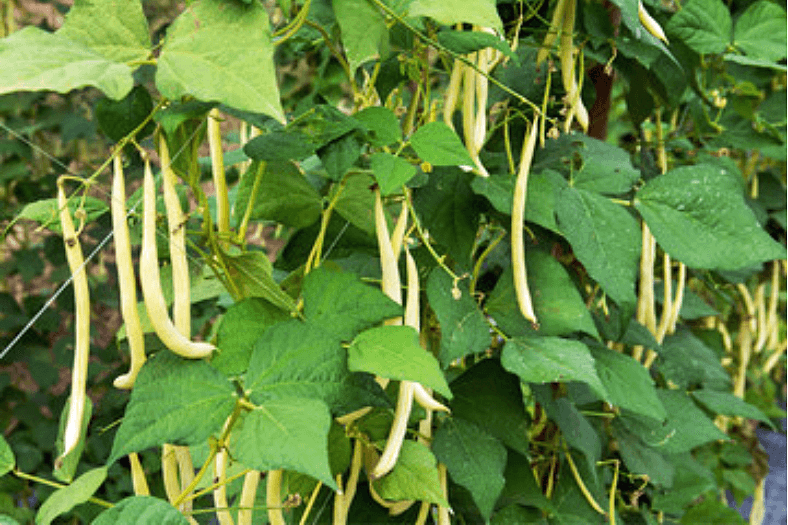
Yellow wax beans
Yellow wax beans have a milder bean flavor.

Lima beans or butter beans (Phaseolus lunatus) are grown for their broad, flattened, buttery seeds, lima beans are a much more diverse tribe than the frozen food section of your local supermarket might lead you to believe. The heirloom ‘Willow Leaf’ bears small, meltingly succulent, greenish-white limas, borne on disease-resistant vines furnished with distinctive narrow foliage.  A favorite of Thomas Jefferson, ‘Sieva’ also produces small whitish scrumptious limas, but on high-climbing vines with broad leaves. Some Phaseolus lunatus varieties are brightly colored, as is the case with the heirloom ‘Christmas’. It yields large, white, heavily red-splotched limas on tall disease- and heat-resistant vines.

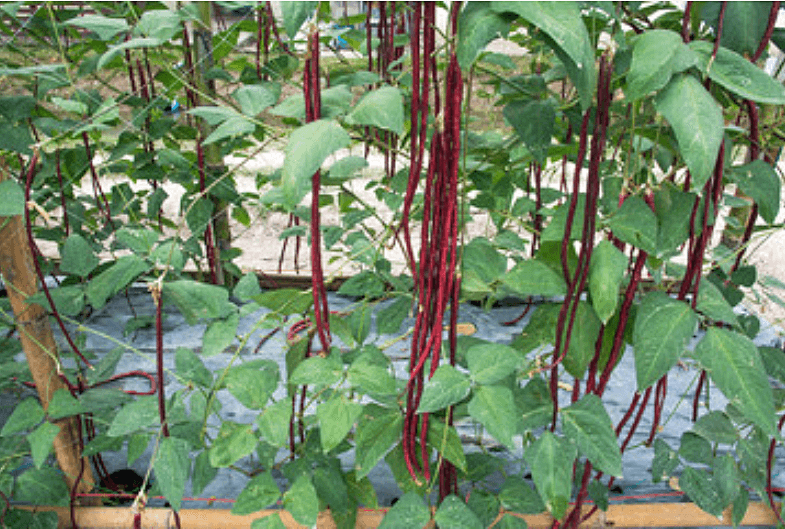
'Red Noodle' beans
Yardlong beans like ‘Red Noodle’ produce for longer than average beans and thrive in heat!

Yardlong beans (Vigna unguiculata) are East Asian legumes grown for their remarkably long slender beans that ripen all summer on tall, vigorous, exceptionally heat-tolerant vines. Look for ‘Chinese Red Noodle’, with deep red, 18-inch beans; ‘Chinese Mosaic’, with pale purple pods; and ‘Taiwan Black’, which produces 40-inch-long fruits studded with black seeds.

Other Vigna unguiculata varieties are grown expressly for their seeds, commonly called cowpeas, rather than their pods. Many of these varieties also grow as vines, including ‘Whippoorwill White’, ‘Blue Goose’, and another Thomas Jefferson favorite, ‘California Blackeye’. All varieties of the species do best in areas with hot summers and long growing seasons.

Peas

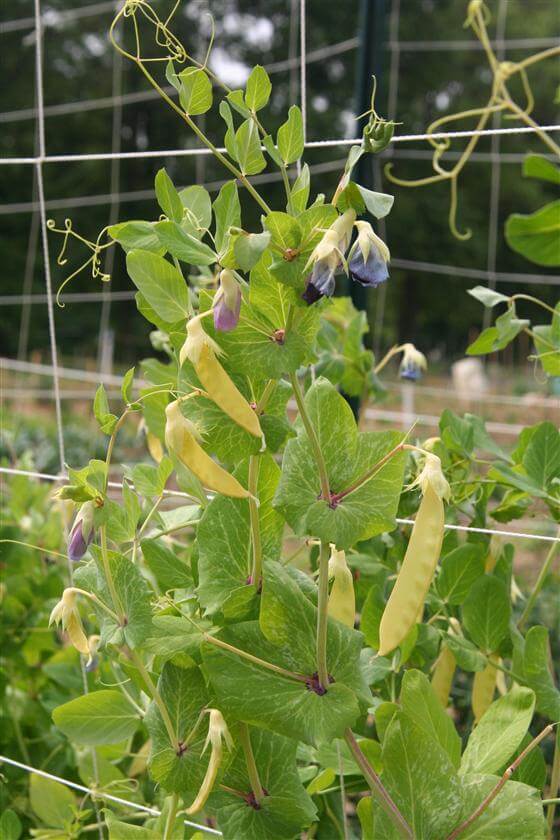
Golden snow peas
These tall golden snowpeas are perfect for upright growing. (Image by Jessie Keith)

Many shelling, snap, or snow pea (Pisum sativus) varieties produce long stems furnished with clasping tendrils to hold them upright. They grow best in spring, fall, or areas with cooler summers, so keep this in mind before planting them. The tallest varieties such as ‘Tall Telephone Pole’ will top out at 6 feet or more. Some peas grow as low bushy plants, so be sure to check before purchasing. (Click here to learn more about growing peas.)

Tomatoes

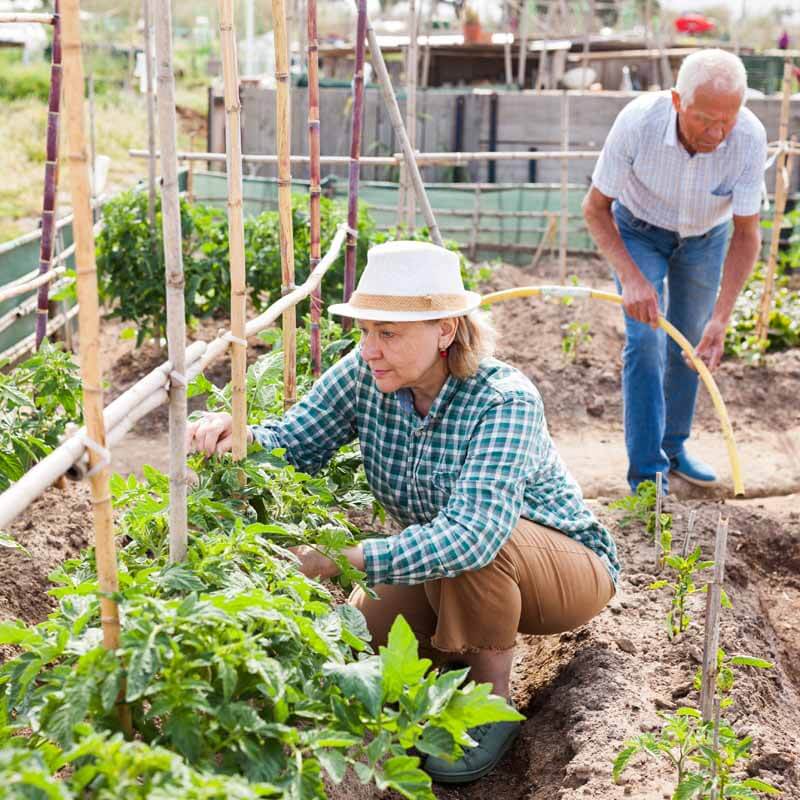
A couple tending tomatoes in the garden
Vining indeterminate tomatoes are easily drained up a trellis.

Tomatoes (Solanum lysopersicum) are often described as growing “on the vine”, and many of them do exhibit clambering, vine-like growth. Yet relatively few gardeners treat them that way. To trellis your tomatoes, start with an “indeterminate” variety – the term for types that keep lengthening their stems rather than growing to a certain height and stopping. Train the plant’s main stem up a sturdy twine trellis as described above, pinching out any side suckers that appear. Rampant varieties such as ‘Yellow Oxheart’, ‘Black Cherry’, and ‘Climbing Triple Crop’ will ascend to 10 feet or more. You can also allow your tomato vines to double back down the trellis once they’ve reached the top. Avoid determinate varieties, which will resolutely not climb. (Click here to learn more about growing cherry tomatoes.)

Cucumbers

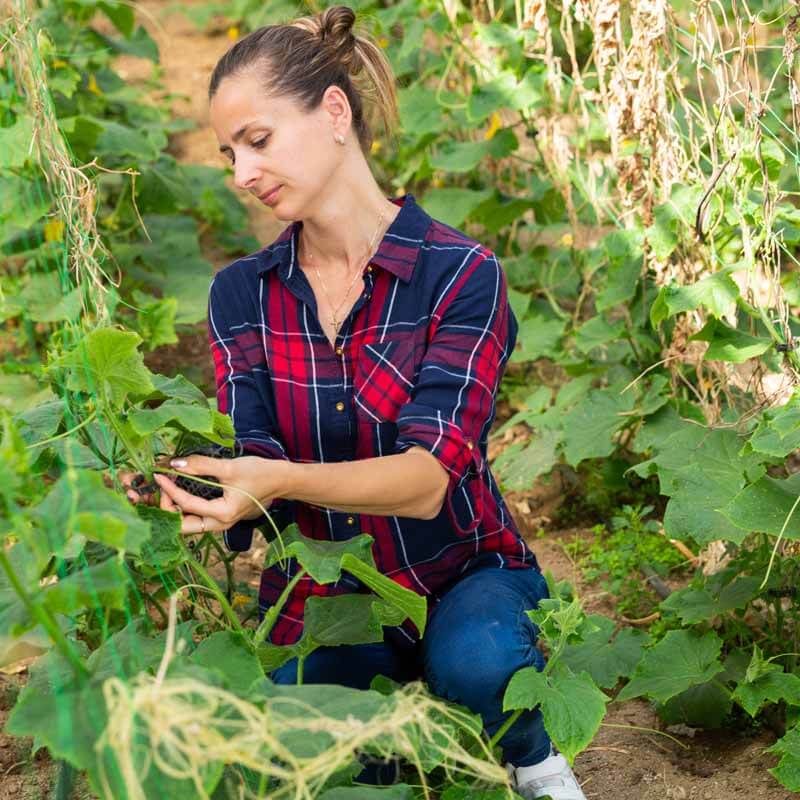
Gardener working on cucumber vines
Strong trellis netting will easily support trained cucumber vines.

Cukes (Curcumis sativus) are natural-born climbers, equipped with curlicue tendrils that cling to whatever structure they’re scaling. Consequently, they’re a natural choice for training up a sturdy trellis or fence. Less weighty types such as pickling cukes are often the best choice. A few varieties such as ‘Japanese Climbing’ have been bred expressly to grow as vines. Of course, you’ll want to avoid bush cucumbers, which are bred not to climb. The small-fruited, heat-tolerant Beit-Alpha type cucumbers are also recommended. The easy, crisp, and delicious ‘Diva‘ is a good one to start with. (Click here to learn more about growing cucumbers.)

Melons

Melons on study trellis
Melons are easily trained vertically, but their heavy fruits need to be trussed and supported.

Cantaloupes (Curcumis melo), watermelons (Citrullus lanatus), and many other melons have vining habits and work well as climbers. The average cantaloupe or small-fruited watermelon (such as ‘Sugar Baby’) will require something much sturdier than a stake-and-twine trellis. Four-by-four posts and heavy-gauge wire are more like it. (Click here to learn more about growing melons.)

Gourds

Gourds on a makeshift pergola
Gourds can be grown on a trellis or makeshift pergola.

Bottle and swan gourds (Lagenaria siceraria), luffa (Luffa aegyptiaca), and a number of other gourd species grow on rampant vines that benefit from the support of a sturdy trellis or other structure. With their fanciful shapes and colors, gourds are a kick to grow, and kids of all ages love them. Favorites include ‘Bird House‘, ‘Big Apple’, ‘Bushel Basket’, and Luffa for homegrown skincare.

Happy climbing!

Hugelkultur Layered Vegetable Gardens

Garlic, herbs and squash have been planted in this newly planted garden hugel
Garlic, herbs and squash have been planted in this newly planted garden hugel. (Garden by Annalisa Vapaa)

Looking to create truly sustainable vegetable gardens? Try a layered hugelkultur garden! These raised gardens layer in organic material to create deep reserves of truly rich soil for vegetables. They also allow gardeners to use yard waste, such as leaves, grass clippings, logs, and branches, for no-waste vegetable growing.

Hugelkultur

Hugel garden with organic-rich soil
Over time, hugel gardens naturally develop deep layers of organic-rich soil.

Hugelkultur (meaning “hill culture” in German) is a European planting style that uses permaculture methods to create fertile planting beds rich in organic matter and microorganisms. Designed for food production, the raised “hugel” gardens rely on a base of hardwood logs, branches, compost, and topsoil which, as they slowly decompose, increase fertility and water retention.
Hugels can be as small or large as desired and should be sited in sunny spot that’s flat and spacious. They can be built from reclaimed materials from your own property or a friend’s yard. This will help you save money and increase the garden’s sustainability. Here are the materials and directions for making one.

Materials:

  1. Hardwood Logs (Decomposing logs hold more water and break down faster.)
  2. Trimmed Branches
  3. Grass Clippings, Leaves, or Leaf Mulch
  4. Fafard Premium Natural & Organic Compost Blend
  5. Fafard Premium Topsoil
  6. Straw
  7. Vegetable and Herb starts

Directions:

Outline the Bed: Create the hugel base by lining up your hardwood logs. Place larger logs along the outside and smaller logs along the inside. (You can also dig out a furrow to deeply set your logs, but this is not necessary. Large logs can create substantial outer supports for hugel beds. Some hugels are even outlined with rocks, logs, or even woven willow wattle for extra support.)
Layer in Branches and Smaller Logs: Line up smaller branches within the log frame—trim large or unwieldy branches for a tight fit. A 2-foot layer is recommended.
Compress Branches: Press and stomp down branches to reduce air pockets.
Layer in Leaves and/or Grass Clippings: Layer in your leaves, leaf mulch, and/or grass clippings, being sure to pack everything between the branch layers.
Add Compost: Add in a thick layer of Fafard Premium Natural & Organic Compost. Poke the compost down into any remaining pockets. Good soil-to-wood contact will help your branch layer break down faster.
Fafard Premium Topsoil packAdd Topsoil: Add a final layer of Fafard Premium Topsoil and rake and shape your hugel to form an attractive mound. (Some hugelkulture guides recommend pyramidal hugel beds, but these are prone to erosion and difficult to plant. A rounded mound with a flatter top is better.)
Water: Gently water in your hugel for at least an hour to allow moisture to seep deep down. This also encourages settling and will reveal any areas that might need extra topsoil. Let the hugel settle for a day or two before planting.
Add Straw Layer and Plant: Cover the hugel with a 2- to 3-inch layer of straw, leaves or grass clippings to hold down the soil and reduce weeds. Simply move areas of straw aside to plant in your vegetables and herbs.
Hugel beds will slowly break down over several years as the wood layers decompose, and as they break down, they will lose loft. Each year it helps to add a new layer of compost and straw to further enrich the beds and keep them weed free. In time, they will take on the appearance of more traditional bermed garden beds with the added benefit of very deep organic matter.

Wood and rocks for side support
Extra wood and rocks can be placed outside the hugel for added side support.

Over time, hugels break down and take on the appearance of standard bermed beds.

Seasonal Vichyssoise

VischyThere’s nothing like seasonal produce. In spring, garden-fresh spinach, tender snap peas, spring onions, and asparagus grace our tables. In fall, we can look forward to kale, arugula, and Swiss chard. One easy, tasty way to make use of an overload of seasonal vegetables is by making a pot of vegetable vichyssoise, a creamy potato and leek soup that originates from France. This delicate soup can be eaten hot or cold, so it’s perfect for warm or cool days. And, it’s so good that your friends will be asking for the recipe!

Ingredients

1 tablespoon butter
1 tablespoon olive oil
1 quart chicken or vegetable stock
3 cups sliced leeks and/or onions
3 cups coarsely chopped spinach, kale, chard, arugula, asparagus, or snap peas (strings removed)
2.5 cups chopped peeled potatoes
1 teaspoon salt
1/2 teaspoon white pepper
1/2 cup half and half

Directions

Chop and prepare all ingredients before beginning. In a large pot, add the butter and oil and heat until it begins to sizzle. Add the onions or leeks and cook until translucent and soft (7-10 minutes). Add the stock, chopped potatoes, veggies, salt, and pepper and heat to a rolling boil then turn it down to medium-low heat. Simmer the soup for 25 to 30 minutes then remove from the heat and cool for another 30 minutes. Add the soup to a blender or food processor and mix until smooth, and then add the half and half.
This soup tastes delicious with a drizzle of hot sauce and looks pretty garnished with fresh herbs from the garden.

Organic Cucumber Growing

Cucumis sativus
Pickling cucumbers should be picked when they are very small and crisp.

Cucumbers have their fair share of pests and diseases, but growing them organically is not too difficult if you choose the right variety for your area and give them the right care. Experience is the best teacher.

When I first began growing cucumbers, it was a challenge. I failed to amend the soil properly, feed and water them enough early on, and then they developed a bad case of powdery mildew. Cucumber beetles, and the diseases they vector, were also a problem. My plants yielded only a few small fruits. That was about 20+ years ago. Since that unproductive season, I’ve mastered growing these  fast-growing annual vines – and you can, too! The great thing about cukes is once they’re happy, they produce like gangbusters! Before you know it, it’ll be time to break out the tzatziki and pickle recipes and find friends willing to take a few off your hands.

Cucumis sativus
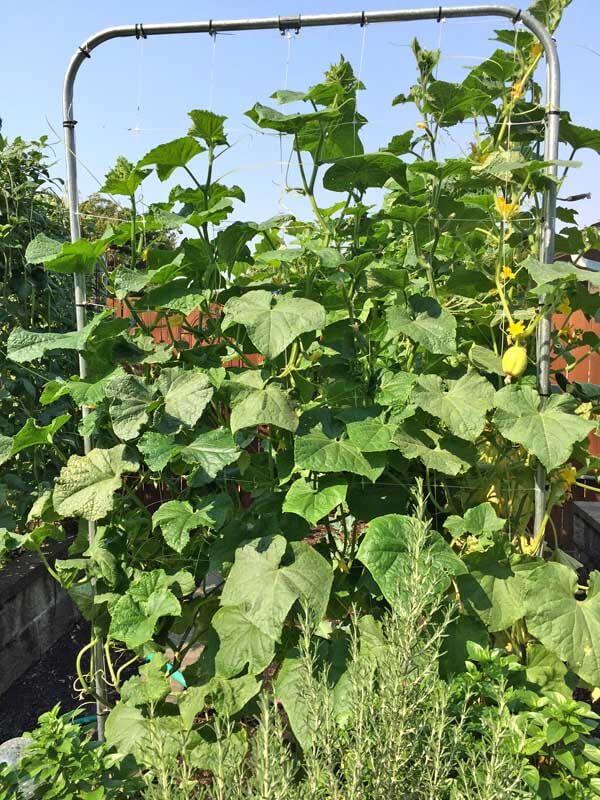
Trellising creates more space for cucumber growing.

Cucumbers (Cucumis sativus) are frost-tender, warm-weather vegetables; which means they grow when days and nights are relatively warm and the sun is at its brightest. They tend to sprawl but can be trained to grow on a support to save space and make harvesting easier.

The vines are lined with large, prickly, green leaves and produce two types of yellow, funnel-shaped flowers, male and female. The pollen-producing male flowers bloom first, followed by the fruit-producing female flowers. Female blooms are easily identified by their elongated, bulbous ovaries at the base, which are destined to become cucumbers. The flowers are pollinated by bees, so smile when these productive insects visit your plants, and refrain from using broad-spectrum, non-organic pesticides that will kill them. (Look out for the small, native squash bees that like to visit cucumber vines!)

Cucumber size, shape and color depend on the type of plant you grow. No matter what variety you choose, proper site selection and good soil preparation can make or break your cuke-growing success.

Cucumber Types

Lots of cucumber types exist. Americans are most familiar with slicing cucumbers, which tend to be large, broad, and thick skinned when mature and have tougher, bigger seeds. In contrast, thin-skinned Asian cucumbers are long, straight and small-seeded as are English types. Pickling cucumbers, which include gherkins, have a pleasing shape when young, dense flesh and are picked immature, when they are most crisp.

Cucumis sativus Slicemaster
‘Slicemaster’ is a common American slicer that’s easy and prolific.

Several varieties are better adapted to hotter, drier growing conditions. These include lemon, or dosakai, cucumbers, which are almost completely round, yellow-skinned, and originate from India. Israeli Beit Alpha cucumbers are smaller, seedless (parthenocarpic), sweet-tasting, and well-adapted to dry climates. ‘Socrates’ is a larger Beit Alpha cultivar worth growing.  Another favorite, heat-tolerant “cucumber” is the curved, thin-skinned Armenian cucumber (Cucumis melo var. flexuosus), which is technically not a cucumber but a melon (Cucumis melo) variety.

Growing Cucumbers

Full sun is essential for good growth and fruit production, so choose a planting location that’s open and sunny. Deep, friable, well-drained soil high in organic matter yields the best crops. The best rule of thumb is to dig and work up the soil to a depth of a foot or more, then amend liberally with good compost. The more room your plants’ roots have to develop, the healthier the plants. If your garden is at a low topography, create raised berms to plant your cucumbers. Enrich the berms with OMRI Listed Fafard Premium Natural & Organic Compost or Garden Manure Blend for best performance. (Generally, I start my seeds outdoors in 4-inch pots and plant them once they’ve reached 3 inches long and the threat of frost has past. Other home gardeners may opt to direct-sow the seeds following packet directions.)

Feeding and watering cucumber vines are simple tasks: Just apply good organic fertilizer (like Black Gold® Tomato & Vegetable Fertilizer) early in the season and make sure established vines get a deep application of water twice a week (by rain or hose). The next consideration is deciding whether or not to trellis your plants.

Cucumis sativus Lemon
‘Lemon’ is a popular Dosakai cucumber that tastes best when picked before the round fruits turn lemon yellow.

Trellising Cucumbers

Trellising has lots of advantages: It saves space, makes harvesting easier and encourages airflow, which discourages foliar diseases. Some standard trellis types are vertical ladder trellises, bentwood or teepee trellises. Trellis-grown cukes will be straighter than ground-grown. If you don’t mind your vines on the ground, be sure to pad the ground with hay or straw. This will keep your cucumbers clean and discourage rot, as well as keep weeds down. If you don’t have a lot of gardening space, you can grow dwarf cucumber varieties in large containers.

Cucumber Pests and Diseases

There are a few cucumber pests and diseases to be mindful of. Striped and spotted cucumber beetles are the worst of them. Both pests are elongated, around ¼ an inch long and have beaded antennae. Striped cucumber beetles have bands of yellow and black stripes, and the spotted ones are tannish-yellow and are typically marked with 12 black spots. Both chew on the leaves and vector a nasty bacterial wilt disease that Fafard Garden Manure Blend packcan kill vines. The best means of defense is to use botanical insecticidal sprays like pyrethrum-based sprays, always carefully following label directions. (Planting disease-resistant strains, Like the small-fruited ‘H-19 Little Leaf’, is also helpful.) Begin to spray when the plants are young, and refrain from spraying when bees are actively pollinating the flowers. Squash bugs are another common pest that can be eradicated using this method. Aside from bacterial wilt, powdery mildew is the second most common disease of cucumber vines. (The organic fungicide, GreenCure®, clears up powdery mildew fast and is safe to use.)

So, whether growing cucumbers for pickling or slicing, feel confident you can cultivate happy cucumbers this year. By fulfilling just a few smart steps, new gardeners can avoid a first-time cucumber catastrophe and enjoy a cornucopia crop instead!