Articles

How to Create Miniature Water Lily Pots

How to Create Miniature Water Lily Pots Featured Image
The white pygmy water lily is tiny and perfect for container culture.

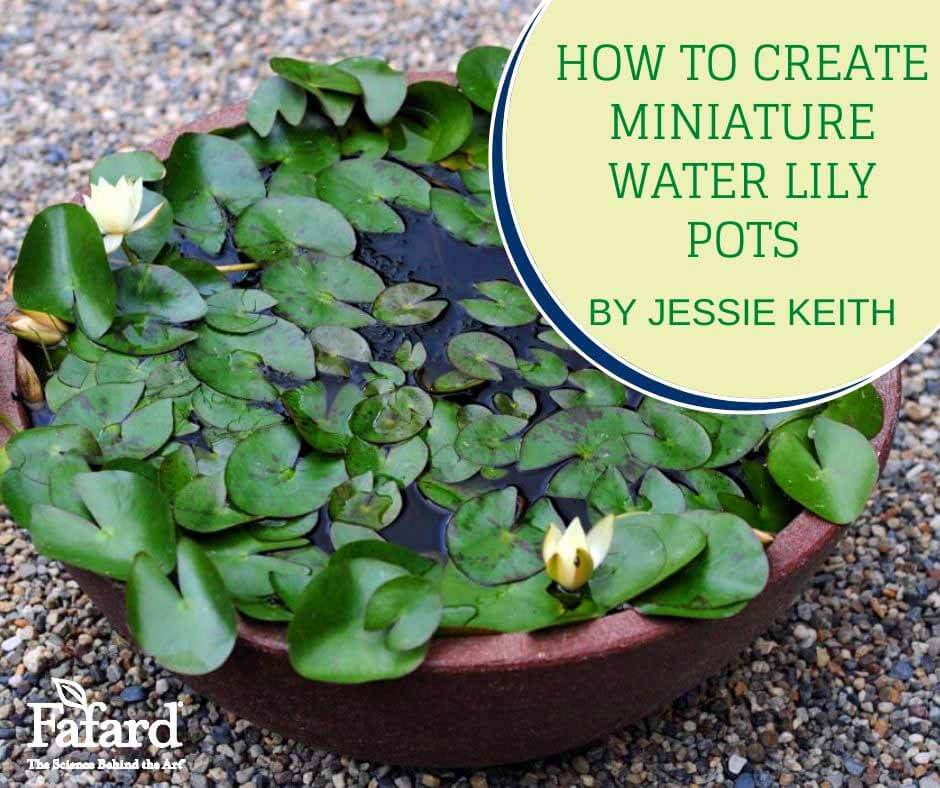
Nothing is more pleasing and cool in summer than a water garden filled with water lilies. Most gardeners don’t consider growing these beautiful aquatic flowers because they lack the desire or space for a pond, but ponds are not needed if you grow small. Watertight, spacious troughs or pots can be converted into tiny water gardens for miniature water lilies. If you have a partially sunny patio, deck, or garden space that can take the weight of a water-filled pot, you are set!

Choosing a Container

Pot with miniature water lilies
Any deep, spacious, water-tight pot will hold miniature water lilies.

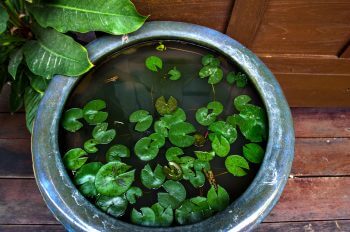
Water lily pots have to be large and spacious, so start by choosing a container that’s at least 15-18 inches deep and 24-40 inches wide. This will give you enough space for your lilies. Pots must be watertight. Specialty “no hole” pots designed for aquascaping are sold, but you can also line large pots with pond liner, which is often a cheaper option. Simply cut the liner to a size that will fit in your pot and place it snugly along the inner lip of the pot. It helps to apply a strong, non-toxic adhesive along the edge to keep it in place.

Choosing Miniature Waterlilies

Yellow water lily 'Helvola'
The yellow water lily ‘Helvola’ is a classic compact variety that grows beautifully in containers.

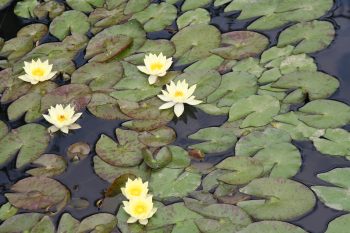
True miniature water lilies are so tiny that some have flowers the size of a quarter. Many are pygmy waterlily (Nymphaea tetragona) variants, which are very hardy—surviving winters as cold as USDA Hardiness Zones 4-11 with good protection. They come in a suite of colors that include ivory, pale yellow, pink, and red. The best for home gardens are easy to find online or in specialty stores.

One of the tiniest miniatures is the white pygmy water lily (Nymphaea tetragona ‘Alba’). The hardy plants reach 18 to 24 inches across and sport tiny white flowers that float alongside teensie lily pads. Another beautiful white-flowered variety with much bigger, tulip-shaped flowers but a small growth habit is ‘Hermine’.

The peach-pink-flowered ‘Berit Strawn’ (Nymphaea ‘Berit Strawn’) has larger flowers (3 to 4 inches across) and pads of deep green with some reddish mottling. The little plant is perfect for container growing, very hardy, and will bloom nonstop from early summer to fall. Plants will spread between 24 and 30 inches.

'Hermine' water lilies
‘Hermine’ is a stunning, white-flowered miniature water lily.

One of the smallest red-flowered miniatures is ‘Perry Baby Red’ (Nymphaea ‘Perry Baby Red’). Its rosy-red flowers compliment dark green pads. Plants spread 12 to 36 inches across.

An older, classic mini water lily is the hardy ‘Indiana’ (Nymphaea ‘Indiana’). Its tricolored, 2- to 3-inch flowers are in shades of rose-red, yellow, and orange. The diminutive plants have a spread of 12 to 28 inches across and small green pads with reddish spots.

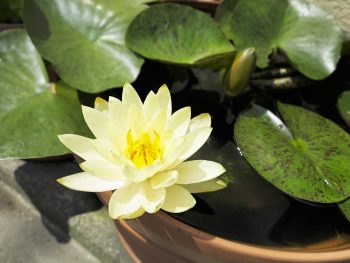
One of the best yellow-flowered water lilies is the cheerful ‘Yellow Pygmy’ (Nymphaea ‘Helvola’). Its flowers are only 2 inches, but they are bright and pretty. Plants reach 18 to 36 inches across.

There are lots of great sources for miniature water lilies. Lilypons and Texas Water Lilies are good sources that offer quality selections.

Planting Waterlilies

'Helvola' water lilies
Water lily ‘Helvola’ in full bloom. (Photo by Jessie Keith)

Water lilies grow from fleshy tubers that must be grounded in smaller pots and sunk below the surface of your water container. Choose a wide, shallow pot that will provide plenty of space. Planting depth can be 10 to 24 inches from the water surface. Pots should be placed where they can get 6 hours of sun per day or more. These planters can only be prepared after the threat of frost has passed.

Line the pots with porous but tight-knit plastic burlap bag. Fill it with a 3:1 mixture of heavy loam and Fafard Premium Natural & Organic Compost. Add just enough to fill the pot bottom and hold the waterlily tuber. The compost and soil must be well combined before planting. Finally, add a teaspoon of a slow-release, all-purpose fertilizer to the mix. Overfertilization can cause algal bloom, so don’t add more during the season.

Cut a small hole in the bag and sink the tuber into the soil, so the top of the plant meets the soil line. Once it is planted, line the top 2 inches of the pot with pea gravel to help keep the soil and plant in place. Place a 1- to 2-inch thick rock along one side of the pot, so it sits at a slight angle. Doing this helps with gas exchange for healthy root growth. Small- to medium-sized water pots don’t need aeration filters.

Gently fill the pot with clean tap water to a depth a couple of inches below the lip of the pot. Soon the plant will put forth fresh pads followed by flowers.

Maintaining Potted Waterlilies

Pink water lily in ceramic pot
Clean, fresh water is important to the health of potted water lilies.

Keeping the water clean in your water lily pot is essential. Remove any debris that falls in the water, and cut old leaves from your water lilies. Refresh the water regularly as it recedes.

Water-filled containers cannot be allowed to freeze in winter, even if your water lily is hardy. They are too exposed above ground and freezing and thawing will cause the containers to crack. The best course of action is to drain the container before the first freeze of the season, remove the lily from the pot (being sure to cut back the leaves), and store it in a water-filled bucket in a cool, dark place through winter. Water lily tubers should be divided every two to three years.

These cool, impressive containers will brighten any summer garden spot. If you want the tranquil beauty of a pond without all the work and hassle, plant a water lily pot this season.

Bring Fafard to Your Local Garden Center!

Sun Pro Fafard Superior Quality packs Header Banner
Can’t find Fafard® or other Sun Gro Horticulture products at your local garden center? Interested in carrying Fafard mixes Then please email us at i[email protected]. We will work with you to find a solution!
Fafard products are quickly moving beyond the Eastern United States to garden centers and hydroponics stores near you. It’s easy to see why. Gardeners choose our products because of their reliably great performance. What’s more, many of our products are OMRI Listed, so you can feel confident that you are growing with the best.
Want to be part of the action? Then request our top-quality growing products today!
If you are a retailer ready to join the thousands of other happy Fafard vendors, please email us here.

Bad, Invasive Garden Perennials and Safe Substitutes

Purple Lythrum salicaria
Purple lythrum looks pretty in the garden but beware this dangerous invasive flower. (Image by Jessie Keith)

Some perennials have major territorial issues.  Give them an inch, and they’ll take a yard – or at least a good chunk of it.  Allow them a toehold, and their rampant root systems or prolific seedlings will likely haunt your garden for years to come.

Of course, such perennials don’t limit their thuggery to the garden; they also can spread (usually by seed) into nearby natural areas, out-muscling native vegetation.  For the scoop on the worst offenders in your region, check your state’s list of banned invasive species.  But keep in mind that many species with serious boundary issues don’t appear on most state banned lists.  Even if it’s not listed by your state (as is probably true of the species described below), the perennial that’s captured your heart might have designs on taking over your garden.

Yellow Lysimachia punctata
Yellow loosestrife is pretty but a garden thug. (Image by Jessie Keith)

Baptisia sphaerocarpa 'Screamin' Yellow'
Yellow wild indigo has characteristics similar to yellow loosestrife, but it is tame. (Image by Russell Stafford)

Just about any list (state or otherwise) of takeover perennials is likely to include a few that go by the common name “loosestrife.”  Purple loosestrife (Lythrum salicaria) – the perennial that ate the Northeast (as well as several other regions) – is the textbook example.  Close behind, however, are several species in the genus Lysimachia.  Many a gardener has regretted falling under the spell of the arching white spires of gooseneck loosestrife (Lysimachia clethroides).  Lovely in bouquets, this East-Asian native is a rambunctious bully in the garden, spreading rapidly via fleshy white underground shoots (known as rhizomes).  A far wiser (and better behaved) choice for perennial borders is milky loosestrife (Lysimachia ephemerum), which forms 3-foot-tall, gray-leaved clumps surmounted in summer by candles of frothy white flowers.

Also too vigorous for most gardens are yellow loosestrife, Lysimachia punctata, and fringed loosestrife, Lysimachia ciliata (usually grown in its purple-leaved form, ‘Firecracker’).  Both make good candidates for damp, isolated niches where they have room to romp.  Yellow wild indigo (Baptisia sphaerocarpa) and its hybrids (including ‘Carolina Moonlight’) would be a better choice for situations where good manners and 3-foot-spires of bright yellow, early-summer flowers are desired.

Rudbeckia laciniata
Rudbeckia laciniata is pretty but aggressive. (Image by Jessie Keith)

Quite a few other yellow-flowered aggressors are commonly grown (and virtually ineradicable) in gardens.  Almost all perennial sunflowers (Helianthus), for example, are rapid colonizers with tenacious questing rhizomes.  If the mellow yellow blooms of Helianthus ‘Lemon Queen’ beguile you, you might want to opt instead for Silphium mohrii, which produces summer daisy-flowers of an even softer pastel-yellow, but on 4-foot-tall plants that stay in place.  Another popular splashy yellow summer-bloomer to avoid is the double-flowered Rudbeckia laciniata ‘Golden Globe’ (also known as ‘Hortensia’).  Take a pass on this common pass-along plant (there’s always plenty of it to share thanks to its romping rhizomes), and seek out its mannerly look-alike, ‘Goldquelle’.

Also often passed along are some of the more assertive yellow-flowered members of the evening primrose tribe (including Oenothera fruticosa and Oenothera tetragona).  These might best be passed by in favor of arguably the largest-flowered and loveliest hardy Oenothera, Missouri primrose (Oenothera macrocarpa).
Missouri Evening PrimroseIn contrast, goldenrods (Solidago) often get tagged with the “invasive” label, even though many of them are model citizens with arresting late-summer flowers.  Stiff goldenrod (Solidago rigida) holds dense, flat heads of lemon-yellow flowers above handsome clumps of gray-green foliage, while the equally fetching showy goldenrod (Solidago speciosa) carries steeples of bright yellow blooms on burgundy-red stems.  As for the canard that goldenrods cause hay fever: they don’t.

Physostegia virginiana 'Miss Manners'
Physostegia virginiana ‘Miss Manners’ is tidy and clump forming, unlike the spreading species. (Image by Jessie Keith)

The common name of Physostegia virginiana – obedient plant – also gives the appearance of a canard, given the relentless rhizomes of this Central U.S. native.  The moniker, however, refers to the mauve-purple, turtlehead-shaped flowers that line its 3-foot-tall spikes in late summer.  Push an individual flower into a new position, and it compliantly stays put.  The white-flowered cultivar ‘Miss Manners’ departs from other physostegias in possessing obedient flowers AND rhizomes.  Its flower color is also more compatible.
The domed flower heads of garlic chives (Allium tuberosum) share the adaptable, milk-white coloration of ‘Miss Manners’.  This prolific ornamental onion isn’t so good at sharing space, however.  Neglect to deadhead its late-summer blooms, and it will populate much of your garden with seedlings.  The somewhat earlier blooming Allium ramosum also bears showy (and sweet-scented) heads of white flowers atop 18-inch stems, but without the resulting seedling swarm.
Three more invasive perennials to steer clear of (and suggested substitutes) include:

  1. Plants sold under the botanical name Adenophora, which almost always are the fiendish, tuberous-rooted Campanula rapunculoides.  Use peach-leaf bellflower (Campanula persicifolia) or great bellflower (Campanula latifolia) instead.
  2. Yellow archangel, Lamium galeobdelon.  Rather than unleashing the garden-variety species on your yard, substitute its cultivar ‘Herman’s Pride’, which offers even more handsome silver-splashed foliage, sans the infinite spread.
  3. Butterbur (Petasites).  Yes, the romping colonies of immense, heart-shaped leaves are captivating, but the thick rhizomes will not stop until they’ve occupied every square millimeter of available soil.  A Ligularia or Rodgersia will give the same foliage effect without commandeering the whole neighborhood.

Petasites hybridus
Butterbur will take over a shade garden in no time. (Image by Russell Stafford)

Whenever you plant a mannerly perennial in your yard, be sure you know its soil needs. Fortifying soil with needed amendments will result in better overall performance. We suggest Fafard Premium Natural & Organic Compost, for starters. Although these and quite a few other perennials are too rampant for most garden areas, they might work in an isolated niche (such as a driveway island) where nothing else will grow, or in an informal planting (such as a cottage garden) that features plants that can fend for themselves.  “Right plant, right place” is a garden maxim that never goes out of style.

Easier Gardening with Ergonomic Tools

Easier Gardening with Ergonomic Tools Featured Image
Something as simple as cushioned nitrile gloves can protect gardeners from blisters and ward off hand pain. (Image by Jessie Keith)

Gardening is a great equalizer. Anyone—from the tiniest child planting sunflower seeds to the retiree happily nurturing enough tomato plants to feed the neighborhood—can enjoy it.  But young or old, each of us has physical strengths and weaknesses.  Listen to a committed gardener for more than a few minutes and you will probably hear something about aches and pains.  These common complaints eventually led to a happy collision of engineering and horticulture.  Ergonomic gardening tools* were born.

Coined back in 1949, “ergonomics” is the science or study of ways by which tools, utensils, and systems can be made safer and easier to use.  An “ergonomically designed” garden hoe, for example, may feature any or all of the following: a padded handle, an easy-to-use shape, or an attachment that gives the user a longer reach.  Once a rarity, ergonomically designed tools are now fixtures in every lawn and garden product category, lining shelves at garden centers and big box stores.  Each gardener has to find the combination of ergonomic options that works just right.  Recommendations can help, but for most of us, trial and error still yield the best results.

Cushioning and Padding

Cushioned seat for gardener
Cushioned seat and kneeler. (Image by Gardener’s Supply Company)

A little extra padding attached to tools, equipment, or clothing can yield big rewards in comfort. For those of us who like getting close to our plants by getting down on our knees, the range of ergonomic options is large. Cushioned kneelers or garden pants with pockets for padded knee inserts ease the toll on vulnerable joints. Some padded kneelers have long handles that help gardeners rise to their feet. When the kneeler is turned over, those same handles act as supports for the padded portion, transforming the kneeler into a seat.

Many standard garden tools, including hoes, rakes, spades, trowels and hand forks, are available with padded, easy-grip handles that provide shock absorption, and a secure grip for repetitive tasks and blister prevention.  They are especially helpful to people with arthritis or other joint or muscle problems.
Easy-grip gloves, especially those with sturdy nitrile on the palms and fingers, make for a tighter hold on just about anything.

Shapely Options

Ergonomic hand tools by Radius

Ergonomic hand tools by Radius. (Image by Radius)

Ergonomics specialists have redesigned familiar tools into new shapes that allow gardeners to dig, rake, or hoe more effectively with less effort.  Some trowels and hand weeders, for example, feature curved handles that conform to the shape of the user’s hand, providing greater comfort and ease of use.  Ergonomic rakes and cultivators may appear to have curvature of the spine, but the curves are actually designed to minimizing the effort involved in moving soil or leaves from one place to another.  Spades may have enlarged stepping edges to prevent slipping while digging holes.

High-Rise Bedding

Elevated beds by Gronomics

Elevated beds by Gronomics make gardening easier for those unable to bend or squat. (Image by Gronomics)

One of the greatest ergonomic advances of the past few decades has been the updating of an old idea—raising raised beds.  Whether the challenge is poor soil quality or physical limitations, elevated growing beds offer a great alternative to traditional in-ground garden spaces.

Depending on the situation, raised beds can be anywhere from a few feet tall to waist high.  Filled with a quality growing medium, including a high-grade amendment like Fafard Premium Topsoil, a raised bed can give anyone great results and maximum accessibility.  The beds placed at the correct height and width have been a boon to wheelchair-bound gardeners, the elderly, or anyone with trouble bending and stooping.

Right behind raised beds on the accessibility spectrum are lightweight containers that can mimic the look of heavier terra cotta or concrete pots.  Easier to lift and move around, these containers allow people with physical limitations and/or no green space at all the opportunity to grow flowers or edibles.  Some containers have ergonomically designed handles or wheels on the bottom to add even more convenience and safety.

Reach Extenders

Pole tree pruning saw
Pole tree pruning saw (Image by Corona Tools)

Gardeners who work from seated positions or those with limited ability to stretch and bend can get great results with extended-reach tools, including forks, spades, hoes cultivators and pruning saws, many of which also have easy-grip handles. 

In the case of pruning saws, the extended reach capability often eliminates the need to climb ladders—a boon to those individuals with balance issues. Tools with easy-grip handles are even better because they are easier to manage! Just be sure to keep them away from electrical lines.

Seating

Seat on wheels
(Image by Pure Garden Essentials)

Older gardeners sometimes find it easier to sit than to kneel or bend.  Folding garden seats or stools are inexpensive, lightweight and come even have pockets for garden tools. Wheeled garden scooters can roll along paths, carrying the gardener from bed to bed and providing secure seating for weeding or harvesting.  Some scooters can also accommodate small garden trugs or equipment trays.

Watering

2-Liter Dramm long-sprout watering can
2-Liter Dramm long-spout watering cans are easy to handle. (Image by Dramm)

Traditional hoses tend to be bulky to lug around and cumbersome to coil and store.  Newer hoses, either coiled or straight, are made of lighter materials, making them easier to carry, more flexible and less likely to kink.  Sprayer nozzles are available with padded, easy-grip handles as well.

There are also many ergonomic watering cans. Most have a streamlined design with a long pour spout to take the strain off of hands and backs. More lightweight models that hold more water are best for gardeners that suffer from arthritis.

The advice for gardeners with any kind of physical challenge is to pay attention to their bodies.  Aches and pains are a signal to rest the affected muscles and engage the greatest muscle of all—the brain—to figure out better ways to familiar chores.  With a little help from ergonomic tools, anyone can make and maintain a garden.

Colorful gardening tools
The right tools make gardening a whole lot easier!
*All tools mentioned are examples and not endorsements.

Yes, Peas! Growing Edible Pod & Tendril Peas

'Golden Sweet' snow pea
‘Golden Sweet’ snow pea is one of many delicious edible pod peas. (Image by Jessie Keith)

The tendriled vines of peas produce delicious pods in cool spring weather, and their roots naturally fortify soil with nitrogen. Once warm weather comes on, they can be pulled and replanted again in late summer for a second crop in fall. Peas are easily stored—by freezing or canning—making them a great choice for gardeners that preserve the harvest.
There are many edible pod and tendril types to try.  Some create long vines, while others are bush-forming and better suited to small spaces. Fortify their soil, choose a sunny spot, and plant at the right time of year, and they’re a cinch to grow. At least 8-10 weeks are required to raise plants from seed to harvest. Harvest can last for several weeks. Once summer heat comes on, vines stop producing, and slowly turn brown and die.
Edible Pod Peas

'Sugar Snap' peas
Classic ‘Sugar Snap’ peas are the snap pea standard. (Image by AAS Winners)

Snow and snap peas are the two edible pod peas of choice. Snaps are crisp and plump and snow peas are more delicate and slender. Both are very sweet and can be eaten fresh or cooked.  Snaps are favored by most growers, but snow peas are gaining more garden ground.
Two snow peas stand out when it comes to flavor and performance, ‘Oregon Sugar Pod II’ and ‘Golden Sweet’. The productive and vigorous ‘Oregon Sugar Pod II’ consistently gets high reviews by gardeners. It produces super sweet, 4- to 5-inch-long flattened pods on bushy, disease-resistant plants that only reach 2 ½ feet. The pale yellow pods get top marks for flavor and are produced on vigorous 6-foot vines that require trellising. First discovered in India, this variety is also more heat tolerant than most, which extends its window of harvest.
Snap pea culture is dominated by the ever-popular ‘Sugar Snap’ (1979 AAS Winner) and ‘Super Sugar Snap’ varieties. This is because both are crisp, sweet, and prolific. The “super” in ‘Super Sugar Snap’ comes from the fact that these peas are more compact, earlier to produce (60 days), and bear more heavily over a shorter window of time. Reportedly, the mildew-resistant, 5’ vines yield pods that are not quite as sweet as the classic ‘Sugar Snap’.

'Patio Pride' snap peas
‘Patio Pride’ is a new, super compact snap pea perfect for containers. (Image by AAS Winners)

Original ‘Sugar Snap’ peas became a household name for a reason. Nothing has come close to their quality since they were first introduced over 35 years ago. Young pods are relatively stringless, super sweet, reach up to 3 ½ inches in length, and are produced after 62 days. The 6-foot vines are heat tolerant (but not mildew resistant) and produce peas over a long period.
The 1984 AAS Winner, ‘Sugar Ann’, is a super early producer bearing sweet peas in only 52 days. Another compact, early gem is the 2017 AAS Winner ‘Patio Pride’. It only takes 40 days for the ultra-compact, 6- to 12-inch vines to produce plump, edible pods. These can be harvested early or allowed to mature a bit at which point they can be enjoyed as shelling peas.
Tendrils

'Super Magnolia' peas
‘Sugar Magnolia’ peas produce loads of edible tendrils. (Image by Baker Creek Heirloom Seeds)

Pea tendrils can be eaten fresh in salads or cooked in stir fries. Heavily tendriled peas are semi-leafless and referred to as “afila” peas. Their sweet flavor and novel looks have made them popular in restaurants. Only recently have they become available to gardeners.
The new tendriled variety ‘Sugar Magnolia’ produces a wild mess of green tendrils on 8-foot vines in addition to bearing good-tasting purple snap peas after 70 days. ‘Feisty is another vigorous tendril pea that has monstrous vines that can reach 30-feet in length. Harvestable tendrils are produced in 50 days and sweet pea pods are produced after 60 days.
Cultivating Peas

Sugar snap peas in hands
A bountiful harvest of sugar snap peas.

Cool weather, full sun, and fertile soil are required for great pea production. For best results, amend garden soil with a 1:3 ratio of Fafard Premium Natural & Organic Compost to garden soil and lightly feed with an all-purpose organic fertilizer for vegetable gardening. Turn the soil gently to make sure it is light and friable.
Most peas need trellising. The lightweight vines will grow well on a moderately sturdy trellis consisting of bamboo posts fixed with tightly fitted trellis netting. Even bush varieties can benefit from a low bamboo and twine support system.
Once your spring pea crop is spent, remember that you can plant a new crop again in fall. These sweet summer treats are healthy, delicious, and well worth the effort.

Bamboo trellis in garden
A sturdy bamboo trellis fitted with taut trellis netting is perfect for peas. (Image by Jessie Keith)