 Sometimes it’s easy to get in a barbecuing rut when the solution is right in front of you! If you are vegetable gardener, grab your favorite veggies from your garden, skewer them up, and grill.
Ingredients:
1 cup boiled red new potatoes, quartered
1 cup red, yellow, or green bell pepper chunks
1 cup red onion chunks
1 cup white button mushrooms
1 cup zucchini or yellow squash chunks
1 cup cherry tomatoes
3 cups sirloin chunks
Garlic & Herb Marinade
1/2 cup olive oil
3 tablespoons fresh lemon juice
1 tablespoon Dijon mustard
2 tablespoons agave syrup
2 tablespoons minced garlic
1 tablespoon chopped fresh basil leaves
1 tablespoon chopped fresh oregano leaves
1 tablespoon chopped fresh rosemary leaves
1 teaspoon salt
1/2 teaspoon freshly ground black pepper
Whisk all of the marinade ingredients together and refrigerate in a covered container or use right away. Before grilling, toss the vegetables in the marinade, and allow them to stand at room temperature for 15 minutes. Skewer the vegetables and beef chunks, and grill them for 4-5 minutes on each side.
Month: October 2016
Fresh Greek Salad

Are you looking for something a little different to bring to that next potluck? Try this delicious Greek vegetable salad that you can make with veggies straight from your garden! It is wonderful by itself, as a side salad, or scooped up with slices of warm pita bread.
2 cups cherry tomatoes, halved
1/2 red onion, thinly sliced
1 large English cucumber, sliced
1 red bell pepper, seeded and chunked
1 cup fresh feta chunks
1/2 cup Kalamata olives, coarsely chopped
3 tablespoons red wine vinegar
1 teaspoon dried oregano
Extra-virgin olive oil to drizzle
Fresh cracked pepper
Mix the chopped tomatoes, cucumbers, peppers, and olives together and top with feta and red onions. Drizzle with red wine vinegar, and olive oil and then sprinkle with the oregano and black pepper. Serve and enjoy!
Crunchy Tomato Bruschetta

Bruschetta is simple, homespun antipasto that originates from Italy. It consists of simple grilled or toasted bread rubbed with garlic, drizzled with olive oil, and topped with salads, meats, or cheeses.
The most classic version is tomato bruschetta, which is most decadent in summer when tomatoes are fresh. This recipe is surprisingly simple and incredibly delicious. The key is toasting the bread until it is beautifully crunchy and finishing with high-quality olive oil and aged balsamic vinegar.
The key to correct Italian bruschetta is grilling the bread using a brustolina, a specialized stovetop grill for gas stoves. The bread is simply grilled on the heated brustolina until brown on each side. Since most American cooks don’t have one, an oven broiler works just as well.
Salad Ingredients
6 or 7 plum tomatoes, seeded and chopped
1 tablespoon extra virgin olive oil
1 teaspoon aged balsamic vinegar
4 chopped fresh basil leaves
Salt and freshly ground pepper
Grated Parmigiano Reggiano (optional)
Extra basil leaves for garnish (optional)
Crostini Ingredients
1 long Italian loaf or baguette, cut in 1/2 inch thick slices
2 cloves garlic, finely minced
1/4 cup olive oil
Salt
Directions
Set your oven to broil and preheat, making sure the oven rack is set on the middle shelf. Mix the olive oil and garlic oil. Place the sliced bread on a cookie sheet lined with parchment paper. Brush each slice of bread with the garlic/olive oil mixture, making sure to coat each side. Place the bread under the broiler, and bake for 3-4 minutes per side, or until each side is golden brown. You must keep a close watch on the bread to keep it from burning. Once the crostini are out of the oven, dust them lightly with salt.
Make the tomato salad by mixing the chopped tomatoes with the basil, olive oil, salt, pepper, and balsamic vinegar. Allow the flavors to marry for at least 30 minutes before serving.
Dress your crostini with the salad only when you are ready to serve your bruschetta because the salad will slowly make the bread soggy. To serve, place the tomato mixture on the bread and dress with grated Parmigiano Reggiano, an extra drizzle of aged or reduced balsamic vinegar, and/or a basil leaf.
Fresh Blueberry Scones with Lemon Glaze
 There’s nothing like the smell of fresh-baked blueberry scones , especially when a key ingredient is from your own garden. Market or garden-fresh blueberries make this recipe taste great, and freshly grated lemon zest gives that extra pop of flavor. For even more sweetness and decadence, drizzle with fresh lemon glaze while the scones are still warm.
Scone Ingredients
2 cups all-purpose flour
3 tablespoons sugar, plus more for sprinkling on top
1 tablespoon baking powder
3/4 teaspoon salt
6 tablespoons cold unsalted butter, cut into pieces
1 1/2 cups fresh blueberries, rinsed
1 teaspoon grated lemon zest
1/3 cup heavy cream, plus more for brushing on top
2 large eggs, lightly beaten
Lemon Glaze Ingredients
1 cup powdered sugar
1/2 teaspoon lemon zest
2 1/2 tablespoons fresh lemon juice
1 teaspoon salted butter, melted
Directions
For this simple recipe, start by adding all of the dry ingredients to a large bowl and whisk them together. Cut the cold butter into the mixture until crumbly. Whisk together the cream, egg, and lemon zest in a liquid measuring cup. Gently stir the wet ingredients into the dry until the dough just comes together, fold in the blueberries. Turn dough onto a well-floured surface and lightly knead, gently turning and folding the mix eight to ten times. (Too much kneading will result in tough scones!) Roll the dough to 1-inch-thick, 4-inch-round circles and cut them into quarters. Brush tops with cream and sprinkle with sugar. Bake at 400 degrees for 20 minutes, and voila!
“Knitting” Perennials for Textural Flower Gardens

Flopping is often frowned upon in the perennial garden (and quickly corrected with bamboo stakes, peasticks, or other mechanisms, if it occurs). Some perennials, however, make a virtue out of laxity, their trailing growth providing the perfect foil to the upright stems of delphiniums, New England asters (Symphyotrichum novae-angliae), and garden phlox (Phlox paniculata). In flower gardens, as in containers, nothing complements a towering thriller better than a contrasting spiller.
 Trailing perennials are especially valuable for their ability to knit together with other garden elements, upright or otherwise. Mass them at the fringe of a perennial border, and they unify what lies behind them. Position them near a path or patio, and their tumbling stems interrupt and soften the line between hardscape and softscape. And they’re literally made for walls, producing cascades of texture and color that bring the landscape alive.
Margins and walls are not the only places where trailing perennials do their knitting. They excel at covering the voids left by large perennials that go dormant in early summer, such as oriental poppies (Papaver orientale) and bleeding heart (Lamprocapnos spectabilis). Many will thread their stems through upright neighboring perennials, intermingling their contrasting foliage and blooms. Some ground-hugging sprawlers (including creeping thyme, Thymus serpyllum) can even be planted into lawns to form textured, flowering patchworks.
Here’s a sampling of some of the best of these perennial “knitters”.

A native of dry prairies throughout the Central U.S., winecups (Callirhoe involucrata) has just about everything a North American gardener could want, including cold-hardiness (USDA Zones 4-9), drought-tolerance, and a long season of showy blooms. Its lax stems typically form low mats, but will also clamber up neighboring plants or cascade down banks or walls. The bowl-shaped, bright purplish-pink, white-eyed blooms continue for many weeks in summer along new portions of the continually lengthening growth. Several other species of Callirhoe – of various habit – are also well worth growing. All of them prosper in dry habitats.
Moss phlox (Phlox subulata) is so common as to be dismissed by gardeners who should know better. But, just because a plant species is sold at hardware stores and supermarkets (as well as about every other establishment that deals in plants) doesn’t mean that it’s unfit for sophisticated gardens. Hailing from dry slopes and ledges in the East and Central U.S., this needle-leaved evergreen can’t be beat for draping down a wall, or covering a dry slope, or fronting a xeric perennial planting. Its filigreed foliage would be reason enough to grow it, even if it weren’t also a prolific early-spring bloomer. Gardeners who are put off by brassy-flowered forms of this species have any number of subtler cultivars from which to choose. It’s worth considering for any sunny garden within USDA Zones 3 to 9.

Several trailing bellflowers (Campanula spp.) occur on ledges and embankments in European mountains and take well to similar habitats in gardens. Among the most vigorous of the lot is Serbian bellflower (Campanula poscharskyana), which in late spring bears starry blue flowers on low, 3- to 4-foot-wide hummocks. The typically sprawling stems will also clamber or drape, given the opportunity. Plants tolerate a wide range of conditions and may become overly rambunctious in moist, fertile soil. Other bellflowers for edging or walls include Campanula cochlearifolia, C. carpatica, C. garganica, and C. portenschlagiana.
Also from Europe is another trailing perennial that excels on sunny dry slopes: bloody cranesbill (Geranium sanguineum). A variable plant, it typically matures into a sprawling, 6- to 10-inch-tall mound of deeply lobed foliage, decked in late spring and summer with magenta, pink, or white, dark-veined flowers. This hardy (USDA Zones 5 to 9), a durable perennial is perhaps at its best in naturalistic plantings, where it can be allowed to seed around into informal colonies.

An excellent geranium for threading through perennials and shrubs is the Geranium ‘Rozanne’, prized for its early-summer-to-frost bounty of purplish-blue flowers. This lanky, 2- to 3-footer will also sprawl obligingly across gaps left by early-dormant perennials.
The legendary garden designer Gertrude Jekyll liked to cover such gaps with the lax, non-climbing growth of, a hybrid between the shrubby Clematis integrifolia and the vining Clematis lanuginosa. Its toppling, 7-foot stems bear a summer-long succession of large starry violet-blue flowers that resemble those of its vining parent. Other clematis for this purpose include Clematis recta, a 5-foot, splaying perennial that envelops itself in summer with small fragrant white flowers; and ‘Mrs. Robert Brydon’, another shrub/vine hybrid whose flopping 8-foot stems carry billowing clusters of pale-blue blooms in August and September.
Hardy perennials for knitting can be planted in fall. Good soil preparation and light mulch will help them become established and protect them through the winter months. Fafard® Premium Natural & Organic Compost should be worked into the soil at planting time and added as a light mulch around newly installed perennials.
Reap the Fall Garden Harvest and Make the Beds for Winter

“Bringing in the sheaves,” goes the old hymn, “bringing in the sheaves. We will come rejoicing, bringing in the sheaves.”
Mid to late fall is when gardeners “bring in the sheaves”, not to mention the tomatoes, pumpkins, cool season greens or whatever crops might still be growing in beds, borders, and containers. As night temperatures dip, it is time to harvest your produce or risk losing it, except in a few cases, like carrots, kale, and collards, where flavor actually improves with a little frost.

Collect Seeds and Dig Dahlias
Edible crops are not the only harvest items. It is also time to collect seeds from heirloom annuals—flowers and vegetables—that you want to save for next year. (Click here to learn more about saving heirloom seeds.) Sort and store your seeds in labeled paper packets and keep them in a cool dry place through winter. If you live in a cold-winter climate, that same cool dry place can provide an out-of-season home for tender dahlia tuberous roots and gladiolus corms. When digging dahlias, be sure to clean them gently while keeping the roots and lower stems intact. Be sure not to disturb any of the growing points, or “eyes”, located just below their stems.
Once they have been dug, allow the corms and roots to dry off for a few days, then nestle them into labeled boxes, tubs, or bags full of dry vermiculite, perlite or peat moss. The stored roots should be kept moderately dry, but not bone dry. In winter, check and mist the contents periodically to keep them from completely drying out.

Bring in House Plants
It is not exactly harvesting, but fall is also the season to bring tender container specimens, like tropical foliage plants and citrus, into the house. Before bringing them indoors, clean off and inspect both pots and plants carefully for hitchhiking pests. Clean plants from top to bottom with insecticidal soap, if you are concerned that they may harbor unwanted pests. You may also consider repotting incoming houseplants in Fafard Natural & Organic Potting Soil. (Click here to learn more about cleaning and repotting house plants.)
Clean Up Beds
But even as you bring crops, plant materials, and potted specimens into the house, a good many chores await outside. Brisk, or at least moderate, fall weather and the beautiful change of leaves make these outdoor tasks a bit easier.

First, decide what you want to do with your ornamental beds and borders. (Click here to learn the best ways to clean your fall landscape!) Some gardeners, especially habitat-conscious ones, leave lots of seedhead-bearing plants standing to provide late fall and early winter rations for birds and wildlife. If you are one of them, remember to keep pulling up the weeds that sprout around those plants as long as the ground is workable. This will make life much easier come spring.
If neatness is a priority, pull out spent annuals and cut down stalks of perennial plants. Compost the remains. If your spring planting scheme features some unfilled spaces, now is the time to plant bulbs like daffodils, tulips, and hyacinths. Once the ground has frozen, mulch with several inches of pine straw, clean hay or chopped leaves to protect plants from the effects of winter frost heaves. Use extra mulch around shallow-rooted ornamentals, like the popular Heuchera and Scabiosa, not to mention anything that is only marginally hardy in your climate zone. Delicate shrubs, like some roses, can be surrounded with stake-supported “cages” covered with hardware cloth or burlap. These can be filled with chopped leaves to insulate the plant from cold winter winds.
 Plant a Cover Crop

Another option for enriching the soil of a productive plot is to sow a fall cover crop of vetch or crimson clover. This kind of “green manure crop” fixes nitrogen in the soil and can be tilled in or turned under in spring, which allows it to do one final good garden deed as a soil amendment. Cover crops also protect the soil by reducing erosion.
As you do these chores, remember that these are the last acts in the seasonal play that is gardening. Applying a little extra effort in fall is an investment in next year’s flowers, vegetables, and fruits.
Seasonal Vichyssoise
 There’s nothing like seasonal produce. In spring, garden-fresh spinach, tender snap peas, spring onions, and asparagus grace our tables. In fall, we can look forward to kale, arugula, and Swiss chard. One easy, tasty way to make use of an overload of seasonal vegetables is by making a pot of vegetable vichyssoise, a creamy potato and leek soup that originates from France. This delicate soup can be eaten hot or cold, so it’s perfect for warm or cool days. And, it’s so good that your friends will be asking for the recipe!
Ingredients
1 tablespoon butter
1 tablespoon olive oil
1 quart chicken or vegetable stock
3 cups sliced leeks and/or onions
3 cups coarsely chopped spinach, kale, chard, arugula, asparagus, or snap peas (strings removed)
2.5 cups chopped peeled potatoes
1 teaspoon salt
1/2 teaspoon white pepper
1/2 cup half and half
Directions
Chop and prepare all ingredients before beginning. In a large pot, add the butter and oil and heat until it begins to sizzle. Add the onions or leeks and cook until translucent and soft (7-10 minutes). Add the stock, chopped potatoes, veggies, salt, and pepper and heat to a rolling boil then turn it down to medium-low heat. Simmer the soup for 25 to 30 minutes then remove from the heat and cool for another 30 minutes. Add the soup to a blender or food processor and mix until smooth, and then add the half and half.
This soup tastes delicious with a drizzle of hot sauce and looks pretty garnished with fresh herbs from the garden.
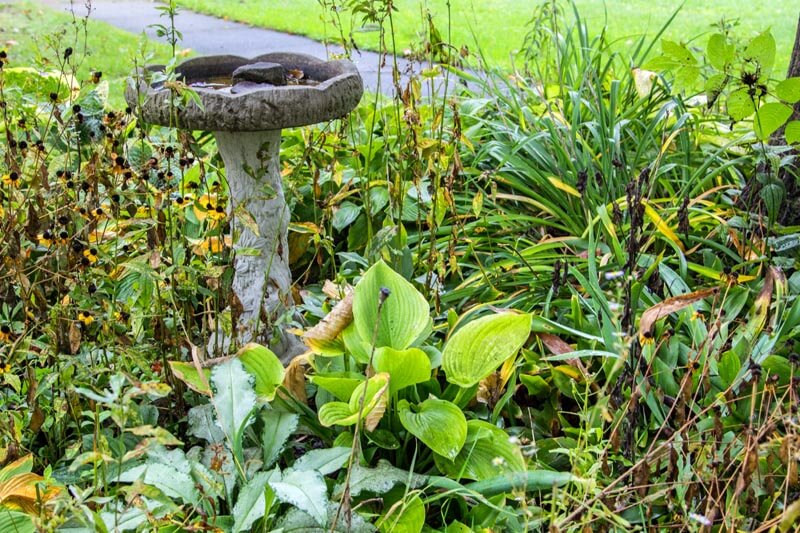
Fall Garden Cleanup

Putting your garden to bed will result in a prettier, healthier garden from fall to spring. It’s essential to know what areas to clean, what to prune, what to leave undisturbed, and what to protect. Simply taking a leaf blower to your beds and landscape is a start, but there’s more to the process if you want to do it right.
Clean Beds
When cleaning your garden beds, consider bed appearance as well as plant appearance and health. This means determining what should be cut back and cleaned and what should be left alone until spring.
Begin by cleaning out loose-leaf material by hand or blower with a focus on the most visually conspicuous areas. Smart gardeners are wise to leave some leaf litter in beds to provide added winter protection for more tender plants and help support overwintering pollinators. (Some species of overwintering native bees and butterflies use undisturbed leaf litter as essential winter habitat. Click here to learn more.) After clearing away unwanted leaves, give your fading garden plants needed attention.
Dead or dying annuals are the first thing to cut back or pull. If some have mature seed heads, consider scattering their seeds in hopes of getting a few extra seedlings in spring. Once annuals are removed and beds smoothed, start work on your perennials and shrubs.
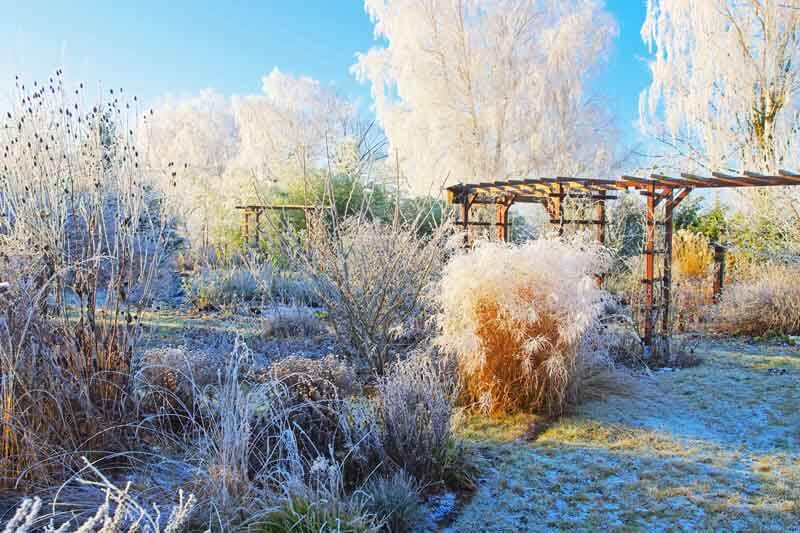
Many perennials look great over winter and their crowns are protected by leaving the top growth intact. Leave all healthy evergreen perennials, such as lavender and sage, alone. Most ornamental grasses, coneflowers, asters, and black-eyed-Susans can also remain up until late winter. Some of these perennials, such as grasses, coneflowers, and asters, produce seed heads that naturally feed overwintering songbirds. Hardy perennials that die to the ground, such as daylilies, hardy geraniums, hostas, Shasta daisies, and salvias should be cut all the way back to keep gardens looking tidy.
Edge and Cover Beds
After cleaning beds, cut fresh bed edges (Click here for a how-to video about edging.), and apply mulch. Lots of mulches will work, but dark, earthy leaf mulch is landscape gold. Not only does it look good, but it breaks down quickly to naturally feed soil, and it is easy to create from yard leaves. [Click here to learn how to turn your fall leaves into mulch.] Screened, partially composted bark mulch is another good option for broadcast mulching. For small garden spaces, Fafard Premium Natural & Organic Compost can be applied as a high-quality, fortifying mulch.
When mulching, work around perennials and shrubs. Many plants will die or perform poorly if their crowns and trunks are thickly layered with mulch. Succulents, alpines, rock garden plants, hosta, and heuchera should never have heavy mulch applied on or around their crowns.
Fall Pruning
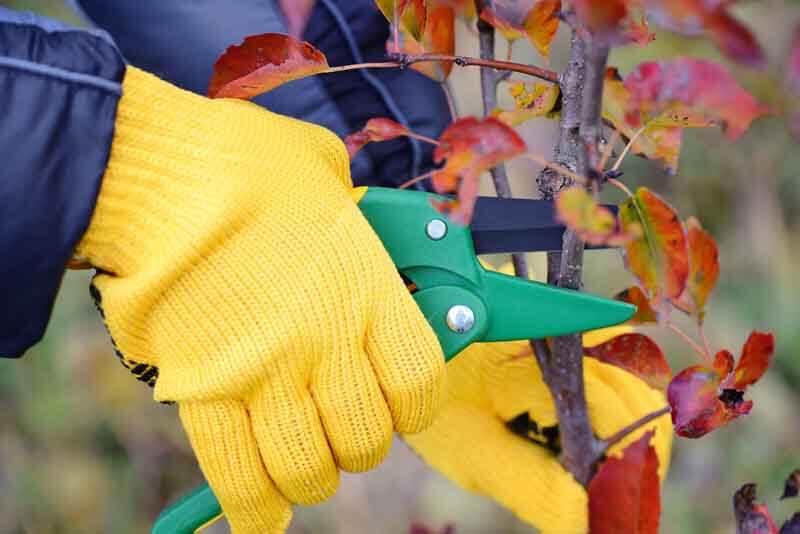
In fall, start by cutting back any dead, unhealthy, or crossing branches from trees and small shrubs. When pruning out dead, diseased, or infested wood, prune just below the point where growth is still fresh and healthy. If you think that a plant you are pruning is diseased, be sure to clean your pruning shears in a 10% bleach solution before pruning another plant. If additional pruning of flowering trees and shrubs is needed to shape the plants, first determine whether your shrubs bloom on old or new wood. It is okay to prune new-wood bloomers in fall but not old-wood bloomers.
French lilacs (Syringa vulgaris), azaleas and rhododendrons (Rhododendron spp.), forsythia, most viburnum, serviceberries (Amelanchier spp.), and some hydrangeas, such as oakleaf hydrangea (Hydrangea quercifolia), all bloom on old wood—meaning they set their flower buds for the next year shortly after they bloom. These plants should never be pruned in fall unless you want to cut off next year’s flowers. Old- or second-year wood bloomers are best pruned right after they flower. Butterflybush (Buddleja davidii), crepe myrtle (Lagerstroemia indica), and some hydrangeas, such as wild hydrangea (Hydrangea arborescens), bloom on new wood, so fall pruning is an option.
Pruning techniques vary from plant to plant. As a general rule, shrubs that bloom on new wood are forgiving and can be hard pruned, or cut back nearly to the ground. In fact, hard pruning is recommended for more aggressive shrubs, like Buddleja.
Toss it or Compost It?
Bed cleaning creates lots of waste. Some of the waste is perfect for composting and some is best discarded. Loose leaf matter makes great compost. Fall grass clippings and leftover edging pieces can also be thrown into the compost heap. Old perennial and annual waste can also be composted, if it appears to be clean and disease free. Healthy woody branches can also be chipped and added to the bin. Any material thought to have pests or disease should be thrown away. This is especially the case for vegetable waste, such as last-season’s tomatoes, which commonly develop early and late blights. Rose clippings should also be kept far away from the bin because of the many diseases they can harbor. [Click here to learn more about rose diseases and pests.]
Clean, coiffed beds with crisp edges look great and will make spring prep a breeze. They will also make it easier to plan and implement fall bulb plantings and decorate for the winter holidays.
