Articles

Bulb Specialist Russell Stafford on the Best Spring Bulbs

Iris reticulata 'Michael's Angel'
The clear blue color of Iris reticulata ‘Michael’s Angel’ pairs beautifully with golden crocus.

Flower bulbs can’t be beat for bringing bursts of color to the garden. And they do it in such delightful fashion – their shoots thrusting up almost magically from the seemingly unoccupied ground in sudden crescendos of bloom. Then, just as suddenly, they pass from the scene, returning to the ground to wait out the months until their next brief fling.

The Siberian trout lily 'Altai Snow' is rare but worth seeking out.
The Siberian trout lily ‘Altai Snow’ is rare but worth seeking out.

Most garden bulbs (which botanically speaking comprise plants that grow from tubers, rhizomes, corms, true bulbs, or other underground storage organs) owe their fast and furious above-ground lifestyle to the short growing seasons that prevail in their native haunts. Many hardy “bulb” species, for example, hail from regions that receive most of their annual precipitation from late fall to early spring. The steppes and uplands of Central Asia – the ancestral home of many garden bulbs – are a place of long dry summers, cold bitter winters, and brief springs. Long, arid summers also characterize the climates of the bulb-rich Mediterranean and South African Cape regions.

Other bulb species are native to localized plant habitats that experience seasonal shortages of moisture or sunshine. Deciduous woodlands are the spawning ground of many of the most familiar shade-loving bulbs, which complete their above-ground growth in early spring before the canopy chokes out rain and sunlight.

Whatever their land of origin, most hardy bulbs need relatively moist, cool to cold winters and relatively dry summers, developing their roots in late autumn and winter and putting in an above-ground appearance for only a few weeks in spring or fall. Frost-tender bulbs, on the other hand, often come from regions in which rainfall and growth are concentrated in summer.

Corydalis, such as this Corydalis malkensis, come in many forms, all beautiful for spring.

This is something to keep in mind when placing bulbs in the garden. Of course, a massed annual bedding display of hybrid tulips or hyacinths can be great fun and will work in just about any reasonably good soil. But a perennialized planting of less highly bred bulbs, artfully deployed in the appropriate garden habitat, can be equally compelling. Any garden niche that roughly mimics the conditions of a Central Asia steppe or a
Mediterranean chaparral or a temperate forest understory is fair game for a scattering of naturalized bulbs, which mingle beautifully with herbaceous and woody perennials that derive from the same natural habitat.

Reticulated irises (Iris reticulata and its hybrids) and “species tulips” (such as Tulipa humilis) make natural companions for penstemons, dwarf campanulas, plumbago (Ceratostigma plumbaginoides), low sedums, and other perennials that occur naturally in rocky steppe habitats. Likewise, crocuses, colchicums, cyclamens, and tuberous anemones look right at home with lavender, perennial candytuft (Iberis sempervirens), shrubby sages, and other small shrubs from the Mediterranean. And just about any partly shaded garden niche could benefit from a colony of woodland bulbs such as corydalis (including Corydalis solida) and trout lilies (Erythronium spp.).

A sunny garden site that dries out somewhat in summer is likely to be favorable for most sun-loving bulbs. In areas that are subject to summer rain and humidity, a well-drained soil works best. Rock gardens and troughs; embankments; wall plantings; sandy berms – all are ideal locations for grape hyacinths (Muscari spp.), ornamental onions (Allium spp.), and other steppe and Mediterranean natives. Quite a few sun-lovers (including many fritillaries and irises) absolutely require a dry summer rest, rotting away in warm moist conditions. Conversely, most woodland bulbs are relatively unfussy, thriving in just about any partly shaded site.

Species tulips (Tulipa bifloriformis shown) are often reliable perennials that spread over time.

Whatever their favored exposure, bulbs tend to do best in relatively rich soil, and will usually benefit from a sprinkling of high-potassium fertilizer in early fall or spring. For excessively dry or heavy soil, incorporate a good amendment for fertility such as Fafard® Sphagnum Peat Moss and/or Compost. A general rule of thumb is to plant bulbs at a depth of 2 to 3 times their diameter (from the soil surface to their tips). Bulbs (such as crocuses and tulips) that are favorite morsels for chipmunks and squirrels may need protection such as a hardware cloth barrier (or interplant them with bulbs that rodents tend to avoid, such as narcissus and alliums).

The right bulbs in the right place will add a seasonal spark to any garden. Plant some this fall to reap your reward next spring, and beyond!

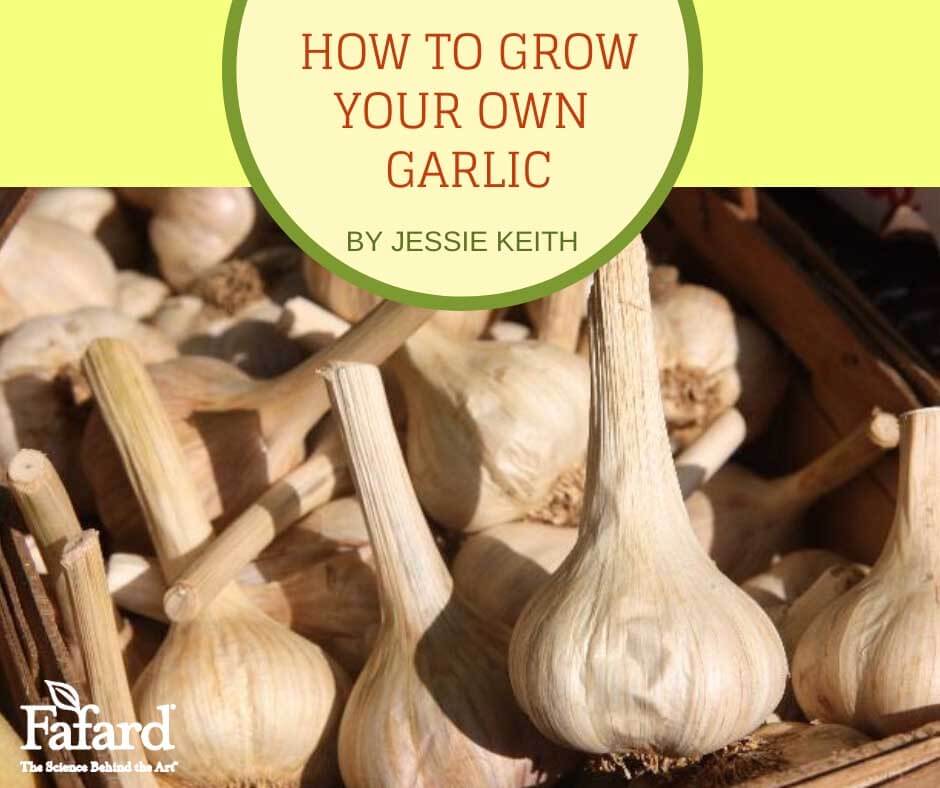
How to Grow Your Own Garlic

How to Grown Your Own Garlic Featured Image
Freshly harvested and cleaned hardneck garlic.

Growing garlic is easy and gratifying. For starters, it tastes infinitely better than store-bought. Secondly, there are also tons and tons of wonderful cultivated varieties to choose from that vary in size, color, heat, and flavor. Garlic isn’t just garlic when you become tuned into its diversity (just check out the offerings at The Garlic Store). And fall is the time to plant it.

Planting Garlic

The cultivation process begins in fall when the soil is still workable, usually between October and December. Just like any other root crop, the best bulbs develop in well-drained, friable garden loam. Then amend with compost, such as Fafard Premium Natural and Organic Compost, and add some bulb fertilizer for assured success

Child digging a hole for planting
Garlic should be planted in fall in fertile, amended loam.

For planting, dig holes 3 to 6 inches deep and 12 to 16 inches apart. Set a single clove in each hole with the tip pointing upwards and the blunt root base down to a depth of 4-5 inches. Cover with soil, water, and wait. Within a couple of weeks, sprouts should rise from the soil, and the plants may reach 6 inches or more before heavy frosts hit. Garlic will overwinter in an evergreen to semi-evergreen state where winters are mild but will die back in colder zones.

Garlic Growth Cycle

In spring, garlic plants will emerge and leaf up, and by late spring to early summer each will produce a heronesque flower or bulbil bud. The buds should be removed as soon as they appear or they’ll deplete the precious garlic bulbs underground. Just clip the stems back to the main plant, but don’t throw away the buds. They’re also good eating and look and taste great stir-fried or sautéed.

Some garlic varieties produce earlier in the season and others produce later, so it’s nice to plant a seasonal variety that will mature at different times. On average, most cultivars are harvestable by midsummer. You will know they are ready when their tops begin to turn brown. Refrain from watering the plants at this time to keep bulbs from rotting.

When the tops start to turn dry and begin to bend down, the cloves are ready to harvest. Dig the bulbs and allow them to dry in a cool, airy place away from sunlight. The drying technique depends on the garlic type. Softneck garlic can be hung to dry in braids, and the tops of hard-neck types can be cut and the bulbs dried on a dry, breathable surface. Store in a cool, dry place.

Softneck and Hardneck Garlic Varieties

Child with garlic cloves
It’s amazing to see what a handful of garlic cloves planted in fall will become the following season.

Choosing the right garlic for you depends on where you live and the flavor your favor. The key distinction between types is whether they are soft or hardnecked. Softneck garlic is the most popular type grown in Europe and the American South. It grows better in milder climates (but will still grow well pretty far north), stores for longer, and has flexible necks that allow mature bulbs and plants to be easily braided into hanging garlic braids.

There are two softneck forms, silverskin and artichoke. Silverskin soft-neck garlic has smooth, silvery skin, more cloves and keeps for a very long time. Artichoke has coarser skin, fewer, larger cloves and a milder flavor. Still, heat, pungency, and flavor vary widely from cultivar to cultivar, so consider this when choosing garlic to grow.

Hardneck garlic is more commonly grown in northern and eastern Europe, Russia and North-Central Asia. It grows better in cooler climates, has a shorter storage life, and stiff necks that attach to the bulbs. This type produces fewer, larger cloves, which are fragrant and vary in flavor depending on the cultivar. Hardneck types are believed to be more closely related to wild garlic.

Garlic scapes
Garlic scapes appear in summer and are very good to eat.

The rewards of growing garlic are great. Homegrown bulbs have superior taste, you can grow lots of different types that vary in flavor, and they are cheap. Specialty varieties usually sell out early in the season, but gardeners wishing to experiment with garlic growing this late in the season still have an option. Garlic cloves from the grocery store (which are always softneck) work just as well. Just separate the cloves and plant away.

Miniature Pumpkins

Small pumpkins at a market
If you didn’t grow your own small pumpkins this season, they are easily found at local orchards and markets! (photo by Jessie Keith)

Miniature pumpkins are so irresistible they almost beg to be picked up and held. Varieties like the bright orange ‘Jack-B-Little’, striped ‘L’il Pump Ke-Mon’, tangerine orange ‘Bumpkin’, and the ghostly white ‘Baby Boo’ stand about two inches tall and three inches wide, their sides creased with deep ridges. Whether you use them for decorating, cooking or party favors, one baby pumpkin is never enough. In October retailers offer bins full of the little charmers, but it is also easy to grow them at home. Raising mini pumpkins can be a great, kid-friendly gardening project.
Fafard Premium Natural & Organic Compost Blend pack

Growing Mini Pumpkins

These smallest pepos are part of the same squash or cucurbit family as their larger relations and favor similar growing conditions—plenty of sunshine—at least six hours per day–and consistently moist soil enriched with organic amendments like Fafard ® Premium Natural & Organic Compost. The vines will sprout happily in large containers or in-ground settings. As befits their smaller size, minis take somewhat less growing time than the orange behemoths, maturing in 90 to 100 days from seed. Under good conditions, each vine should produce eight to ten miniature pumpkins.

If you live in an area with a short growing season, start minis indoors two or three weeks before the last frost date for your area. Otherwise, sow outdoors in mid-May to ensure a supply for harvest-time decorations. Follow package directions, making sure to give the young plants plenty of room. Grow the pumpkins in vegetable or ornamental beds, or on sunny decks or terraces. Proximity to some kind of support—fences, trellises or bamboo teepees—is helpful, though the vines can also be allowed to sprawl along the ground or cascade from porches or raised beds.

'Jack-B-Little' pumpkins
The cute little ‘Jack-B-Little’ is one of the cutest and most common little pumpkin. (photo by Marian Keith)

Lilliputian Jack-o-lanterns are very amenable to container culture. Almost any sturdy vessel will work, as long as it has drainage holes. A ten-gallon container will support a single mini pumpkin vine. To grow several vines in one pot, select one that will hold twenty to twenty-five gallons, preferably with a diameter of at least thirty-six inches. Whatever container you choose, fill with a fifty/fifty mix of quality potting medium like Fafard® Ultra Potting Mix With Extended Feed With Resilience™ and Fafard ® Premium Natural & Organic Compost.

In-ground or in containers, if you decide to support the young pumpkins, tie them with soft ties–pieces of old pantyhose or any other flexible material. As you tie the vines, you will notice that the young fruits start out rather pale in color. Rest assured, the orange-fruited varieties will turn tawny in time.

Critter control is a must because varmints like raccoons, squirrels, and groundhogs are extremely fond of miniature pumpkins. Spray the developing minis with an organic critter deterrent to keep them away. Remember to re-spray after every rainstorm.

Mini Pumpkin Harvest and Use

You will know your minis are ripe when the vines appear dried-out and the stems greenish-brown. If you are using the pumpkins as decorations, let them cure in a cool, dry place for about a week before piling in baskets, mounting on wreaths, carving into votive candle holders or arranging on the mantle. Minis also make clever place cards for birthday or dinner parties.

Cucurbita pepo 'Bumpkin' pumpkins
‘Bumpkin’ is another sweet little pumpkin worth seeking out this season. (photo by Jessie Keith)

Though less fleshy than larger varieties, ‘Jack-B-Little’s and their kin can also be used in cooking. The little pumpkins make eye-catching individual containers for baked eggs or savory hot dishes containing combinations of meat, vegetables and/or grains. Sprinkle the insides with a bit of brown sugar, dot with butter and roast for a simple dessert.

Minis can also be used as colorful ramekins for sweet baked concoctions like custards, bread puddings or fruit crumbles. Because the sides of the pumpkin are somewhat thicker than most ceramic vessels, you may have to add extra cooking time to standard recipes.

In fall, the garden is full of big specimens—giant squash, “dinner plate” dahlias and cushion mums big enough to seat a giant. Miniature pumpkins are a reminder that good garden things also come in small packages.